

This guide covers programming procedures for SI KAOS motors including pairing remotes, setting limits, and troubleshooting common issues.
Info: New SI-50nm motors have a dedicated Programming/Pairing Button located on the motor side of the cassette with antenna for simplified programming.
Bond Bridge Pro Integration #
Pairing the Remote #
New SI-50nm Motor: There is a Programming/Pairing Button located on the motor side of the cassette with an antenna. For pairing: Push and hold the Motor Pairing button for 2 seconds, then tap the UP button on the remote.
Standard Pairing Procedure: #
Unplug the motor from power.
Press and hold the UP button on the remote for 3 seconds.
While holding the UP button, plug in the motor.
The motor will jog once, indicating it is in programming mode.
Quickly press the UP button on the remote. The motor will jog briefly.
The remote is now paired with the motor.
Tip: Pairing may require some trial and error to get the timing right.
Setting Limits #
Important: Setting Limits is for when a motor has NO limits set, usually a new install.
Warning: Be sure an Intermediate position is not set as the UPPER or LOWER limit, this can cause the shade to travel beyond the limits damaging the system.
Setting the Upper Limit: #
Tap the Programming button on the back of the remote–the motor will jog, entering limit setting mode.
Press the UP button to enter upper limit setting mode.
Use the UP button to raise the shade to the desired position.
Tip: Tap UP or DOWN to move in small increments.
Tip: Push and HOLD UP or DOWN for 3 seconds to continuously move, then press STOP at desired location, tap UP or DOWN to fine tune.
Tap the Programming button again–the motor will jog.
The upper limit is now set.
Setting the Lower Limit: #
Tap the Programming button on the back of the remote–the motor will jog, entering limit setting mode.
Press the DOWN button to enter lower limit setting mode.
Adjust the shade to the desired position, then press the Programming button–the motor will jog.
Tip: Tap UP or DOWN to move in small increments.
Tip: Push and HOLD UP or DOWN for 3 seconds to continuously move, then press STOP at desired location, tap UP or DOWN to fine tune.
Tap the Programming button again–the motor will jog.
The lower limit is now set.
Setting Intermediate (Favorite) Position #
Warning: Be sure the Intermediate position is not set as the UPPER or LOWER limit, this can cause the shade to travel beyond the limits damaging the system.
Important: To use the Intermediate (Favorite) Position:
(If shade is Opened) Press the DOWN button
The shade will lower to the Intermediate (Favorite) Position
Press the DOWN button again to lower to the Lower Limit
(If shade is Closed) Press the UP button
The shade will raise to the Intermediate (Favorite) Position
Press the UP button again to raise to the Upper Limits
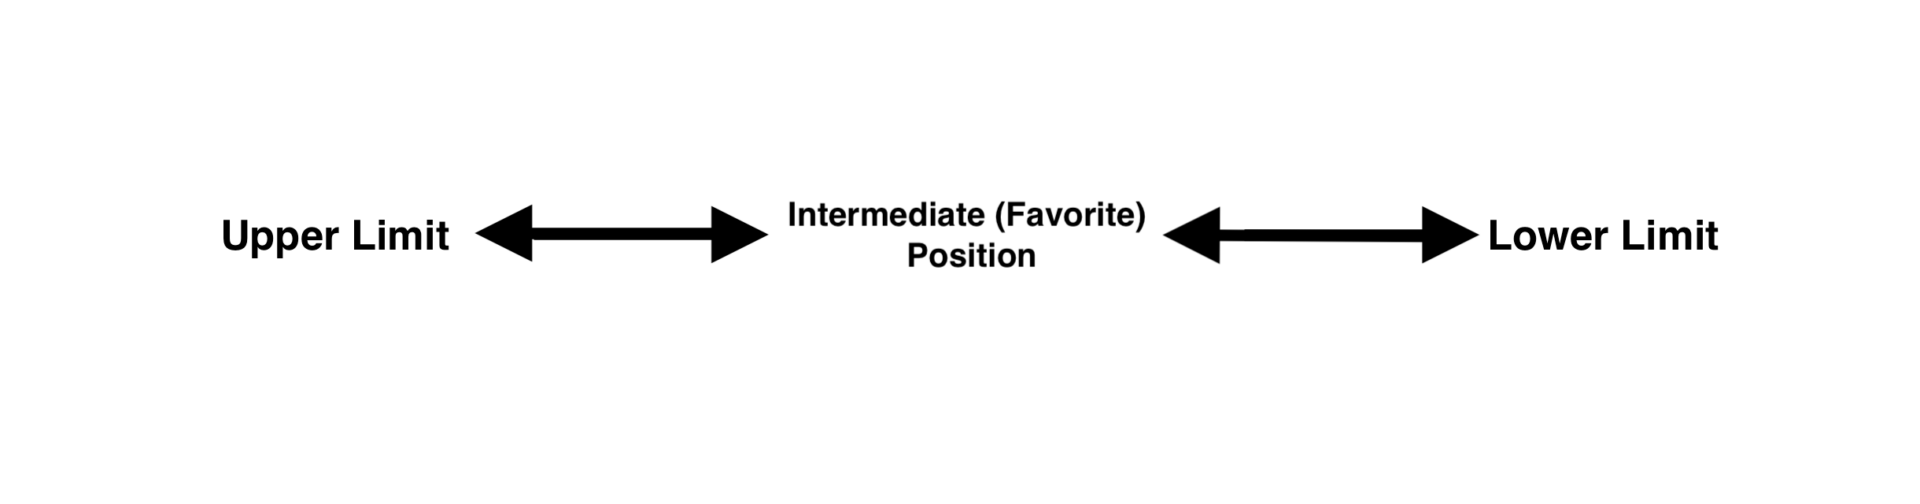
Warning: Once Intermediate (Favorite) Position is set, it will always go to that position when UP or DOWN is pressed. To erase the Intermediate (Favorite) Position: see Erasing Limits section.
Adjust the motor to the desired intermediate (favorite) position.
Tap the Programming button on the back of the remote.
The motor will jog once, indicating limit mode setting is activated.
Tap the programming button on the remote, to confirm intermediate limit position.
The motor jogs once, the intermediate position is now set.
Adjusting Limits #
Important: Adjusting Limits is for changing a currently set limit.
Move the motor to the current limit that needs adjustment and tap the Programming button.
The motor will jog, entering limit setting mode.
Adjust to the new limit position.
Tap the Programming button to confirm.
The motor will jog, confirming the adjustment is complete.
Erasing Limit Positions #
Warning: This will only erase one limit at a time.
Move the motor to the upper, lower, or intermediate (favorite) limit you want to erase.
Hold the Programming button on the back of the remote for 7 seconds.
After 1 second, the motor jogs once.
After 7 seconds, the motor jogs once again.
The desired limit is now erased.
Entering Programming Mode #
Warning: Programming mode performs different functions than Programming button.
Push and HOLD the STOP button for 5 seconds.
The motor will jog briefly, entering programming mode.
Changing Motor Rotation #
Set the motor to programming mode.
Push and HOLD the STOP button for 5 seconds, until the shade jogs.
Tap the DOWN button.
The motor will jog, confirming the direction change.
Tip: Repeat this to toggle back the other direction.
Adding a Remote #
Important: Using the existing remote to add another or multi channel remote.
Tip: To pair directly to a Sidekick remote/keypad, you must put the Sidekick into SI KAOS Mode. Using a paperclip, tap the MENU button on the back of the Sidekick, then on the front tap (3) – (1) – (STOP). All LED’s will flash, and follow the instruction below to pair it to the Shade.
On the original working remote, push and HOLD the STOP button until the shade jogs once.
On the new remote, quickly press the UP button, and the shade will jog once.
Deleting a Remote #
Set the motor to programming mode.
Push and HOLD the STOP button for 5 seconds, until the shade jogs.
Press the Programming button on the remote’s back.
The motor will jog once, confirming the remote is deleted.
Continuous Movement Mode Toggle #
Important: What is Continuous Mode?
Continuous mode means tapping the UP or DOWN button moves the shade to its limit. When disabled, holding the UP or DOWN button for 1.5 seconds makes the shade move continuously until you press the STOP button.
Set the motor to programming mode.
Push and HOLD the STOP button for 5 seconds, until the shade jogs.
Tap the STOP button on the remote.
The motor will jog once to confirm the mode has switched.
Tip: Repeat this process to switch back to Continuous Mode.
Factory Reset #
Warning: This will erase all limits and remotes from the motor.
New SI-50nm Motor: There is a Programming/Pairing Button located on the motor side of the cassette with an antenna. Factory Resetting the Motor: Push and hold the Motor Pairing button for 7 seconds, the motor will jog after 1 second. Continue holding the button, and the shade will jog again after 7 seconds.
Set the motor to programming mode.
Push and HOLD the STOP button for 5 seconds, until the shade jogs.
Hold the programming button on the transmitter for 7 seconds.
The motor will jog briefly.
After the 7 seconds, the motor will jog again.
Limits and remotes are deleted, and factory settings are restored.
Obstacle Detection #
Adjusting Sensitivity (Range: 1-5, Default: 3) #
Hold UP + DOWN for 5 seconds–the motor will jog.
To increase sensitivity, press STOP + UP–the motor will jog.
To decrease sensitivity, press STOP + DOWN–the motor will jog.
If the motor doesn’t move, you’ve reached the maximum or minimum level.
Hold STOP for 2 seconds–the motor will jog, confirming the setting.
Troubleshooting #
Motor won’t exit programming mode #
Solution: The motor may be in Continuous Movement Mode
Press and HOLD the STOP button for 5 seconds, or until the shade jogs ONCE
TAP the STOP button, and the shade will jog ONCE
The motor will now move to its limits
Note: If the problem persists, the motor may need to be factory reset.
Shade will move past its upper or lower limit #
Solution: There may be an Intermediate (Favorite) Position set
First you must Erase the Intermediate Position by holding the Programming button on the back of the remote for approx. 7 seconds
The shade will jog once immediately, then once again when the limit has been erased
Now erase Upper/Lower Limit by moving to that limit and push and hold the Programming button on the back of the remote for 7 seconds
Move the shade to the new Upper/Lower limits and re-set the limit
Shade stops working completely #
Solution: Motor may have gone into Thermal Protection
Verify voltage to the motor
If repeated use, motor will overheat and stop working
Let motor cool for 15-30 minutes and it will start working again
Make sure batteries in the remote are fresh
Make sure remote/control system is within range
Shade will stop and reverse direction on its own #
Solution:
Check for any obstructions in the shade’s path
Verify that the shade fabric isn’t catching or binding
Make sure the shade is level
Clean and lube inner track with a Silicone based lubricant
Adjust sensitivity of the Obstacle Detection
Note: This behavior is a safety feature to prevent damage. If the issue continues after addressing physical obstructions, the motor’s obstacle detection may need calibration.



