Setup & Discovery #
Best Practices for System Integration:
When configuring an SI shade/screen system, data is stored across multiple devices, including motors, keypads, and gateway devices, as well as the web browser used to configure TRO.Y 2. During commissioning, slight delays may occur based on device communication.
To prevent data loss:
✔ Commit data to TRO.Y 2 and other devices before leaving an unfinished commissioning process.
✔ Create a site backup to safeguard your work.
✔ Avoid closing or navigating away from the browser before saving to TRO.Y 2 or exporting a site file, as this could result in lost data currently stored in the browser.
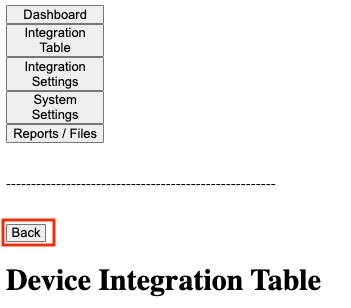
⚠️ Always use the “Back” button within TRO.Y 2, not your browser’s back button.
Finding TRO.Y with a Local Network #
Network not set up? See “Discovering Without a Local Network” below.
Using Windows #
1. Open Command Prompt
Click the Search icon (bottom left)
Type
CMDClick Command Prompt to open
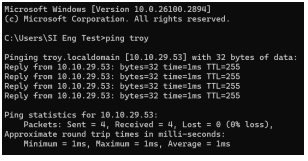
2. Ping the Device
Type:
ping troyPress Enter
You’ll see the DHCP IP address for TRO.Y 2
Viewing MAC Addresses Using Command Prompt #
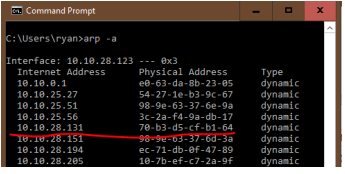
3. Run ARP Command
Type:
arp -aPress Enter
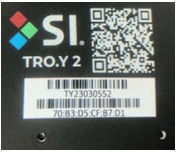
Look for MAC address starting with
70:B3:D5or58:76:07
Finding TRO.Y Using UPnP (Windows) #
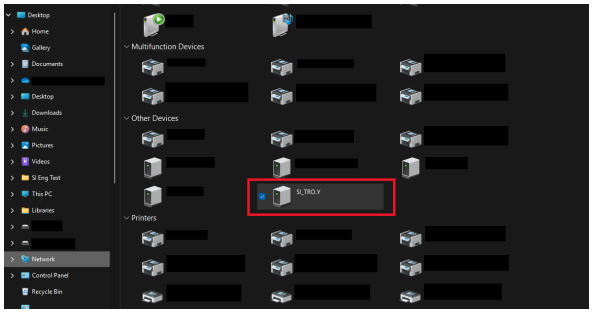
4. Open File Explorer and Go to Network
Click the File Explorer icon (yellow folder) on taskbar
In the left panel, click Network
Find SI_TRO.Y listed under Other Devices
Double-click to open in browser, or right-click → Properties for IP address
Using Mac #
1. Open Terminal
Press Command + Space (or click Launchpad)
Type
Terminaland press Enter
2. Ping the Device
Type:
ping troy.localPress Return
3. Run ARP Command (Mac)
Type:
arp -aPress Return
Look for TRO.Y’s MAC address
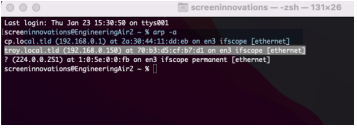
TRO.Y MAC Address: Will start with
70:B3:D5or58:76:07
Discovering Without a Local Network #
Items Needed: #
TRO.Y 2
Computer with an Ethernet port, or USB to Ethernet adapter
2x Ethernet Cables
PoE Injector
(Optional) Helen for Zigbee Control, Pegasus for RTS
Step 1: Connect the Hardware #
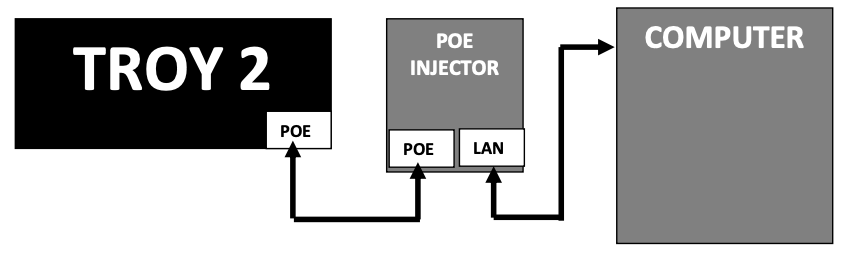
Connect the PoE Injector to a power source and plug two Ethernet Cables into the two ports of the PoE Injector.
Connect the Ethernet Cable from the “POE” port into the TRO.Y 2 “POE” labeled port.
Connect the Ethernet Cable from the “LAN” port into your computer or ethernet adapter.
Turn off your computer’s WiFi.
Step 2a: Using Windows #
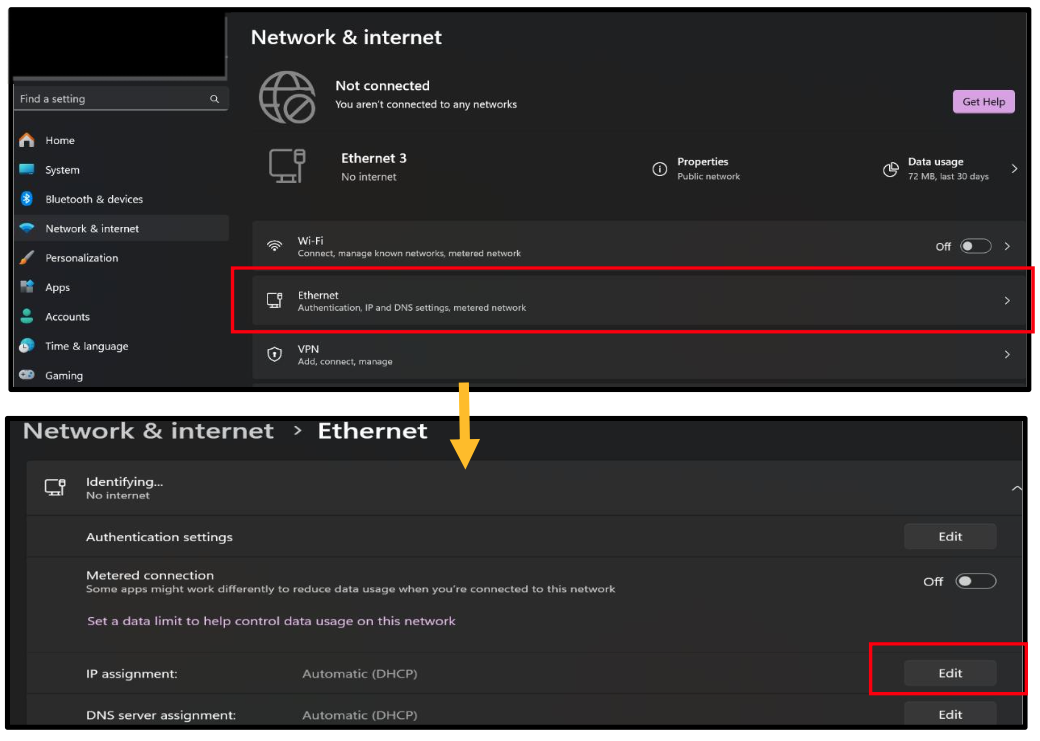
2a Configure Windows Network Settings
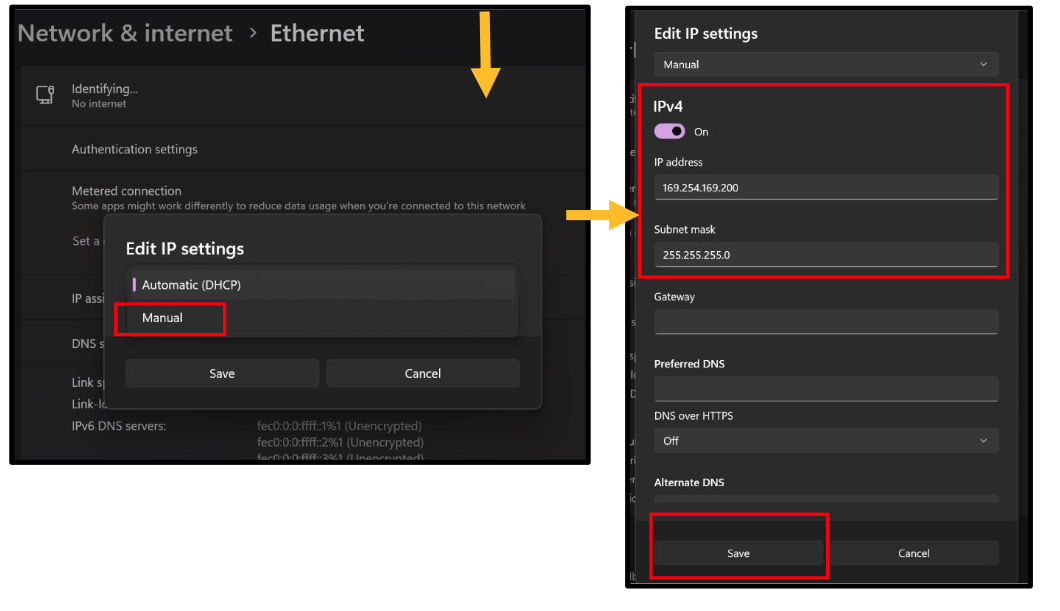
On your computer, go to the network settings, and change your IP on your network adapter that your TRO.Y is plugged into from DHCP to MANUAL.
Change your IP address to 169.254.169.X, with X being anything from 1-250.
Change the Subnet Mask to 255.255.255.0
Click the save button to save your changes.
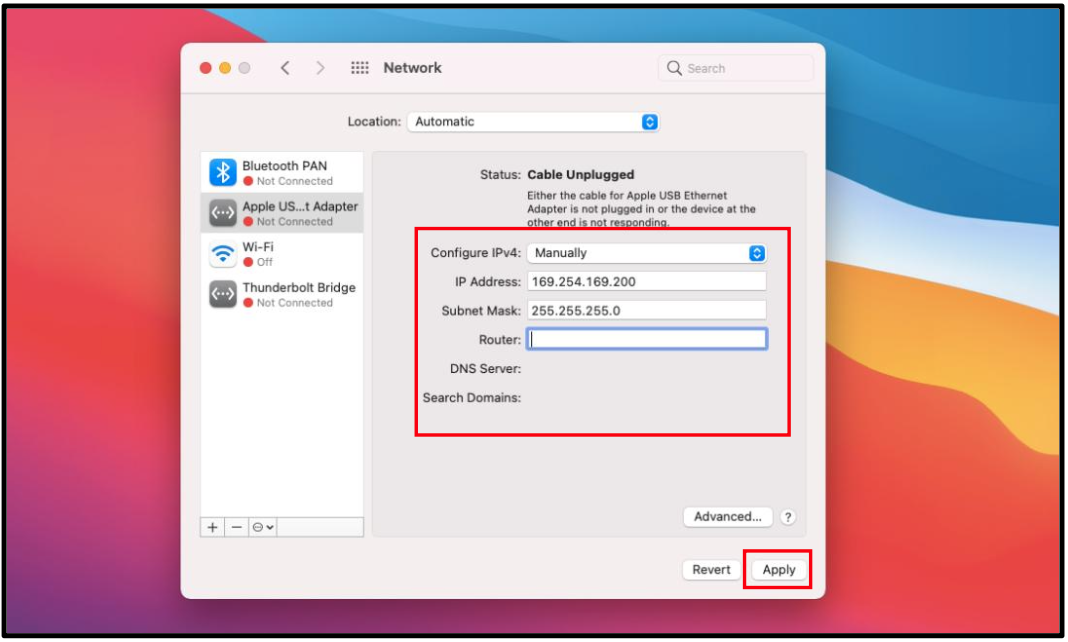
Step 2b: Using a Mac #
2b Configure Mac Network Settings
On your computer, go to System Preferences, then Network settings.
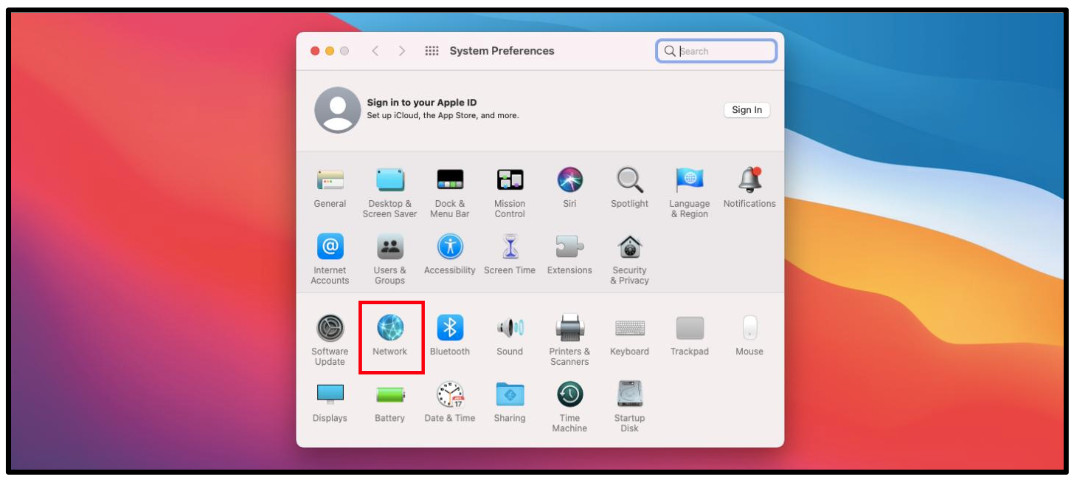
Click on the network adapter that your TRO.Y is plugged into. Change the IP settings from DHCP to MANUAL.
Change your IP Address to 169.254.169.X, with X being anything from 1-250.
Change the Subnet Mask to 255.255.255.0
Click apply to save your changes.
Step 3: Access TRO.Y Web Interface #
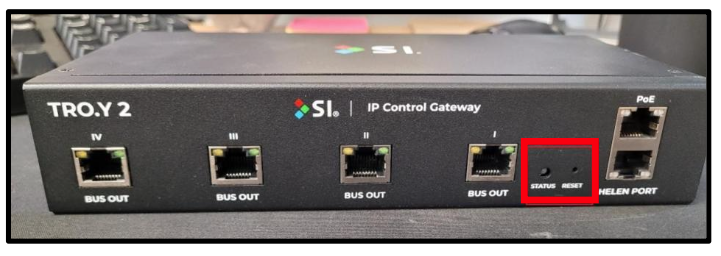
Using a small tool or paperclip, press the reset button located on the front of the TRO.Y unit.
The red LED should start flashing after pressing the button.
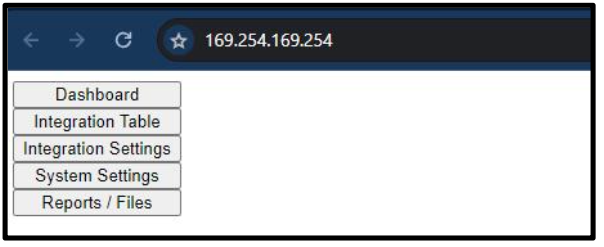
Open a web browser, and in the web address field, put 169.254.169.254 and press enter.
If everything is set up correctly, this will take you to your TRO.Y’s webpage.
Troubleshooting Direct Connection #
If you can’t connect, try these steps:
Turn off Wi-Fi and ensure the only active internet adapter is the one used for connecting to TRO.Y.
When connecting, press the Reset button on the front of the TRO.Y and confirm the red LED is flashing.
Double-check your IP address and subnet mask for any typos.
Power-cycle your TRO.Y and attempt to connect again.
Open Command Prompt (Windows) or Terminal (Mac) and enter:
ping troyorping 169.254.169.254If you receive a reply, your computer can see TRO.Y, and you should be able to connect via a browser.
If no reply or the command fails, your computer is currently unable to detect TRO.Y.
Updating Firmware #
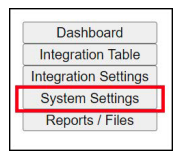
1. Press System Settings at top of screen
2. Scroll to bottom and press Show next to Firmware Updates
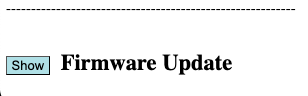
3. Click “Choose File” and select the TRO.Y firmware file
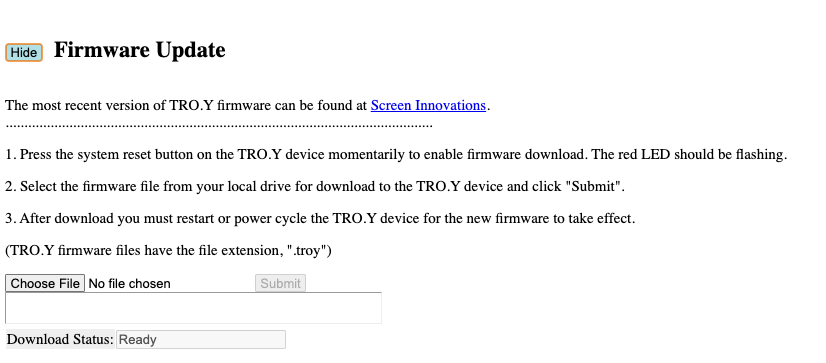
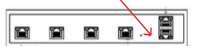
4. Press the Reset button on front of TRO.Y (red LED should flash)
5. Click “Submit” to start the upload
Wait for “result”: “good” in the Results box
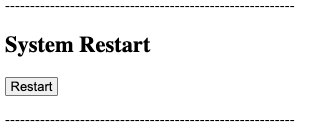
6. Click “System Restart” to reboot TRO.Y
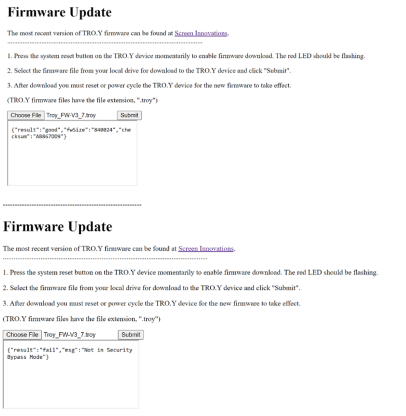
Important: Do not Power Off the TRO.Y or leave the GUI while firmware is being updated.
Note: If the update goes quickly, it did not take. Just repeat the process – it should take a few minutes to update.
Always use TRO.Y’s Back button (not browser back) to avoid data loss.
Success: If you see “result”: “good” in the Results box, the firmware upload was successful.
Updating Helen’s Firmware #
Press the Integration Settings button at the top of the screen
Press the Show button next to Wireless Bridge Settings to open the menu
Push the Reset button on TRO.Y 2
Click Choose File and browse to a valid .gbl file
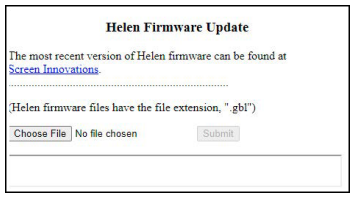
Note: If the update goes quickly, it did not take. Just repeat the process–it should take a few minutes to update.
Network Settings #
It is recommended to use a Static IP or MAC reservation for reliable operation.
Access the TRO.Y web interface
Navigate to Network Settings
Choose between DHCP or Static IP
If using Static IP, enter IP Address, Subnet Mask, Gateway, DNS Server
Click Submit to save
Restart TRO.Y for changes to take effect
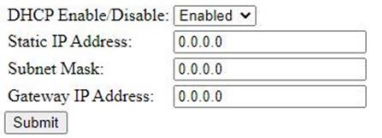
Tip: If using a Static IP, it’s best to reserve the MAC address in your router settings for stability.
User Interface Password (Optional) #
Here, you will set the User Interface password.
This password will allow users to access the TRO.Y dashboard, including connection status and diagnostic information.
To unlock the full TRO.Y menus and features, the password must be entered on the dashboard.
Press the System Settings at the top of the screen.

Enter the desired password and press Submit.
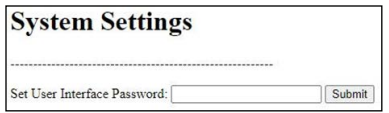
Important: SI Support cannot reset or recover lost passwords.
If you forget your password: Tap the Security Bypass button on the TRO.Y to unlock access for 5 minutes, then refresh your browser. You will now have access to the full menus.
System Time Settings #
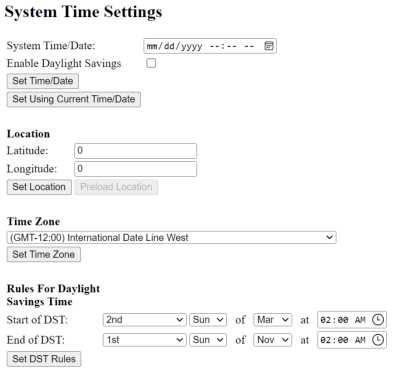
System Time Settings allow system time, date and location to be entered for use with events and scenes.
Tip: Setting the time is based on the time and date settings of the PC connected to TRO.Y. You may need to enable Daylight Savings to get an accurate time.
Press the System Settings at the top of the screen.
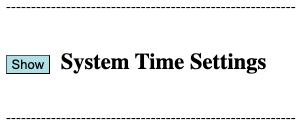
Scroll down and press the Show button for the System Time Settings
Configure the time, date, and location settings as needed.