
Adding Devices to TRO.Y #
Discovering PoE and RS-485 Shades #
RS-485 Wired Shades #
In the Integration Table:
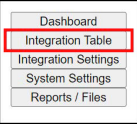
Navigate to the Integration Table in the TRO.Y GUI
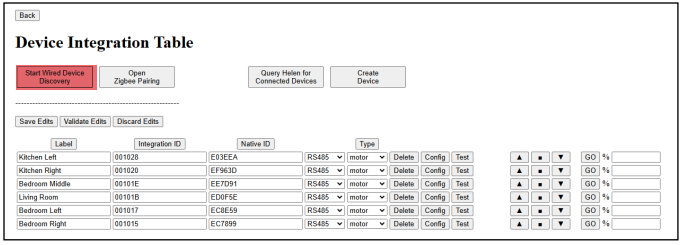
Select the Device Table

Click the Start Wired Discovery button
Devices will automatically appear in the device table
Click Stop Wired Discovery when done
Click Accept Edits to save
Click Commit Integration Table
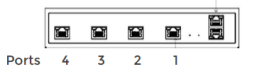
SI IP Bridge Setup #
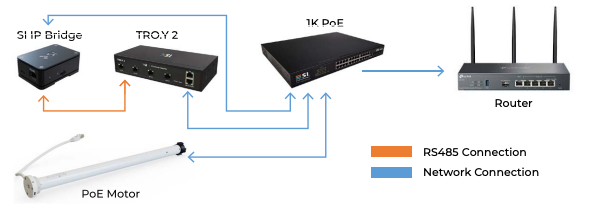
RS-485 Motor Configuration #
After discovering a motor, click the Config button to access motor settings:
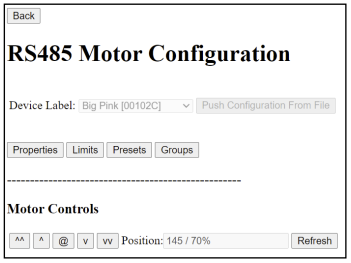
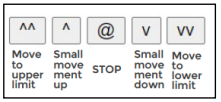
Motor movement controls allow you to adjust the motor:
PoE and RS-485 motor configuration has 4 menus:
Properties – Motor Info, Motor Label, Motor Rotation, and Motor Speeds (if applicable)
Limits – Setting or Adjusting Limits, and Factory Resetting the motor
Presets – Assigning Preset Positions
Groups – Adding a motor to a Group
RS-485 Motor Configuration – Properties #
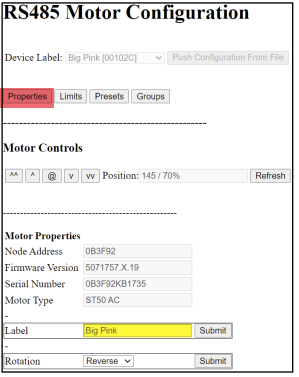
Click “Properties” to access the menu
Here you’ll see the Node ID, firmware version, serial number, and motor type (if available)
You can also adjust the label, motor rotation, and speeds if supported
Click “Submit” to save your changes
If limits are set, the motor will need to be reset before changing the motor rotation.
RS-485 Motor Configuration – Limits #
Your shades came with limits set. If you need to adjust the limits, follow these instructions.
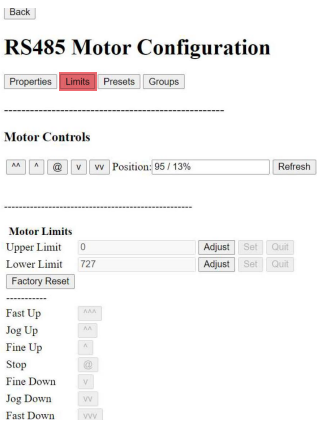
Click “Limits” to enter the menu
Here you can adjust the upper and lower limits and see the current positions
Click “Adjust” to modify limits
Use the controls to move the motor to the desired position
Click “Set” to save the new limit or “Quit” to exit without saving
You can also factory reset the motor, which erases all settings
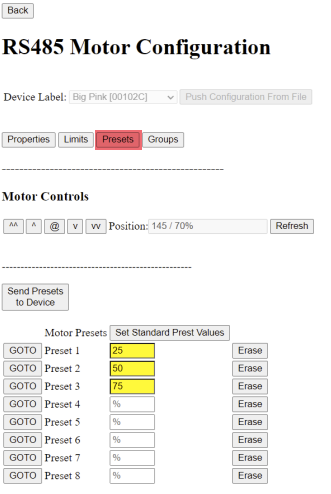
RS-485 Motor Configuration – Presets #
Click “Presets” to open the menu
Set up to 8 presets using % values or arrows
Click “Set Standard Presets” to auto-fill three evenly spaced presets
Click “Send Presets to Device” to save them to the motor
Click “Go To” to move the motor to any saved position
Discovering Zigbee Devices #
Adding the Helen Coordinator #
Note: Helen’s LEDs stay OFF until Helen is enabled in TRO.Y’s integration settings. Once enabled, the LEDs flash before the Zigbee network is created and turn solid after.
If you purchased your SI Eco-System with your shades, your TRO.Y, Helen Coordinator and Shades will come pre-configured.
Important: Connect Helen Coordinator directly to the Helen port on TRO.Y 2.
DO NOT use the supplied POE Injector for the Coordinator.
The wire length from TRO.Y Helen Port to Helen should not exceed 50′.
In the Integration Settings:
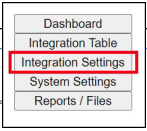
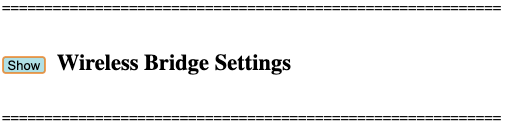
Click “Show” to start the Telnet Server
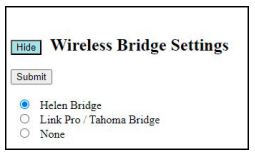
Select “Helen Bridge”
Click “Submit” to save your settings
Restart TRO.Y
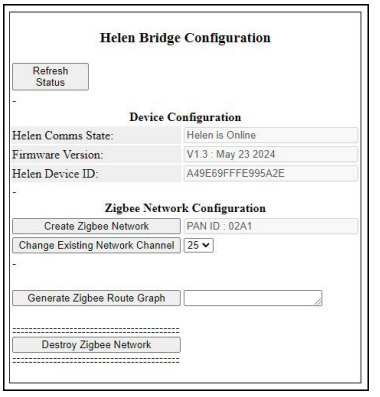
Under Wireless Bridge Settings, press Create Zigbee Network
After a few seconds the PAN ID will populate.
The refresh button only updates the Helen configuration data.
When Helen is ready to configure you will see “Helen is Online” in the Helen Comm State and/or the Dashboard.
This will also show the current Helen Firmware version and Device ID.
Tip: This screen will only appear if you have a HELEN connected to the Helen port.
Adding Zigbee Routers #
Tip: Always set up and install your Zigbee Routers first before adding motors. This ensures a strong and stable Zigbee network.
Router types supported:
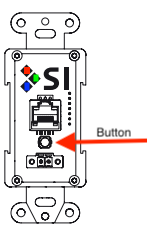
Helen as a Router
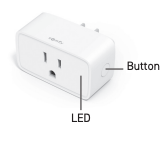
Somfy Smart Plug
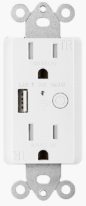
Smart Outlet
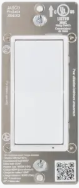
Smart Light Switch
Smart Outdoor Plug
Adding Zigbee Shades #
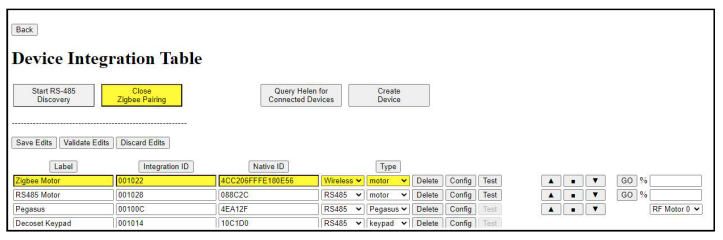
On your TRO.Y, go to the Device Table
Click “Open Zigbee Pairing” – the button will turn Yellow
Put the motor into Discovery Mode by pressing and holding the shade motor head button for 2 jogs
Nano Somfy Motors will Flash Amber LED when in Discovery Mode

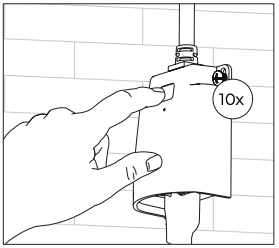
Nano Motor Not Entering Discovery Mode? If a Somfy Nano motor is not responding to the 2-jog hold, the motor may be in Bluetooth mode. Rapidly press the motorhead button 10 times in quick succession — if the motor was in Bluetooth mode, it will jog to confirm the switch back to Zigbee mode and the LED will begin slow blinking amber, indicating active discovery mode.
Still Not Discovering? Use the Somfy TaHoma Pro App — Connect to the motor via Bluetooth using the TaHoma Pro App to: (1) verify the motor has the latest firmware, (2) confirm the motor and antenna are mechanically functional, and (3) run through motor configuration. After completing diagnostics in the app, attempt Zigbee discovery into the Eco-System again.
Niño SI Motors will have a Solid Red LED when in Discovery Mode
The shade will jog once and appear in the Device Table
Name the device and click “Close Zigbee Pairing”
Click “Save Edits”
Go to Integration Table and click “Commit Integration Table”
Zigbee Motor Configuration #
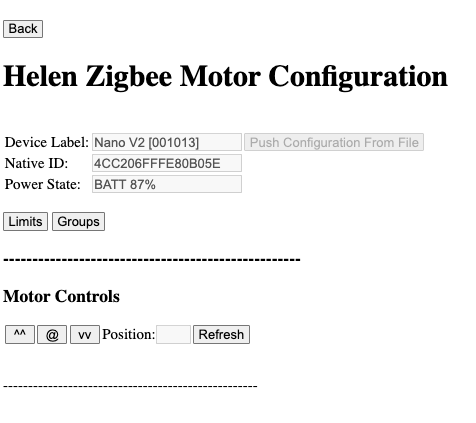
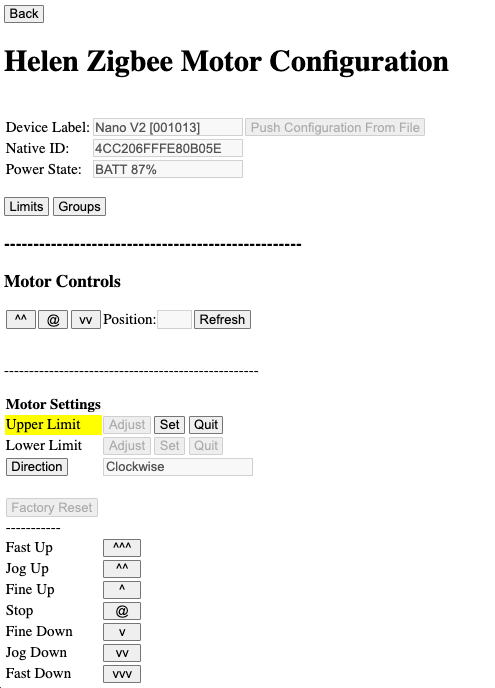
After adding a Zigbee shade, click the Config button to access motor settings:

Motor Options #
Motor Limits Settings #
Zigbee Network Configuration #
Create a Network – Click “Create New Zigbee Network” to start a new wireless network. The Zigbee Network ID (PAN ID) will appear next to the button.
Change Network Channel – Select a channel from the dropdown menu and click “Change Existing Network Channel” to apply (this takes about 10–15 seconds).
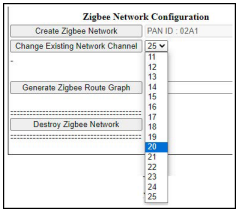
Check Status – After creating the network, ensure the red, green, and blue LEDs on the Helen device are solid (not flashing).
Destroy Zigbee Network – Click “Leave Existing Zigbee Network” if you need to disconnect.
Important: Don’t destroy the network if you have devices paired or don’t want to start over!
Generate Zigbee Routing Graph – Press the “Generate Zigbee Route Graph” This will generate all the Zigbee nodes that have been paired with the Helen, and the corresponding Router (or parent) relationship.
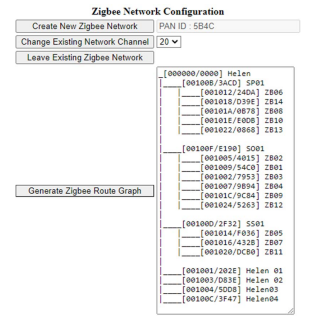
The Helen of TRO.Y 2 (Zigbee Coordinator) is always at the top, with each Zigbee node listed below it.
Mesh Routers (including additional Helen devices) appear under the coordinator, with end-point nodes below them.
Click the three lines at the bottom right to expand the display for larger systems.
A CSV file is automatically generated and can be downloaded for use in Excel or other spreadsheet programs.
Query Helen for Connected Devices #
If a device was previously part of the Zigbee Network and disappeared, or if you purchased your Eco-System with shades, they will be pre-configured from the factory.
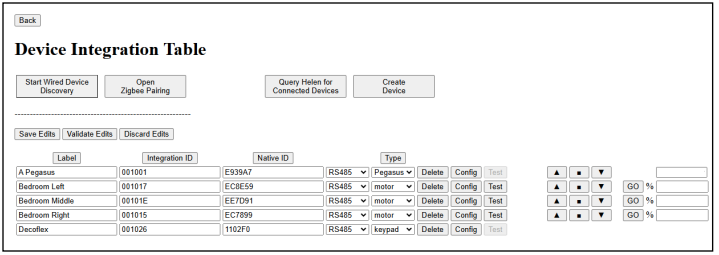
On your TRO.Y, go to the Device Table and click “Query Helen for Connected Devices.”
Make sure you already have a Helen set up as a Zigbee Coordinator.
The “Query for Connected Devices” button will turn yellow.
The device will show in the Device Table and can be re-named
Adding RTS Shades with Pegasus #
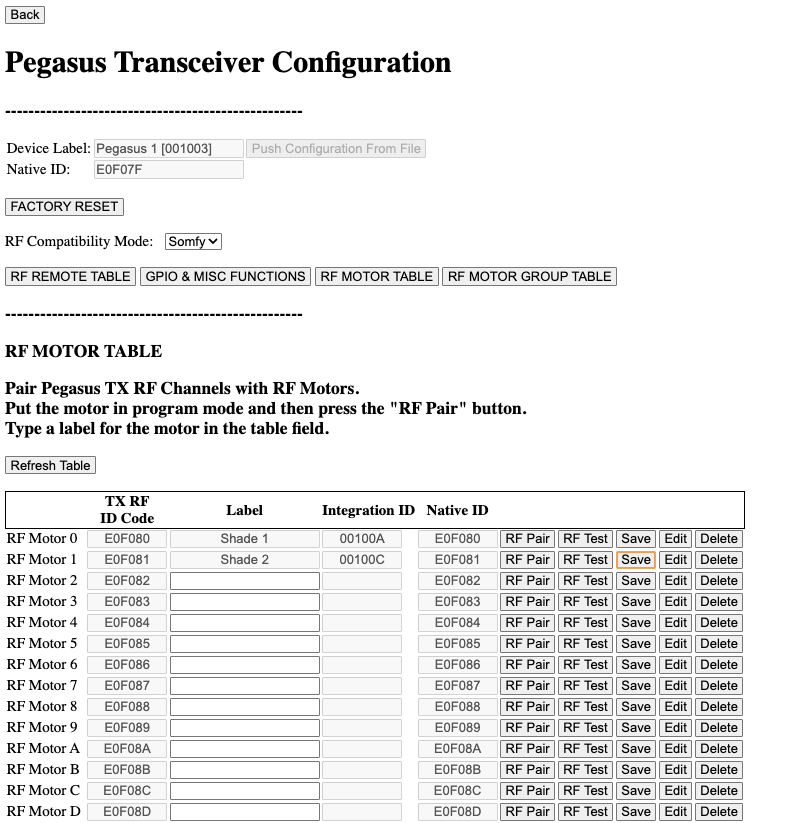
Adding Shades in the RF Motor Table #
RF Motor Table is only available in Somfy, Alpha, and SI Screens / SI KAOS configuration modes.
Make sure your Remote is paired and limits are set
Click Config on the Pegasus in the Device Table
Click RF Motor Table
Put the motor in pairing mode
Click RF Pair for the desired channel – the motor will jog to confirm
Test by clicking RF Test – the motor should jog
Label the channel and click Save to store it in Pegasus
The motors will now show up in the Device Table.
To remove a motor, click Delete and confirm.
Motor Pairing Modes #
Somfy 30/50 Series: Push and HOLD Programming Button until shade Jogs Once
SI KAOS: Push and HOLD STOP button for 5 seconds until shade Jogs Once
Alpha: Tap RED button on Motor Head, or UP+DOWN then STOP 8 times



