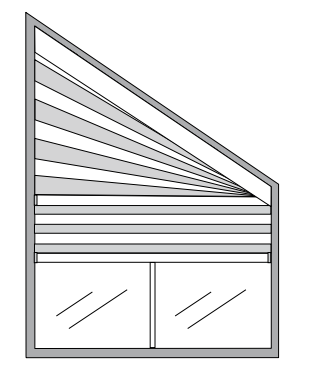
Mounting the Brackets #
The brackets will come attached to the shade.
Reference the sticker “Location for Mounting Bracket” for bracket placement. (additional support at these locations)
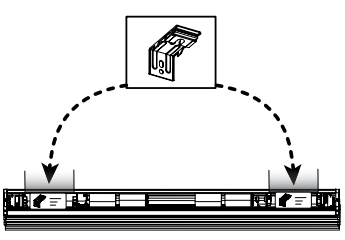
Measure the location of the brackets at the sticker location on the shade.
Install the brackets on the window frame +/- 1.5″ the width of the sticker locations.

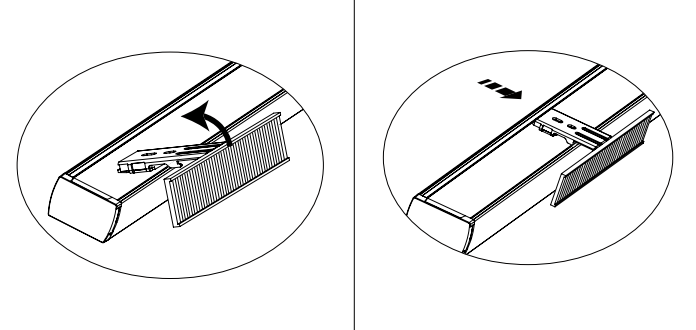
Install the Light Blocking Panel Mounting Bracket #
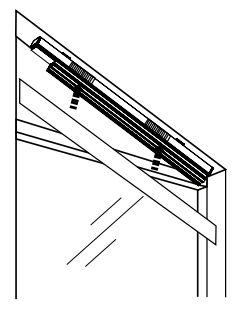
Position the Light Blocking Panel Bracket correctly, ensuring the hook-and-loop fastener faces outward.
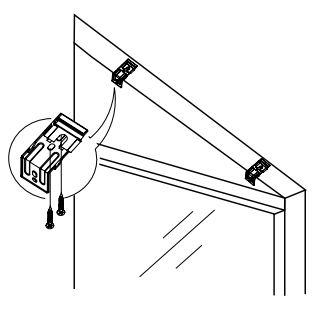
Install the Shade #
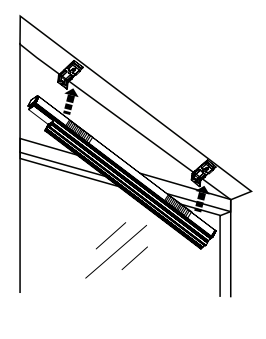
Push the shade toward the mounting surface to release the bracket lock.
Rotate the bottom of the shade upward until it locks
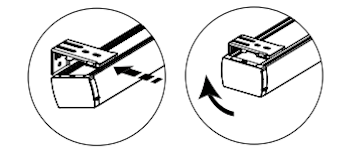
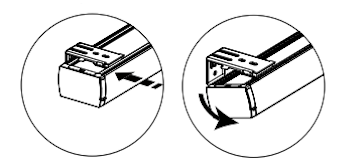
To remove the shade, push against the shade and swing the shade down and out towards you, as depicted below.
Install the Light Blocking Panel #
Attach the Light Blocking Panel (with the hook-and-loop fastener facing inward and the smooth side facing outward) to the correct position on the Light Blocking Panel Bracket.
Ensure the panel fits closely to the window frame during installation to prevent light leakage.
Setup #
Wake up your Shade
Make sure the shade the shade is Awake buy pressing and holding the Motor Head Button for 1 jog #
Adjusting Limits #
#
Adjusting the Upper limit
Move the shade to its current limit.
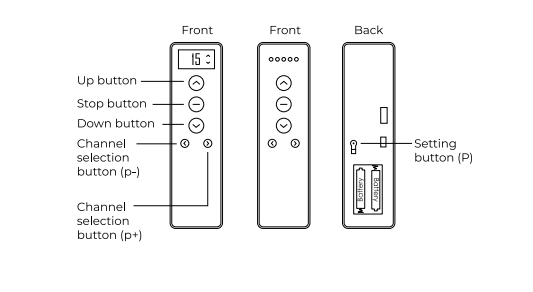
Simultaneously press “Up” & “Stop” on the remote until the motor jogs once.
Move the shade to the desired location.
Simultaneously press “Up” & “Stop” on the remote until the motor jogs once.
Adjusting the Lower limit
Move the shade to its current limit.
Simultaneously press “Down” & “Stop” on the remote until the motor jogs once.
Move the shade to the desired location.
Simultaneously press “Down” & “Stop” on the remote until the motor jogs twice.
Change Nino Motor rotation #
With no limits
Press and hold the “Up” & “Down” button on the remote until the motor jogs once.
With limits
Press the programming button on the back of the remote until the motor jogs once.
Simultaneously press the “Up” & “Down” button for one until the motor jogs once.
Changing Motor Speed #
Increasing Speed
Press the programming button on the back of the remote until the motor jogs once
Press the “Up” button c. Press the “Up” button to increase speed, or “Down” to decrease speed. The motor will jog to indicate current set speed.
1 jog level 1
2 jog level 2
3 jog level 3
If motor does not respond, it has reached its maximum speed.
Decreasing Speed
Press the programming button on the back of the remote until the motor jogs once
Press the “Down” button
Press the “Down” button to decrease speed, or “Up” to increase speed. The motor will jog to indicate current set speed.
1 jog level 1
2 jog level 2
3 jog level 3
If motor does not respond, it has reached its maximum speed
Tilt Mode #
To switch between tilt mode (moves an inch with each press) and running modes (moves continuously)
Ensure the shade limits are set, and then follow these steps below:
Using the remote, hold the UP and DOWN buttons for around 5 seconds; the motor will jog once.
After the motor jogs, press the STOP button, the motor will jog once, indicating it has entered Tilt mode, this is a toggle feature.
NOTE: To return to running mode for continuous movement, simply follow the procedure outlined above again.
Factory Reset the Motor #
This will erase limits, and any paired remotes
Push and Hold the Motor Head button for 4 Jogs (Down – Up)
Nino Remote Settings #
Adding a Remote #
Press the programming button on the Remote control currently paired to the motor until the motor jogs once
Press the programming button on the Remote control currently paired to the motor until the motor jogs once
Press the programming button on the new Remote control you want to add until the motor jogs once
Removing a Remote #
Press the programming button on the Remote control currently paired to the motor until the motor jogs once
Press the programming button on the Remote control currently paired to the motor until the motor jogs once
Press the programming button on the new Remote control you wish to remove until the motor jogs once
Pairing an additional Nino motor to a Remote #
Press the programming button on the head of the motor for 1 jog.
Press the “Stop” button on the remote for 1 jog.
Unpair a remote from a Nino motor #
Press the programming button on the head of the motor for 1 jog.
Press the “Stop” button on the remote for 1 jog.
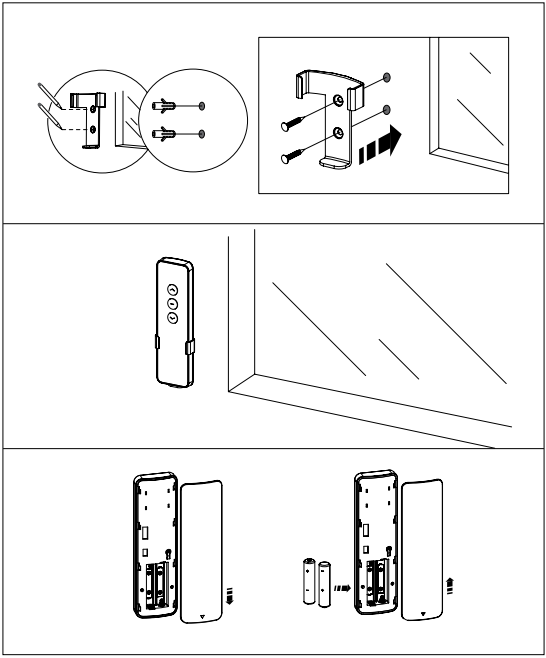
How to Install the Remote Holder #
Instructions for securing the remote holder.
Charging the Shade #
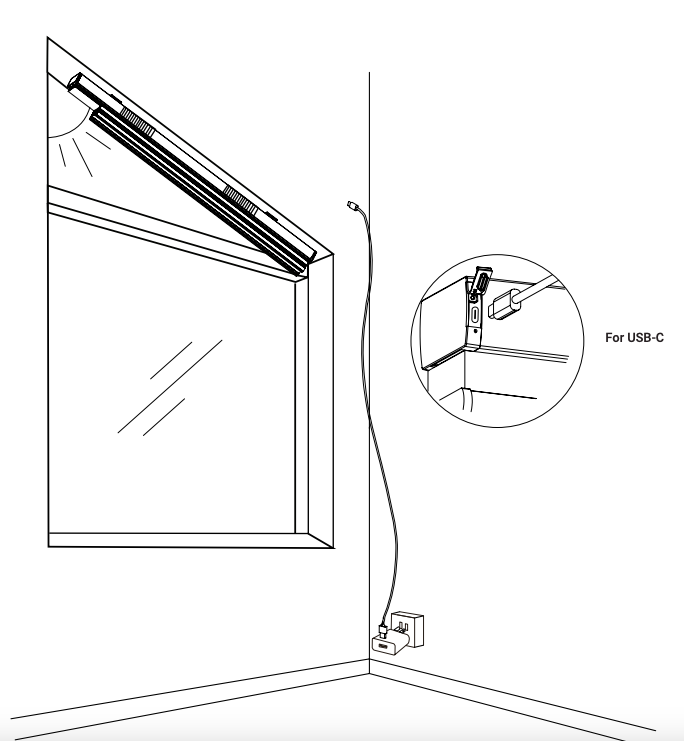
USB-C & Magnetic Charging Cable
Flip up the rubber cover open on the front of the shade to expose the USB-C Plug
Charging: Blinking Green LED
Fully Charged: Solid Green LED
Low Battery: Blinking Red LED
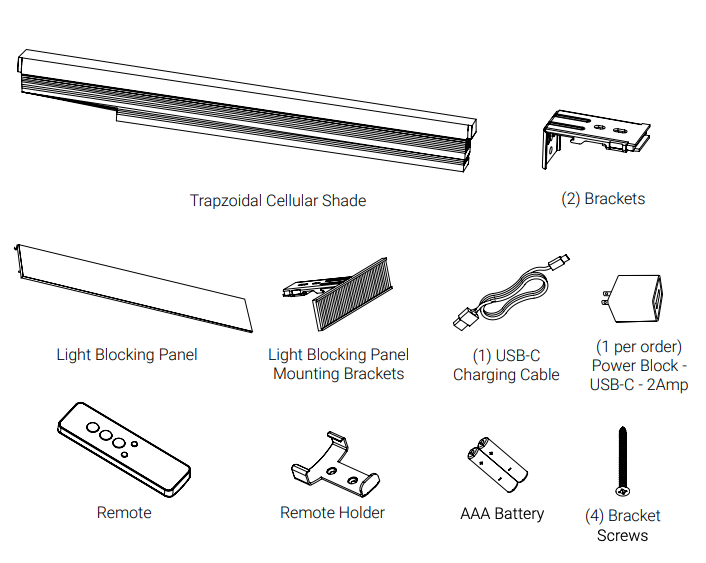
Parts in the Box #
Roll and Box types
Inside and Outside mount
(2) Brackets
(2) Bracket Spacers
(4) Bracket Screws
(2) Light Blocking Panel Brackets
(1) Light Blocking Panel
(1) USB-C Charging Cable
(1) USB-C Magnetic Adapter
(1 per order) Power Block – USB-C – 2Amp
AAA Battery
Remote Holder
Remote