Complete guide to our precision-engineered Nano shading solutions
275 Open Roll
375/475 Open Roll
Narrow Open Roll – External Battery
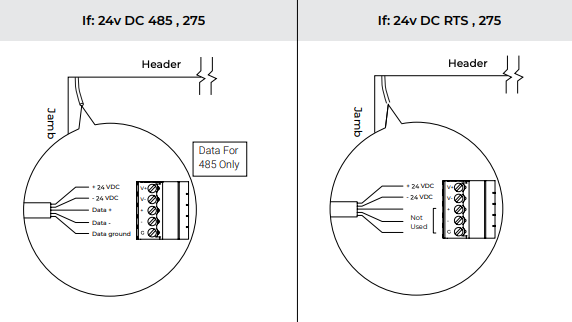
Step 1: Terminate the Wires (If Necessary) #
Determine what wiring system have you ordered and do the pre-wire based on what is shown below.
Before installing the shades, verify whether the shade was ordered as standard roll or reverse roll.
Though illustrations in this manual show standard roll shades, the installation for reverse roll shades is the same.
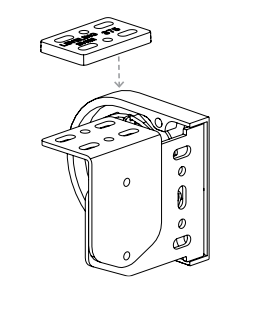
Step 2: Spacer Blocks and Leveling Shims #
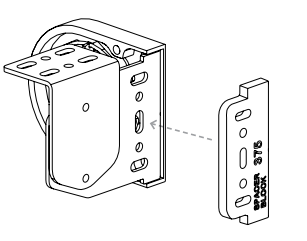
Spacer Blocks are used to clear an obstruction in the fabric path.
Spacer Blocks – used to clear an obstruction in the fabric path.
Connect spacer blocks to shade brackets before installation.
Do not use more than 4 spacer blocks per bracket.
Leveling Shims are used if the window frame is out of level.
Connect to shade brackets before installation.
Do not use more than 2 leveling shims per bracket.
Step 3: Mounting the Brackets #
Install wall bracket/end cap assembly with the supplied screws.
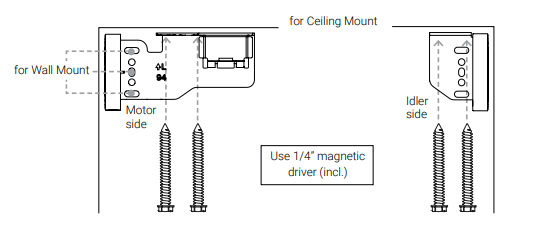
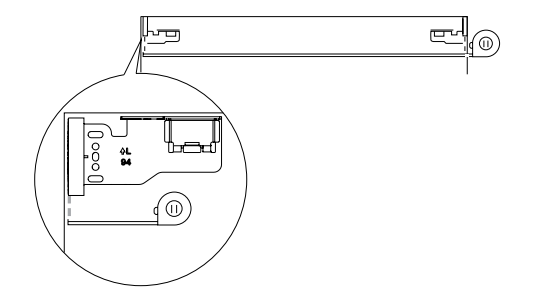
Measure outside of the bracket to the outside of the bracket width and verify it matches the width the shade was ordered.
Adjust accordingly

Brackets must be level before the shade is installed.
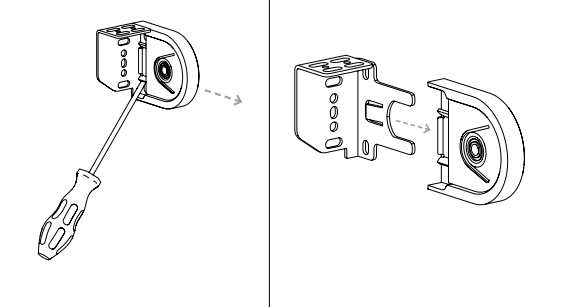
Remove idler end cap with flat screw driver.
Step 4: Installing the Fabric Roll #
FOR LOW VOLTAGE MOTORS: #
Connect shade and pre-wire connectors, snap into bracket.
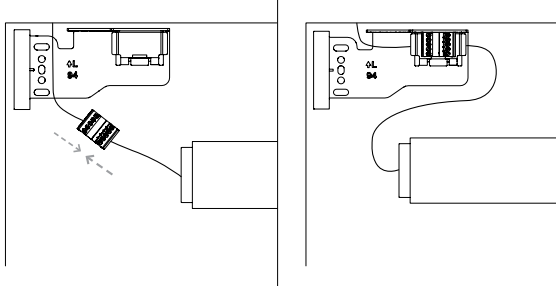
Insert motor side completely.
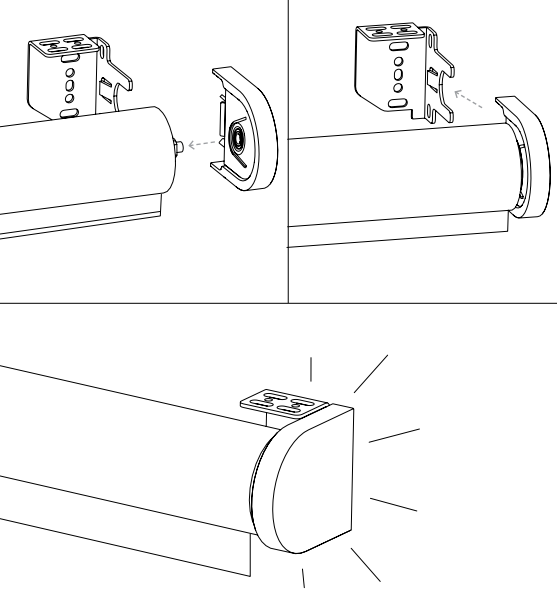
Then, while supporting motor side, put idler end cap over the idler and snap into place.
When installing, the shade should be at the upper limit.
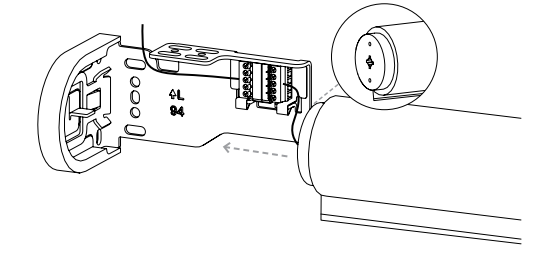
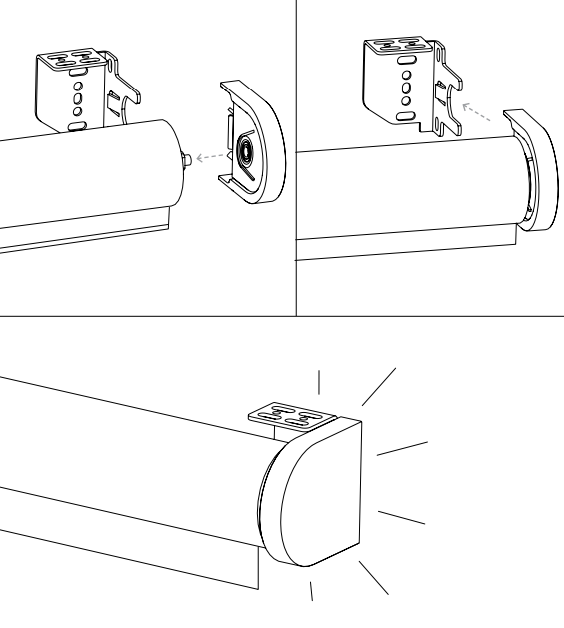
Put the End Cap’s bearing over the idler pin.
Slide the End Cap onto the mounted bracket.
There will be an audible “Click”
FOR WIREFREE MOTORS: #
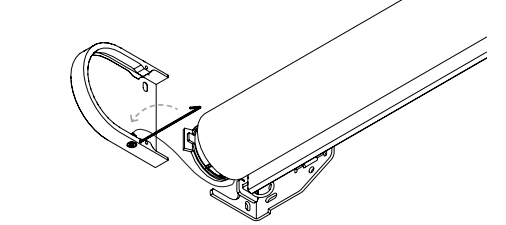
With the charging magnet secured in the end cap, connect the plug into the motor head
Insert the motor side into the bracket
Put the End Cap’s bearing over the idler pin.
Slide the End Cap onto the mounted bracket.
There will be an audible “Click”
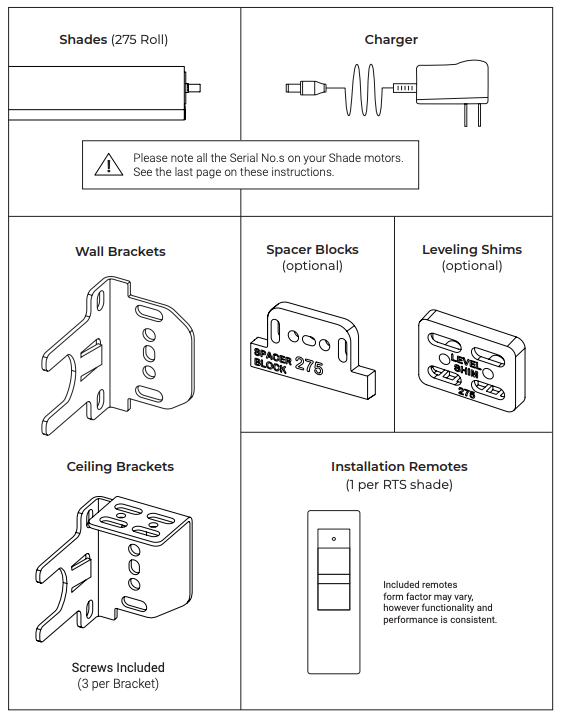
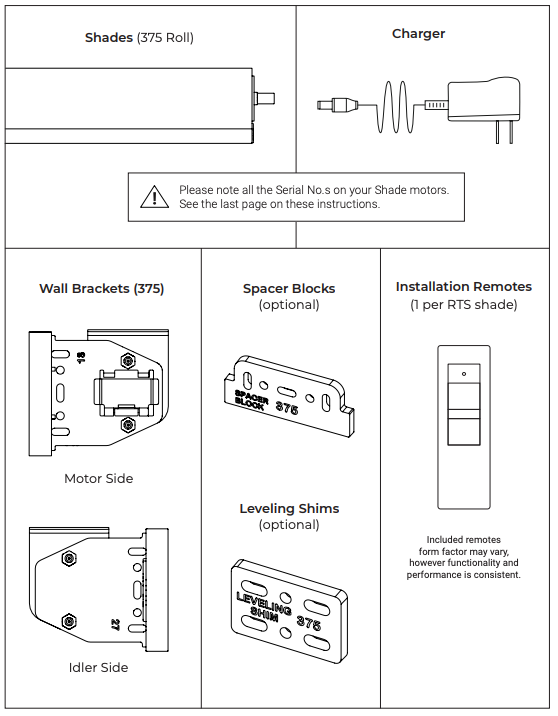
Parts in the Box #
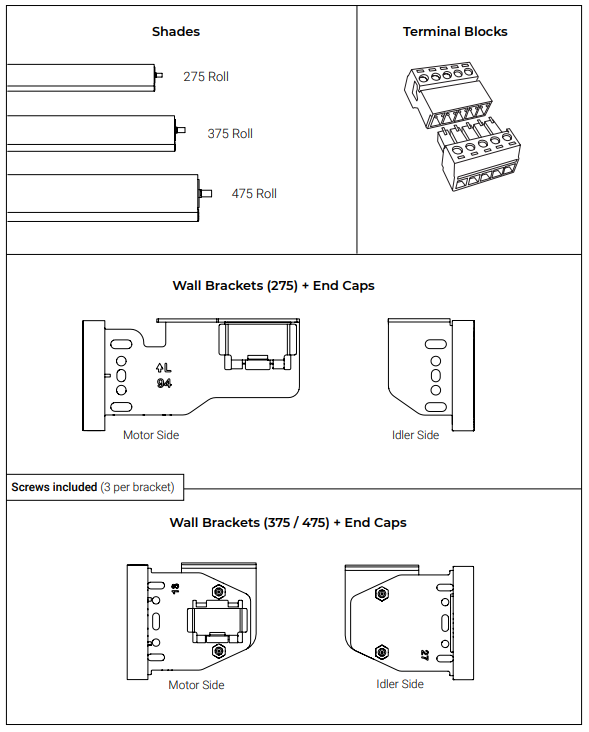
PARTS LIST for Nano Roll – Wired 24v DC – 485 / RTS #
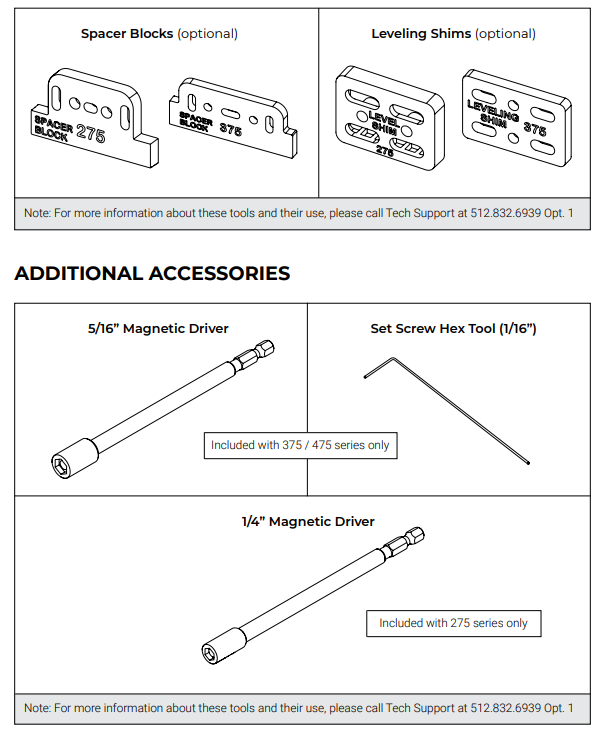
PARTS LIST for Nano Roll – Wire Free #