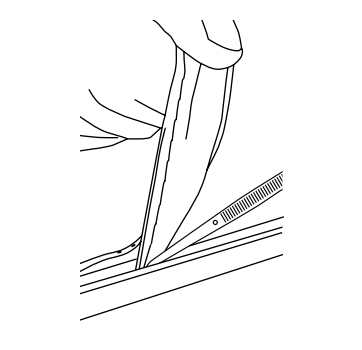
FRAGILE — BLACK DIAMOND FUSION material is delicate. Keep completely flat at all times. Avoid bending, folding, or sagging.

Projector Placement #
Projector Placement #
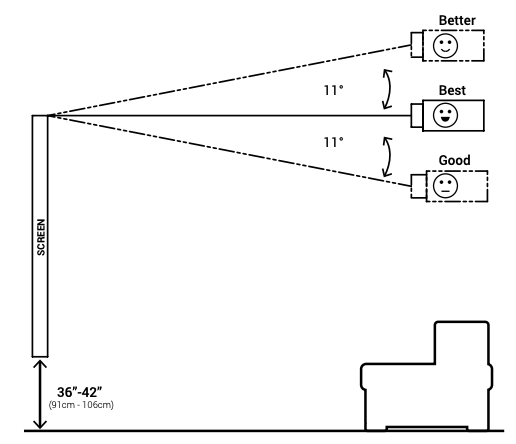
Before beginning frame assembly, plan your projector placement. Mount the projector lens level with the top or bottom of the screen. Do NOT angle the projector or use keystone correction.
Frame Assembly #
Frame Assembly (6 Steps) #
WARNING: Trim comes pre-attached to the retention frame. Remove it first by separating from the ends before beginning assembly.
Step 1: Position Frame #
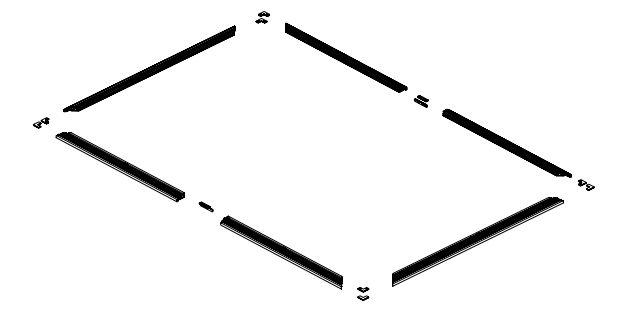
Lay all frame pieces out with the viewing side DOWN.
Step 2: Install Center Brackets #
Install the center connector bracket and attach the vertical I-beam support.
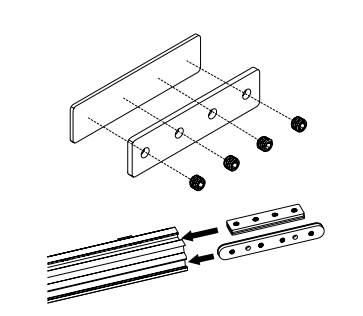
IMPORTANT: Leave the I-beam anchor brackets loose at this stage. They will be tightened after squaring.
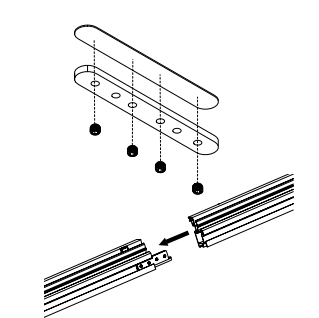
Step 3: Install Corner Brackets #
Install 4 brackets per corner — 2 with hex heads and 2 without. This provides the rigidity needed for the retention channel.
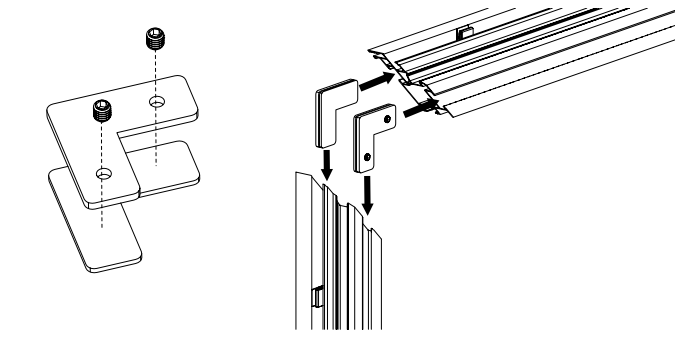
TIP: Ensure corners are properly aligned before tightening any screws.
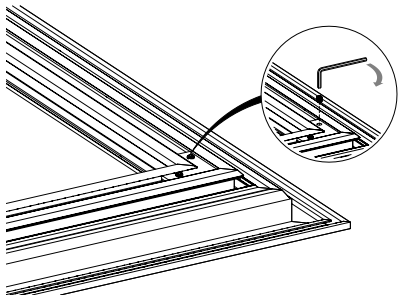
Step 4: Square the Frame #
Measure diagonals corner-to-corner. They must be within 1/8″ of each other.
Step 5: Secure Vertical I-Beam #
Now that the frame is square, fully tighten the I-beam anchor brackets.
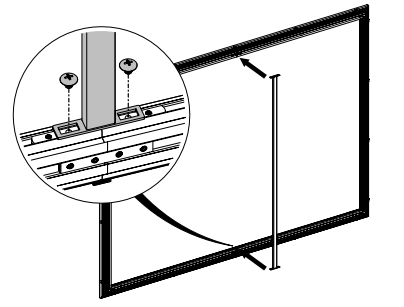
Step 6: Flip the Frame #
Carefully flip the frame so the viewing side faces UP. Tighten all hex screws and ensure corners remain properly aligned.
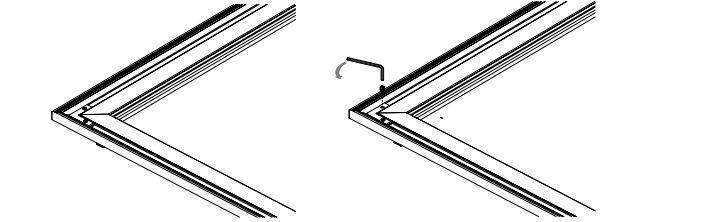
IMPORTANT: Verify that corners remain aligned after flipping. Re-check diagonal measurements if needed.
LED Kit Installation (with Diffuser) #
Step 1: Prepare for Zigbee #
A Philips Hue Hub is required. Set up the Hue Hub and app before powering on the LEDs.
Step 2: Install LED Strip #
First, remove the plastic diffuser from the LED channel on the frame.
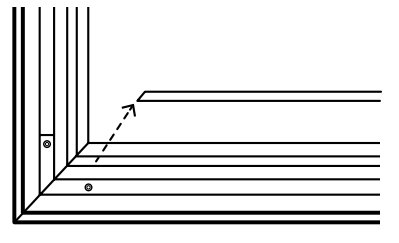
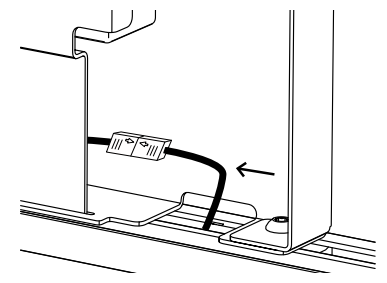
Apply the LED strip into the channel and feed the connector wire through.
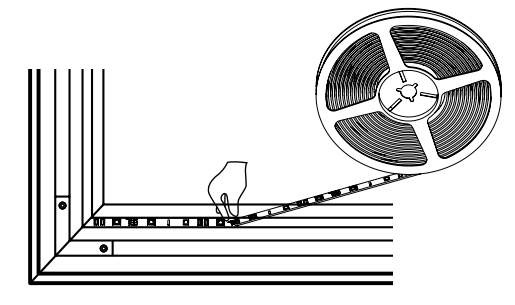
Step 3: Reinstall Diffuser #
Snap the plastic diffuser back into place over the LED strip. This creates an even light distribution.
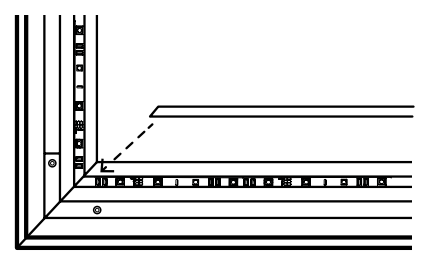
Step 4: Connect System #
Mount the LED kit tray to the frame. Plug the 4-pin connector from the LED strip into the controller.
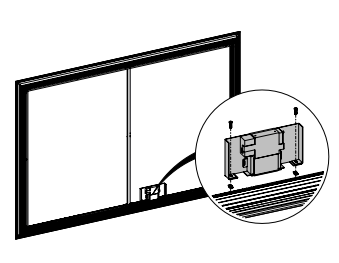
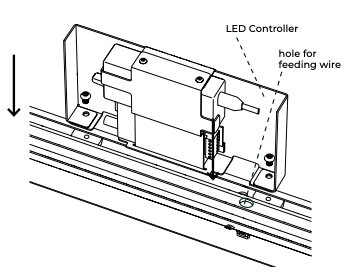
Step 5: Plug into LED Controller #
Connect the wiring harness to the IP LED controller.
Zigbee LED Wiring #
WARNING: Input voltage must equal output voltage. Verify before connecting.
Depress the spring terminals and match the RGB wiring connections.
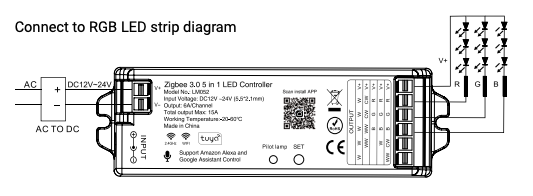
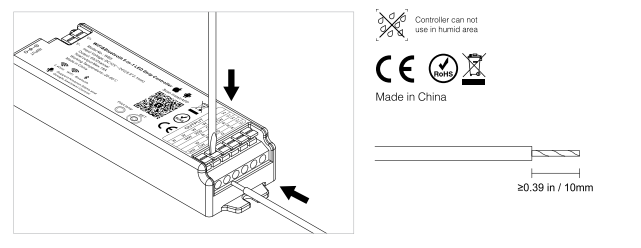
Mount the IP LED controller in an accessible location.
Material Installation #
Retention System
FRAGILE — BLACK DIAMOND FUSION material is delicate. Keep completely flat. Avoid bending, folding, or sagging.
Step 1: Prep Material #
Black Diamond material is rolled with the viewing side UP. Follow these steps carefully:
Place the roll beside the vertical frame member
Remove the tape and orient the roll for unrolling over the frame
Gently unroll the material over the frame
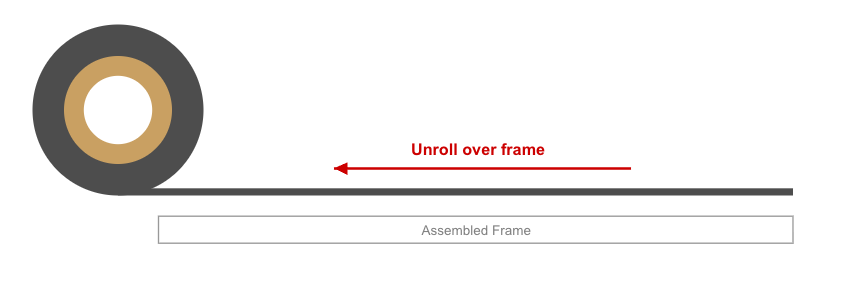
Remove the clear protective layer (requires 2 people)

⚠WARNING: Keep the material completely flat at all times. Do not allow it to bend or sag.
Step 2: Position Material #
Roll the material over the frame and align all corners. Use the insertion tool to press the material edge into the retention channel.
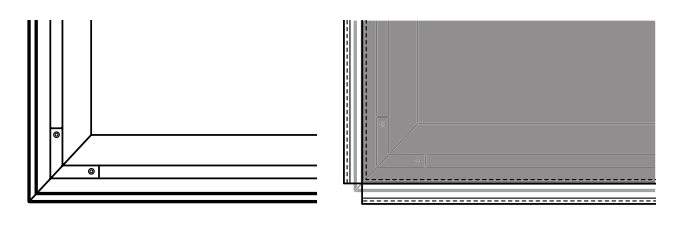
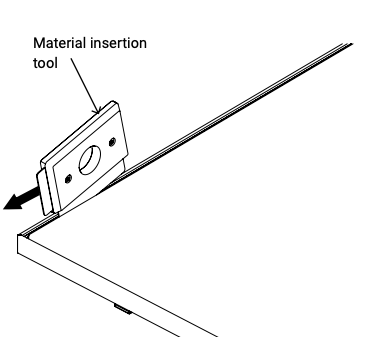
Repeat for all four corners of the frame.
Step 3: Lock Material #
Starting from the center points of each side, use the insertion tool to press the material into the retention channel. Work outward toward the corners until all edges are fully locked in.
TIP: Slide the insertion tool along the channel to smooth the material as you go.
Trim Installation #
Trim Installation (Press-Fit) #
Align and Press Trim into Place #
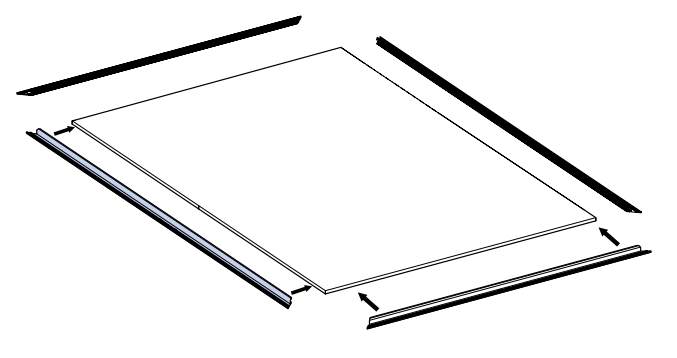
The retention system uses press-fit trim. Align each trim piece with the frame channel and press firmly into place on all four sides.
TIP: Use the insertion tool if the trim does not snap into place easily.
Mounting #
Step 1: Install Mounting Brackets #
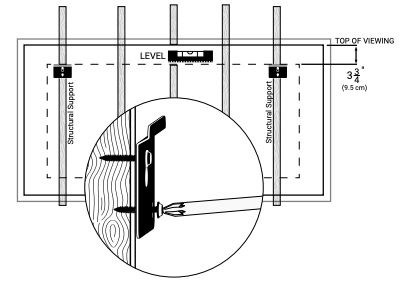
All screen sizes use only 2 mounting brackets. Position them approximately 6 inches to 1/3 of the screen width from each edge. Secure to wall studs or use appropriate anchors.
Step 2: Prepare for LED Power #
Before mounting, pull the bottom of the frame away slightly to manage LED power cables. Route cables to your power source location.
Step 3: Mount the Screen #
With 2 or more people, hang the screen on the wall brackets. Verify the screen is level and secure all fasteners.
Material Removal #
If you need to remove and replace the screen material from a Retention System frame, follow these steps:
Step 1: Insert Removal Tool #
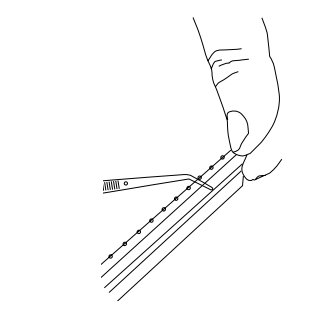
Insert the removal tool into the retention channel alongside the material edge.
Step 2: Wedge Tool and Pull Material Back #
Wedge the tool under the material edge and gently pull the material back from the channel.
Step 3: Rotate Tool Between Material and Channel #
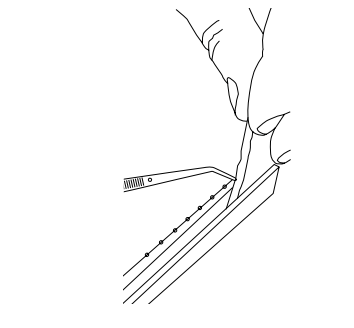
Rotate the tool so it sits between the material and the retention channel wall.
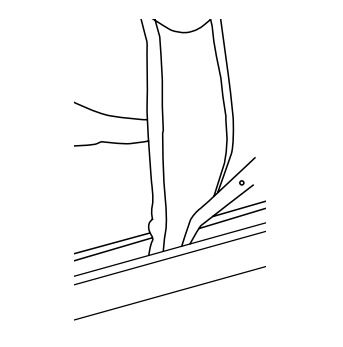
Step 4: Push Tool Forward to Release #
Push the tool forward along the channel to release the material. Repeat around the entire perimeter.