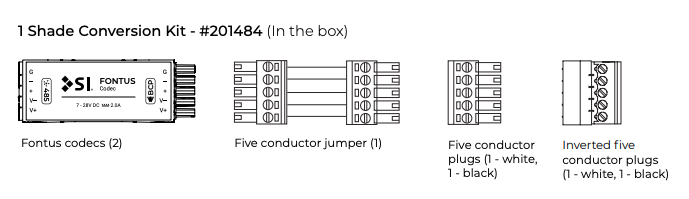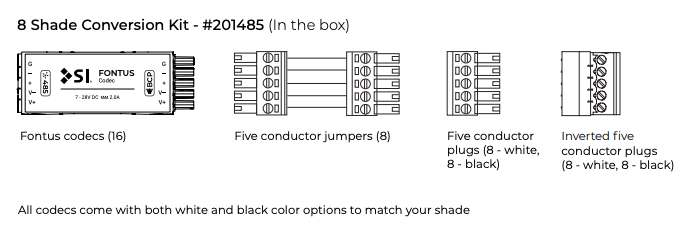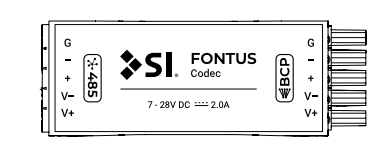
About the FONTUS #
Inputs / Outputs #
BCP: Inverted Header Side
485: Header Side
Power Input: 7V – 28V DC
Dimensions #
0.86″ (L) x 2.42″ (W)
22 mm x 62 mm
Maximum Wiring Distance (UTP) #
18/2 gauge: up to 150 ft
16/2 gauge: up to 200 ft
Features #
No programming required
Plug-and-play setup
Full two-way 485 control
Phantom power: Fontus can be powered from any AC 485 motor
Low voltage DC input: Accepts 7V – 28V DC
Compatible connectors for all 485 shades
Mounting the FONTUS #
Mounting Fontus into your bracket – at the Shade end side #
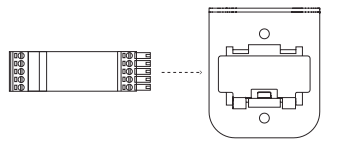
Mount in standard bracket: Fontus will mount in the standard Nano® bracket.
Remove spring clips: The spring clips that normally come with the wall bracket will need to be removed to accommodate the Fontus unit.
Distance requirement: Fontus needs to be placed within 1 meter of the Shade.
Mounting Fontus – at the Head end side #
Connect to Janus: Fontus connects to Janus via the included jumpers (or make your own jumpers).
DIN Rail option: Fontus has an optional Din Rail Bracket which allows you to snap the Fontus into a Standard Din Rail. (See Janus manual to see various Din Rail mounting options).
Rack mount option: You can also install on a standard rack mount shelf.
Distance requirement: Fontus needs to be placed within 1 meter of the Janus.
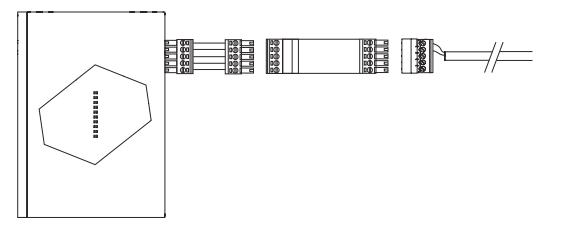
Changing your FONTUS from White to Black #
Remove connector: Remove the 485 connector.
Locate rip cord: Locate the SI Rip cord hidden under the terminal block.
Find cut in heat shrink: Find a small cut in the heat shrink near the bottom right corner, beneath the terminal block.
Pull rip cord: Position the SI Rip cord in the cut. While holding the codec firmly, slowly pull the Rip cord toward the BCP side to begin tearing the white heat shrink.
Remove white layer: Peel away the remaining white heat shrink, exposing the black layer underneath.
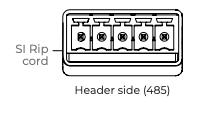
One Shade Conversion #
At the head-end location: #
Connect jumpers to Janus: Connect the included jumpers (or custom-made jumpers) from each terminal block output on the Janus to the 485 side of each Fontus.
Important: Do not connect Fontus directly to Janus without a jumper. Fontus is directional and will only function when the 485 side is connected within 1 meter of the Janus.
Power Connection: Terminate a 2-conductor wire to the V+ and V- terminals on the inverted 5-conductor plug. This wire will run to the shade end.
Important: Do not connect the 2-conductor wire to the other three terminals on the plug.
Important: BCP will only work when connected specifically to the V+ and V- positions.
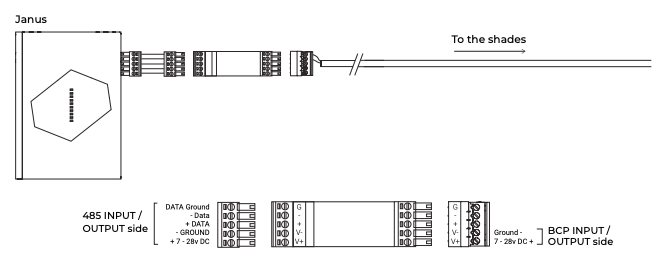
At the Shade location: #
Power Connection: Terminate a 2-conductor wire to the V+ and V- terminals on the inverted 5-conductor plug, connecting to the BCP side of the Fontus.
Important: Ensure the same wire polarity is maintained on both ends of the cable when connecting to each inverted 5-conductor plug.
Shade Connection: Plug the terminal coming from the shade into the header on the 485 side of the Fontus.
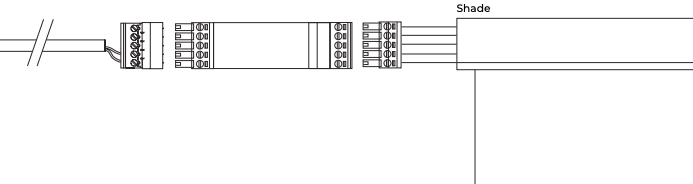
Dual Motor Conversion #
Shade end with Duocoup: #
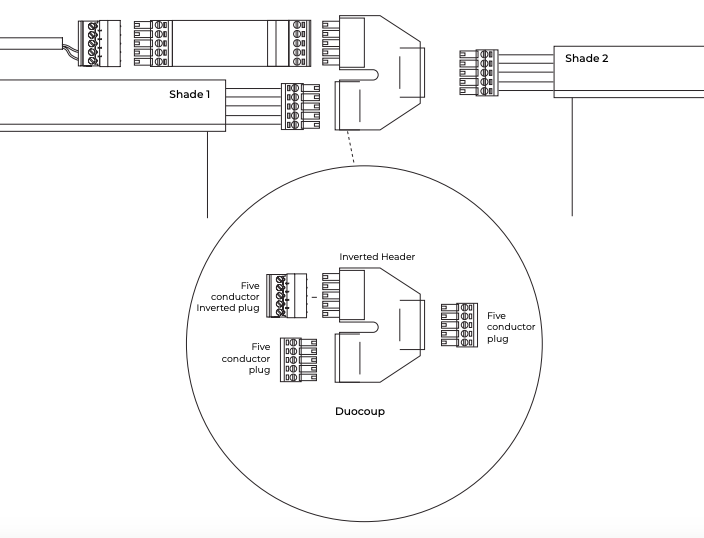
Connect power from head end: At the shade end location, connect the 2-conductor wires coming from the head end location to the inverted header V+ and V- (Fontus).
Connect shades via DUOCOUP: Connect 485 side of Fontus to the DUOCOUP inverted header, then connect the first shade to one of the other two headers, followed by connecting a second five conductor wire to the next shade.
Parts in the Box #