
Connect TriMesh to Home Assistant #
A step-by-step guide for anyone who has never used Home Assistant. Every screen in this guide was captured during a real setup.
About 45 minutes, plus up to 20 minutes the first time Home Assistant starts
Works with TriMesh bridge v1.2 and Home Assistant OS
What this does #
Home Assistant is free smart-home software that runs on a small box in the house. SI’s TriMesh connector lets it see and control what is on the TriMesh bridge, so the homeowner can use TriMesh in the Home Assistant app and in its automations.
Home Assistant can #
Move Zigbee and PoE shades
Switch smart plugs and outlets
Show Zigbee sensor readings
Run the scenes saved on the bridge
Stays on the bridge’s own page #
Pairing new devices
Motor limits and direction
Firmware and Zigbee channels
Creating and editing scenes
Shades wired to a TRO.Y (485 and RTS) do not appear in Home Assistant. The connector talks to the TriMesh bridge only.
Before you start #
1. The TriMesh bridge is finished. Every shade and device works from the bridge’s own page. Give everything its final name on the bridge now. Home Assistant uses those names.
2. You know the bridge’s web password. You need it once, to make a key for Home Assistant.
3. A Home Assistant box on the same network as the bridge. If you are buying one, Home Assistant Green is the simplest: it comes ready to plug in. Any install of Home Assistant OS works the same way.
4. A Mac or Windows computer on the same network.
5. SI’s connector file, si_trimesh_bridge.zip. DOWNLOAD HERE
Words you will see #
Integration: Home Assistant’s word for a connection to one brand of equipment. SI’s TriMesh connector is an integration.
Device and entity: A device is a physical thing, such as a shade. An entity is one control or reading on it, such as its position or its battery level.
App: An extra program that runs inside Home Assistant. Older guides call these add-ons.
Token: A long password the bridge makes for one program to use. You can cancel it without changing the bridge’s own password.
Coordinator: TriMesh’s radio stick, the SONOFF Dongle-M. It talks to the Zigbee shades for the bridge.
The five parts #
Part 1: Start Home Assistant for the first time (10 min + wait)
Part 2: Keep Home Assistant off TriMesh’s radio (2 min)
Part 3: Put SI’s connector into Home Assistant (15 min)
Part 4: Connect Home Assistant to the bridge (5 min)
Part 5: Try it (5 min)
Part 1: Start Home Assistant for the first time #
Skip this part if Home Assistant is already running in the house.
1. Plug it in. Connect a network cable from the Home Assistant box to the same switch or router as the TriMesh bridge. Then plug in power.
2. Open it in a web browser.
On the computer, type homeassistant.local:8123 into the browser’s address bar.
If the page does not open, find the box’s IP address in the router’s device list and type that instead, with :8123 on the end. For example: 192.168.1.146:8123
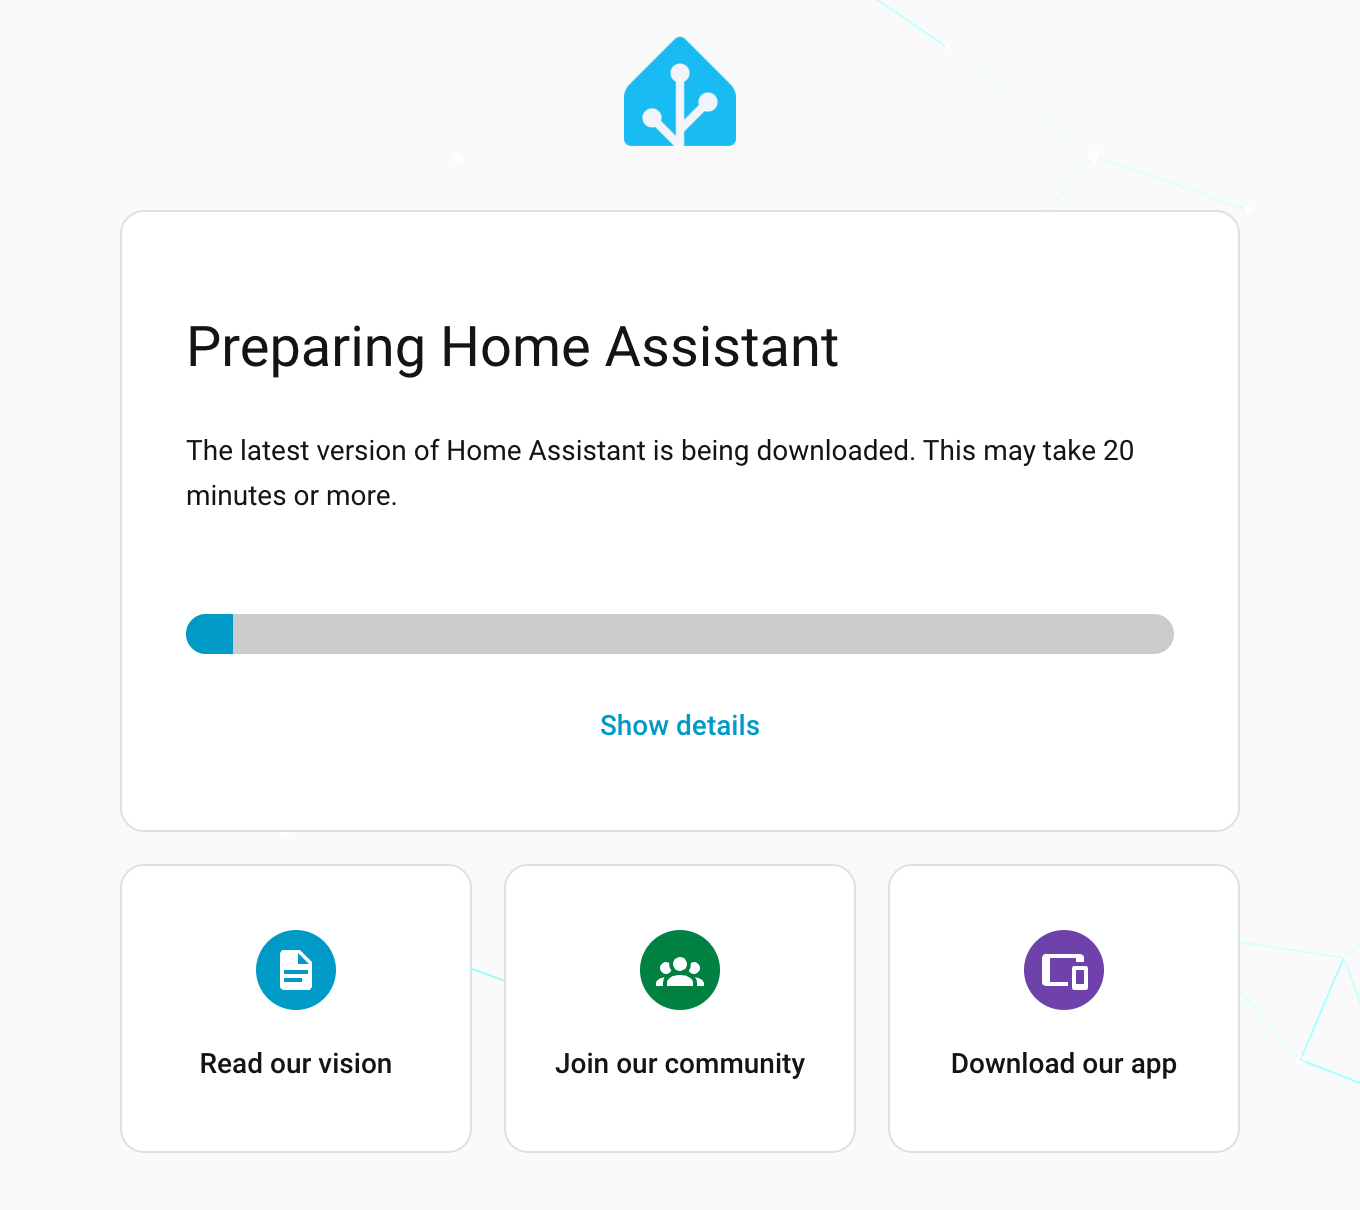
The first start downloads the rest of Home Assistant. It can take 20 minutes or more. Leave the page open; it moves on by itself.
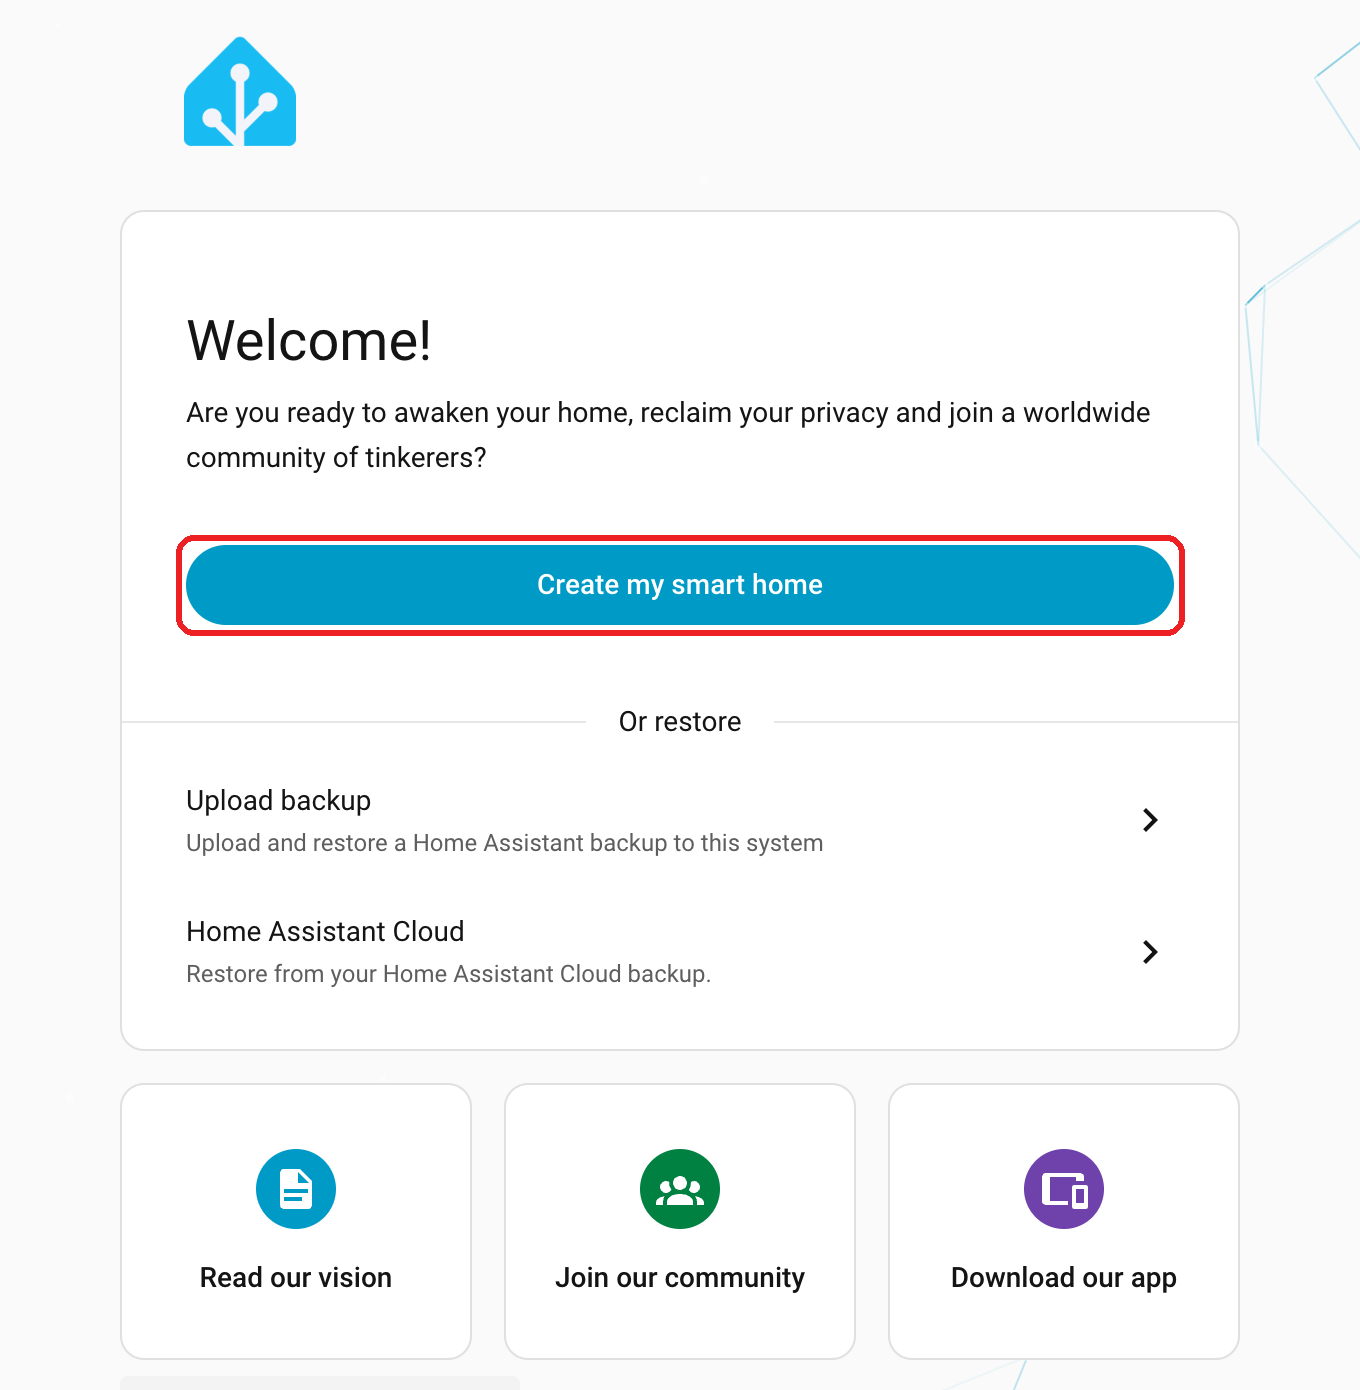
3. Click Create my smart home.
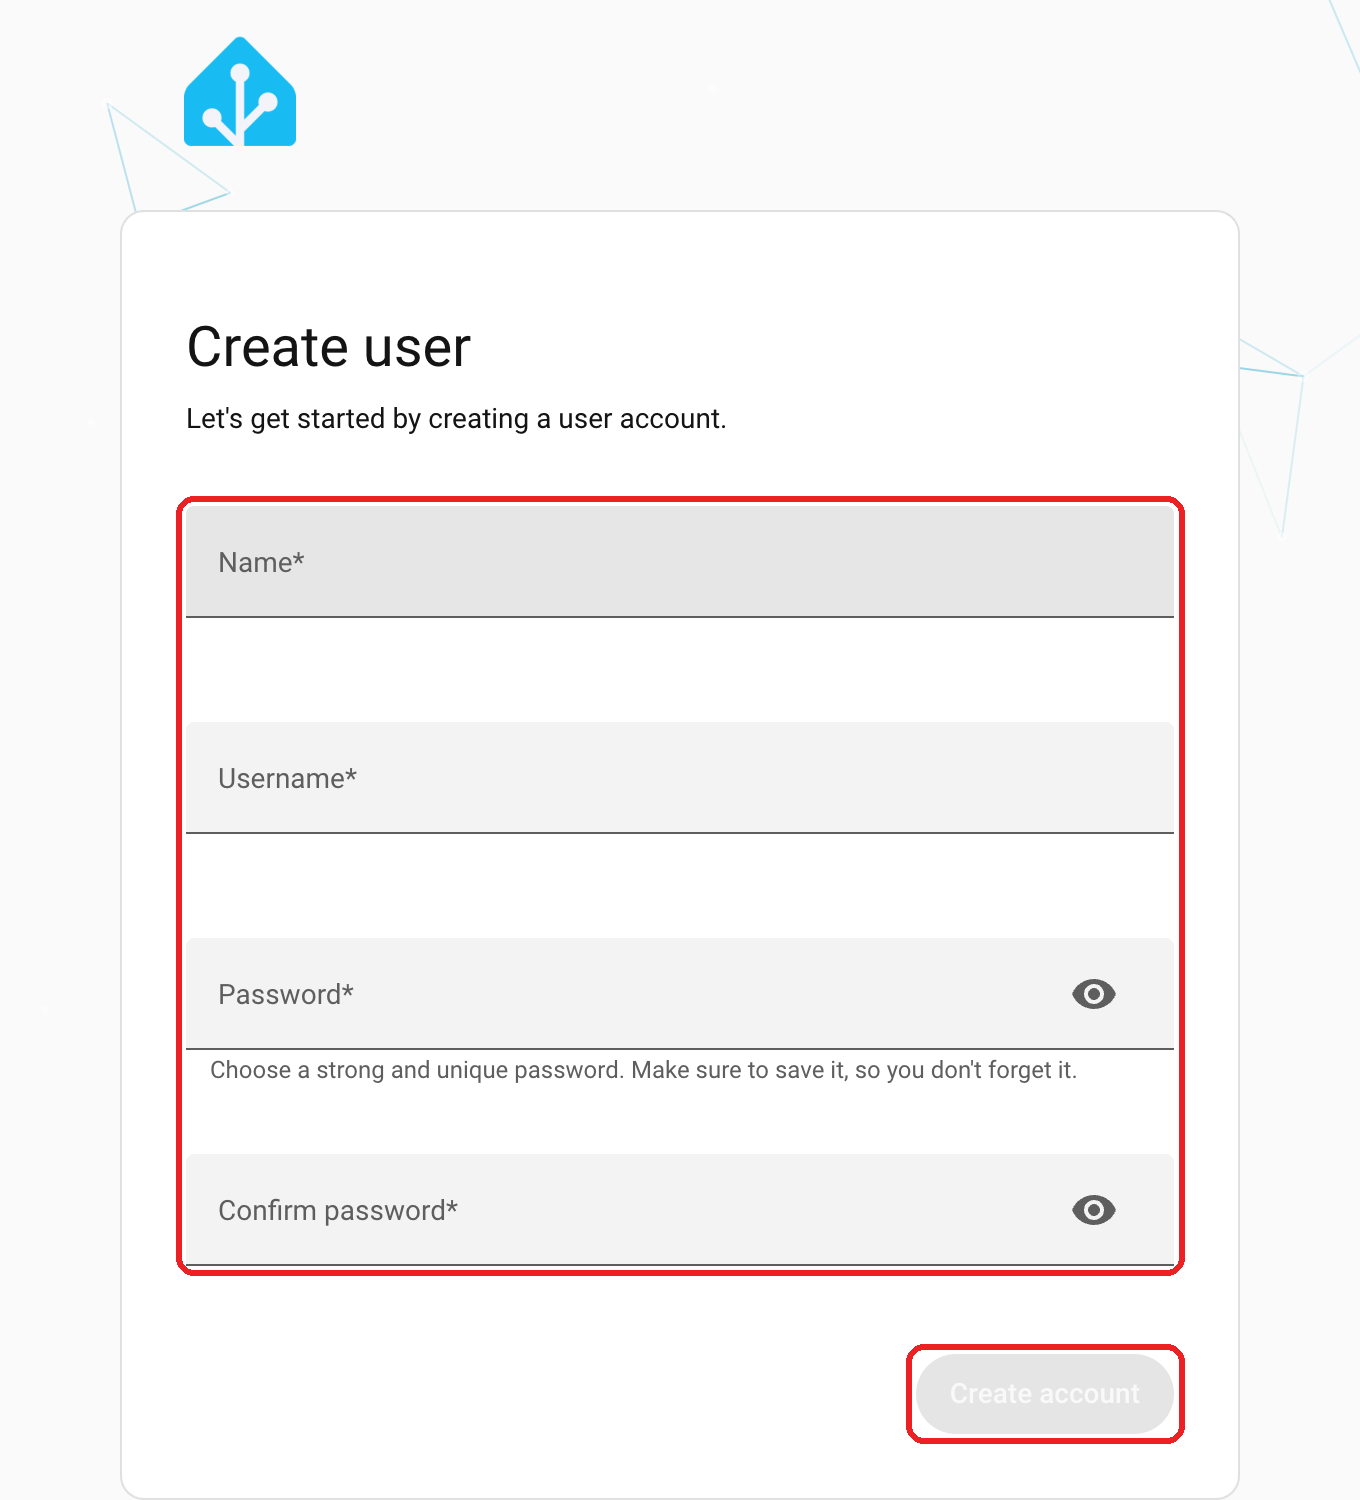
4. Create the owner account.
Fill in Name, Username and Password twice, then click Create account. Write the username and password down and leave them with the homeowner. This is the main account for the whole system.
5. Answer the short questions.
Home Assistant may ask where the home is, whether to share anonymous usage data, and which devices it found. The defaults are fine. Keep clicking Next until you reach the Overview page.
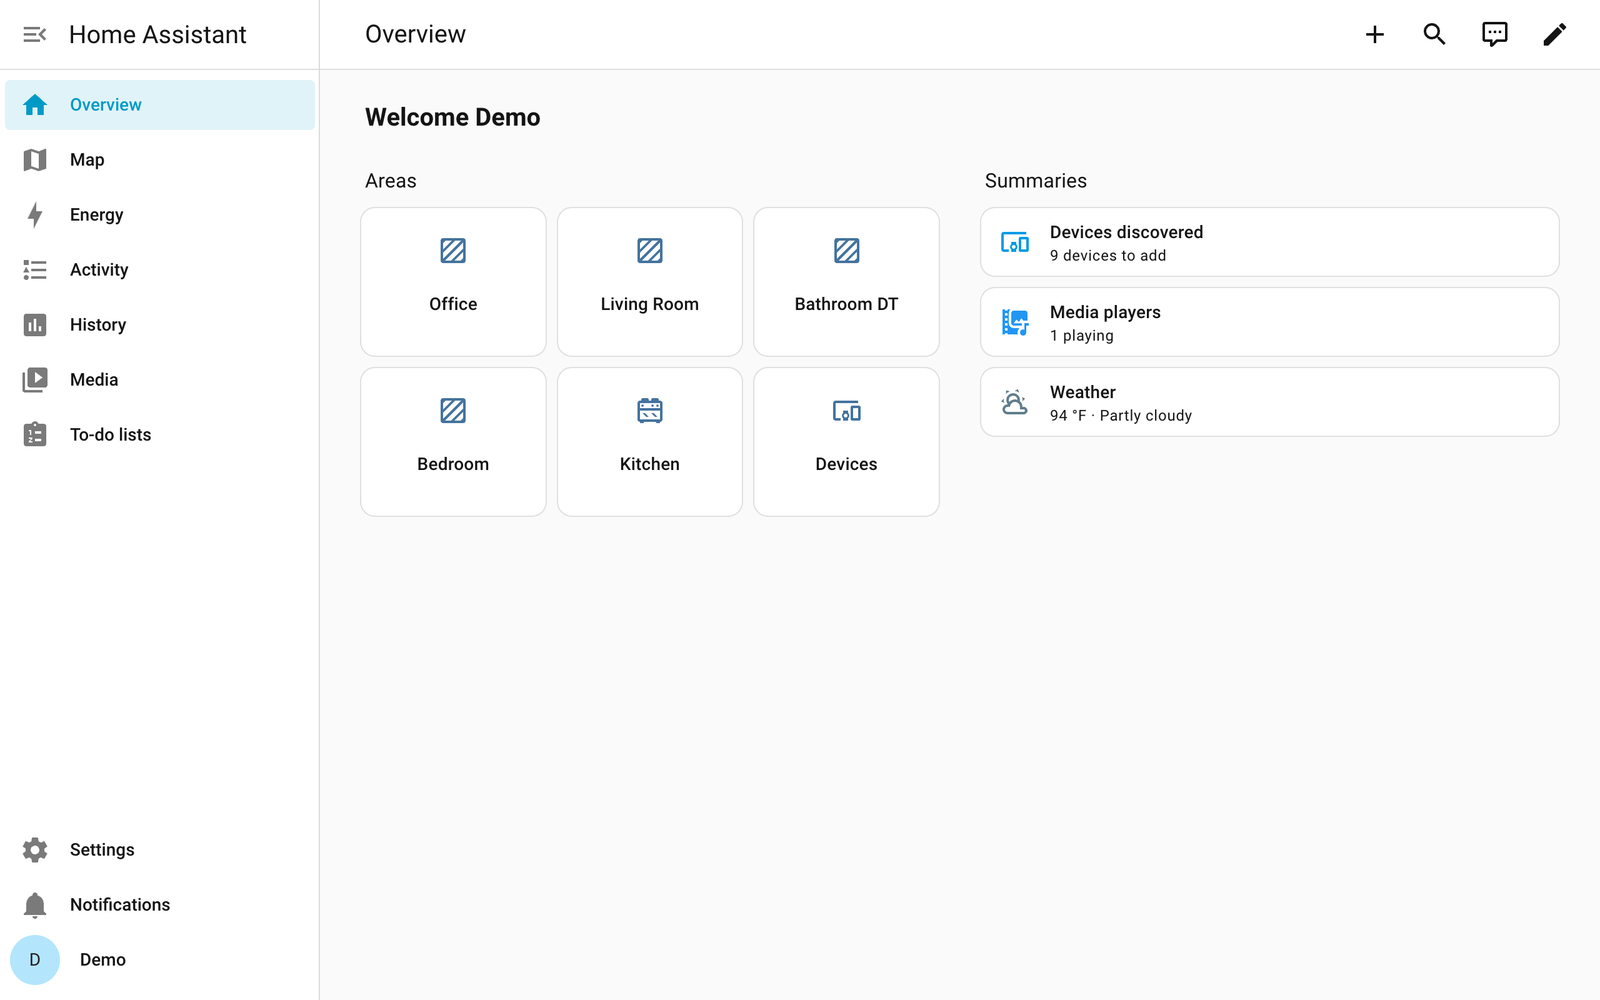
The Overview page. The menu on the left is where everything else lives. Settings is near the bottom.
Done when you see the Overview page with the name you entered.
Part 2: Keep Home Assistant off TriMesh’s radio #
Important: Never click Add on a SONOFF Dongle-M. Home Assistant spots TriMesh’s coordinators on the network and offers to add them as Zigbee Home Automation. If you add one, Home Assistant tries to take over that radio and the shades stop answering the bridge. Tell Home Assistant to ignore them.
1. Go to Settings, then Devices & services. Look at the Discovered cards at the top. These are things Home Assistant found on the network by itself.
2. On every card named SONOFF Dongle-M, click Ignore.
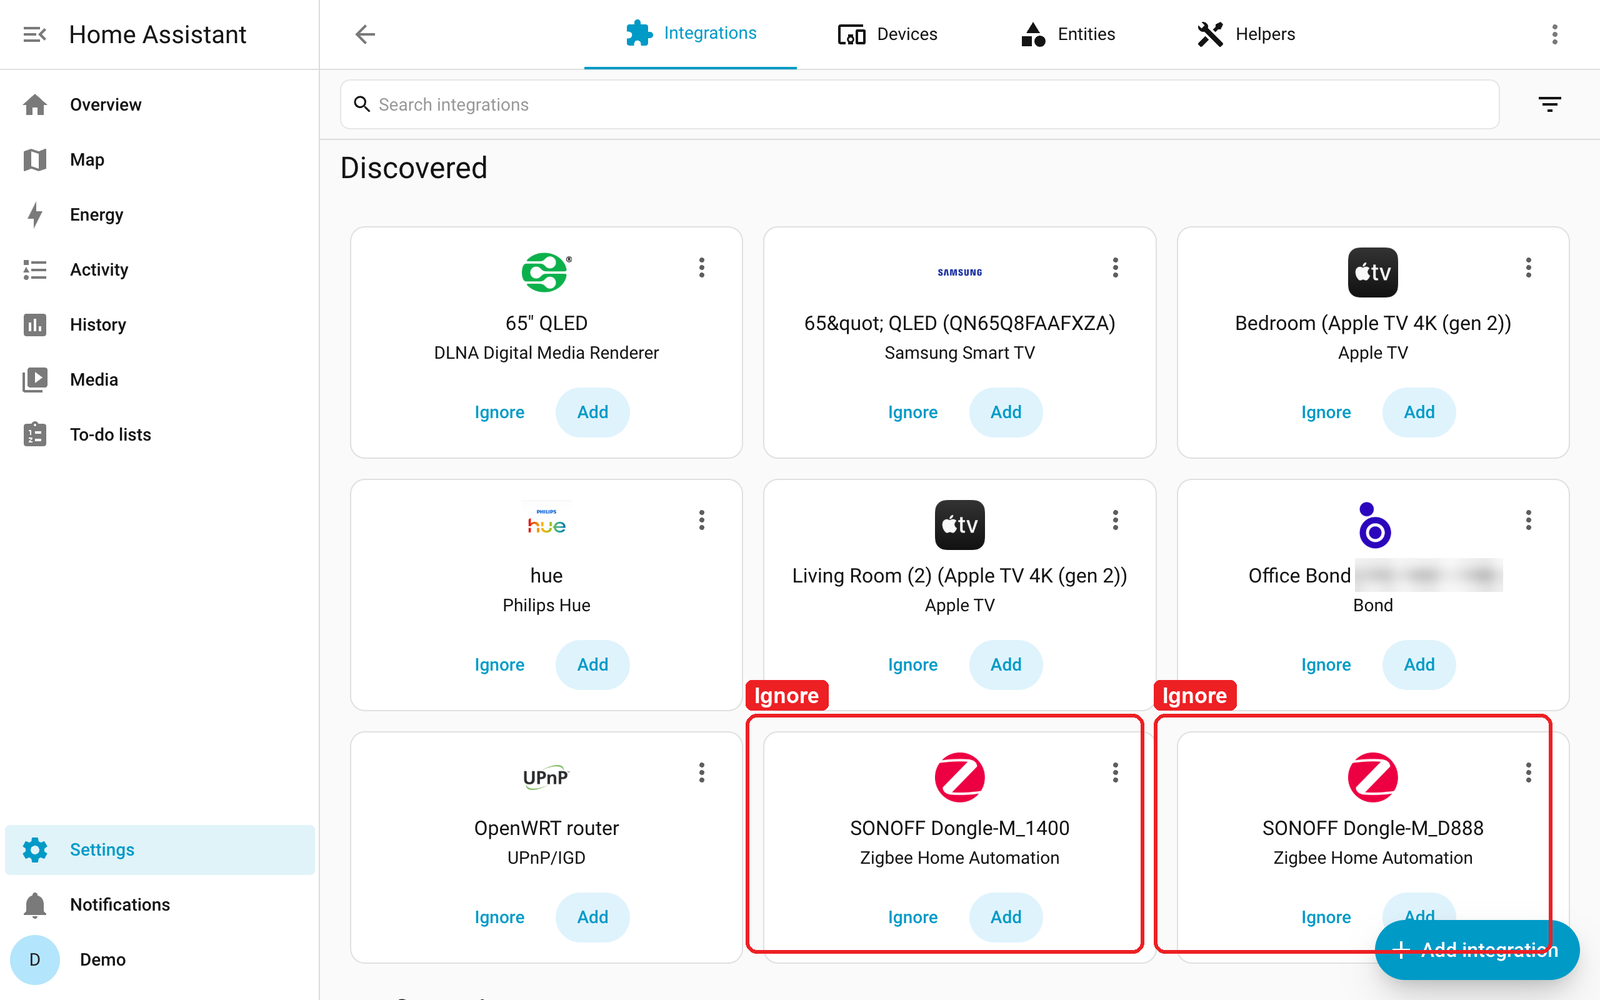
The two cards marked in red are TriMesh coordinators. The other cards are other equipment in the house and do not affect TriMesh.
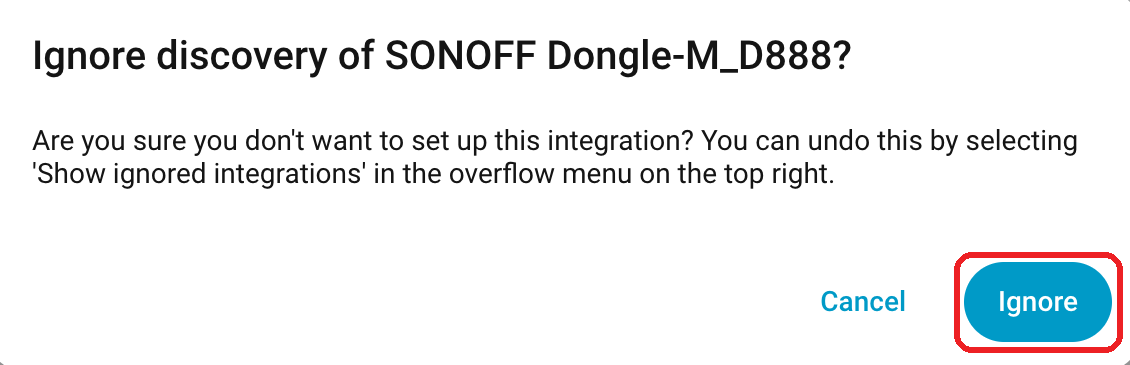
3. Click Ignore again to confirm.
The card disappears. If you ever need it back, it is under the three-dot menu at the top right, Show ignored integrations.
Note: If the homeowner has a separate Zigbee stick bought just for Home Assistant, compare its name with the coordinators listed on the bridge’s page before adding anything.
Done when no SONOFF Dongle-M cards are left under Discovered.
Part 3: Put SI’s connector into Home Assistant #
The TriMesh connector does not come built into Home Assistant, so you copy it in. The easiest way is an app called Samba share. It lets your computer open Home Assistant’s folders like a shared drive on the network.
A. Install the Samba share app #
1. Go to Settings, then Apps.
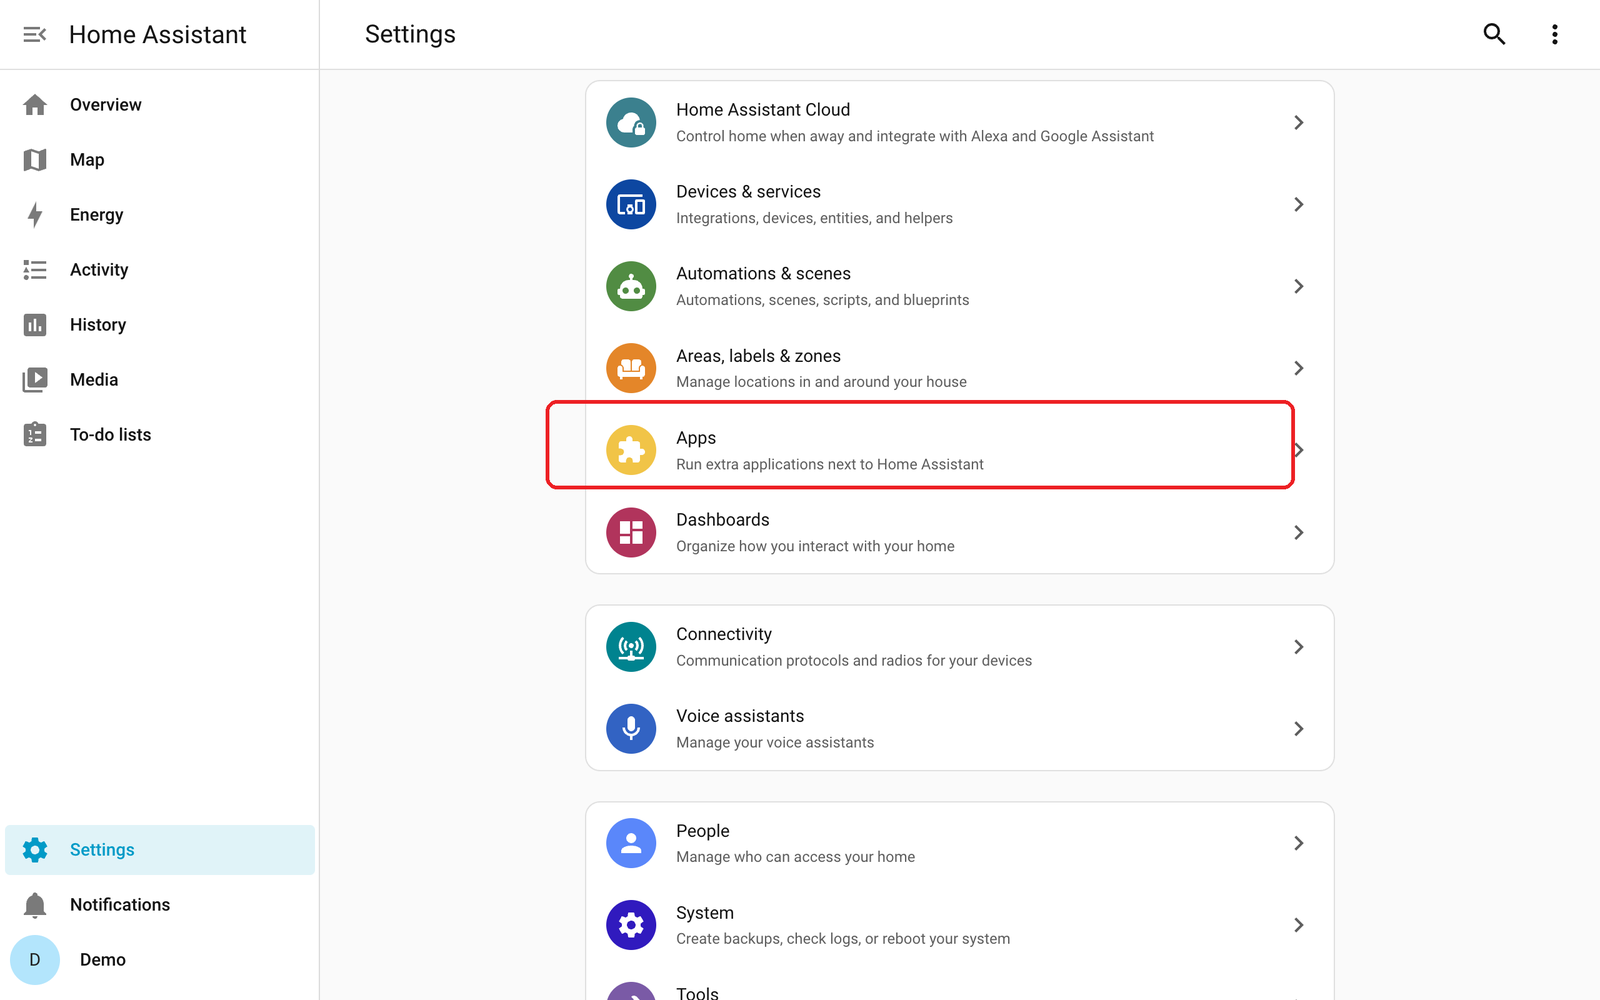
No Apps row? See If something goes wrong.
2. Click Install app at the bottom right.
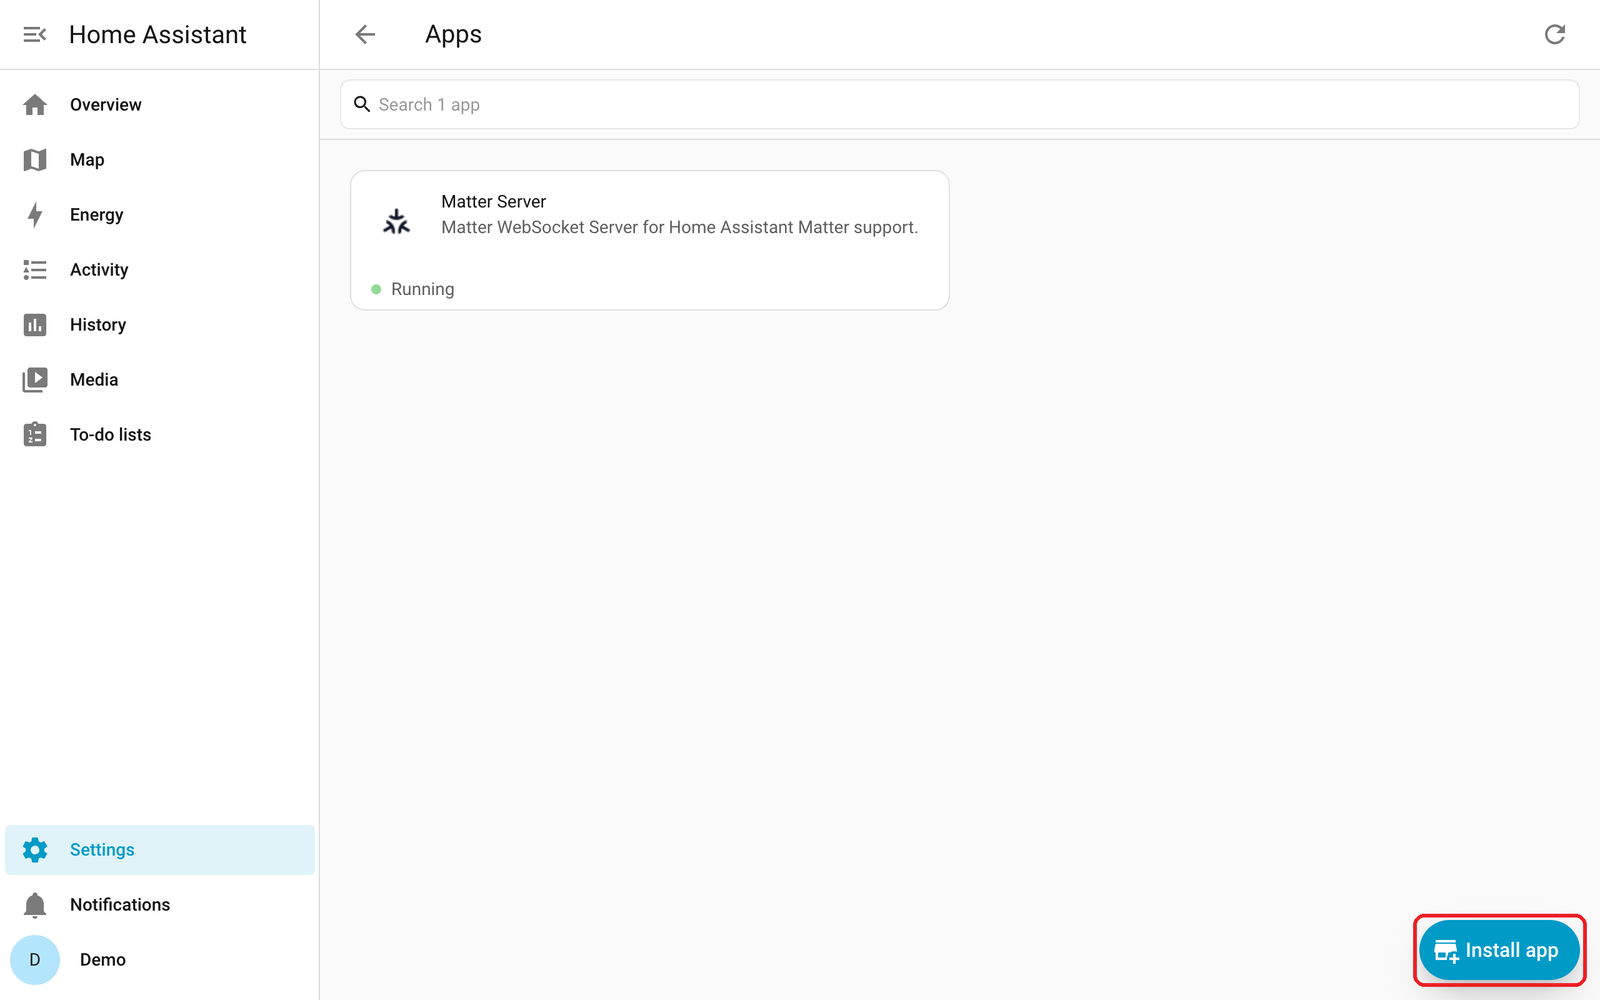
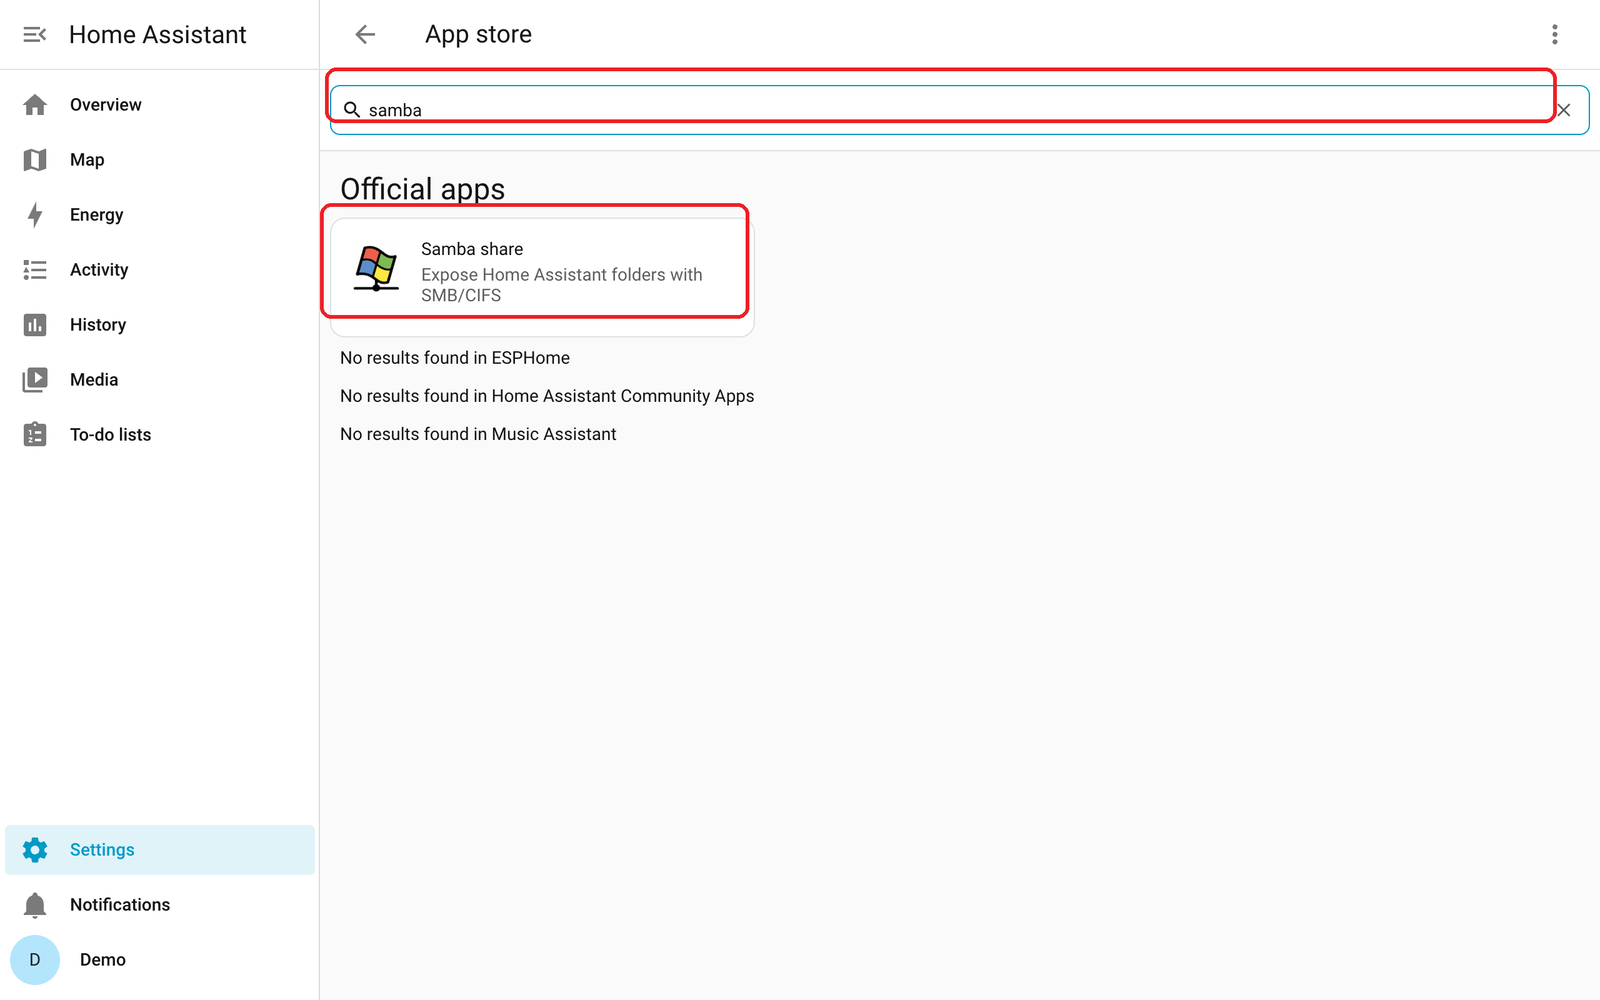
3. Type samba in the search box, then click Samba share.
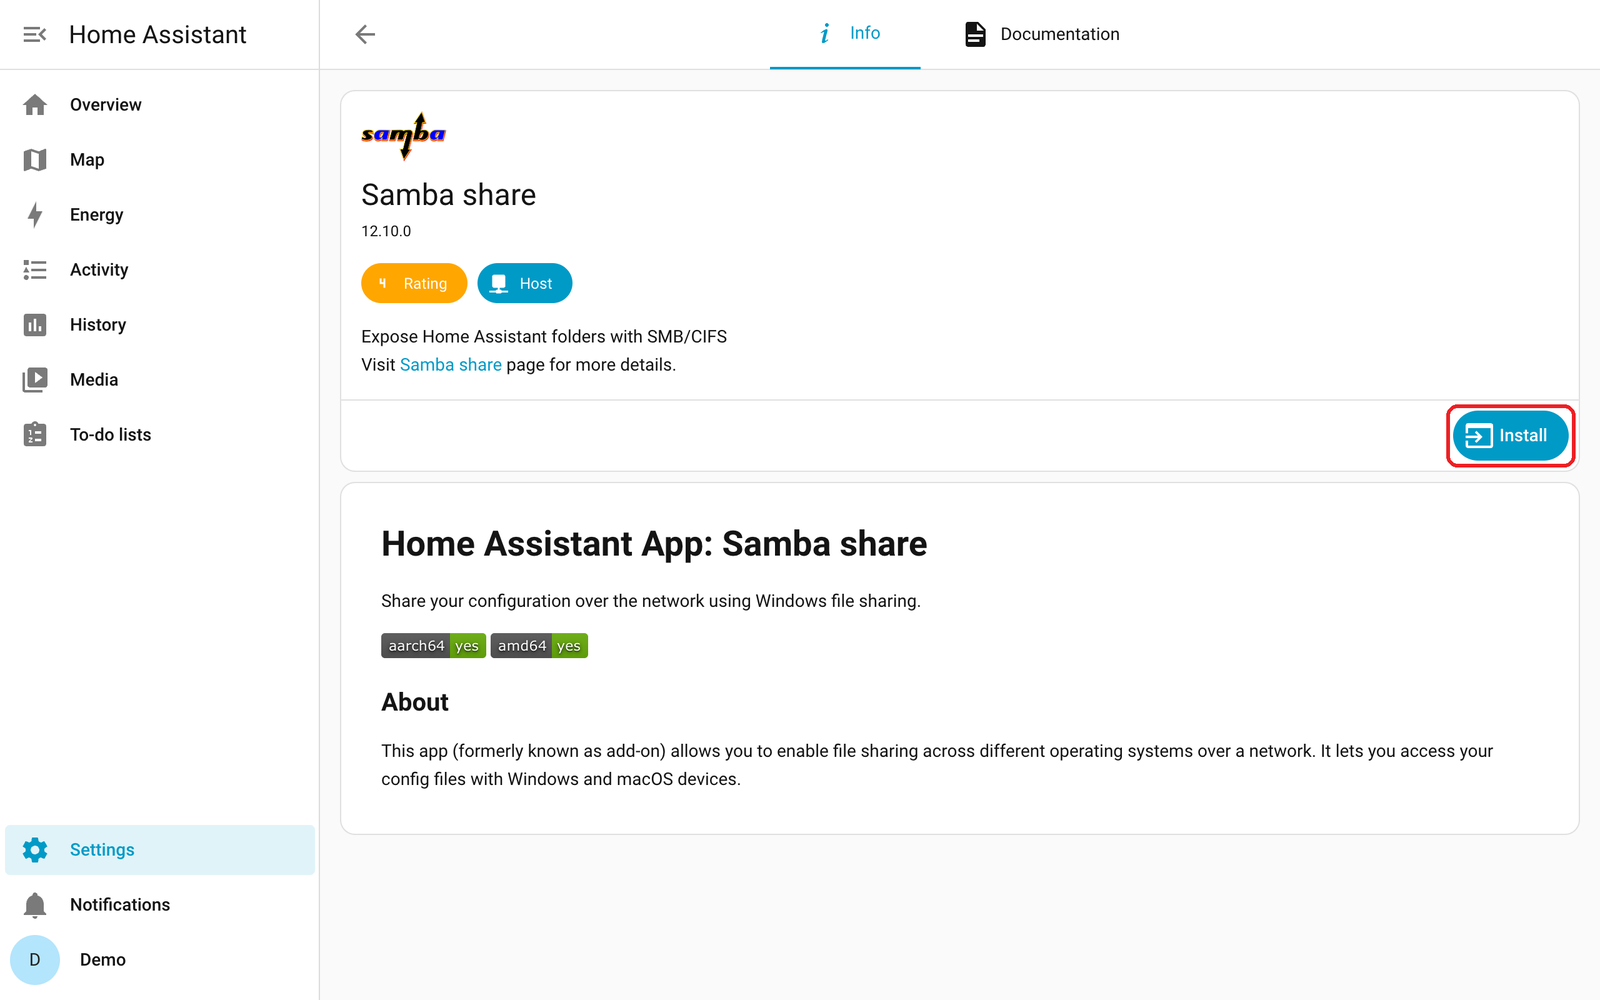
4. Click Install and wait a minute or two.
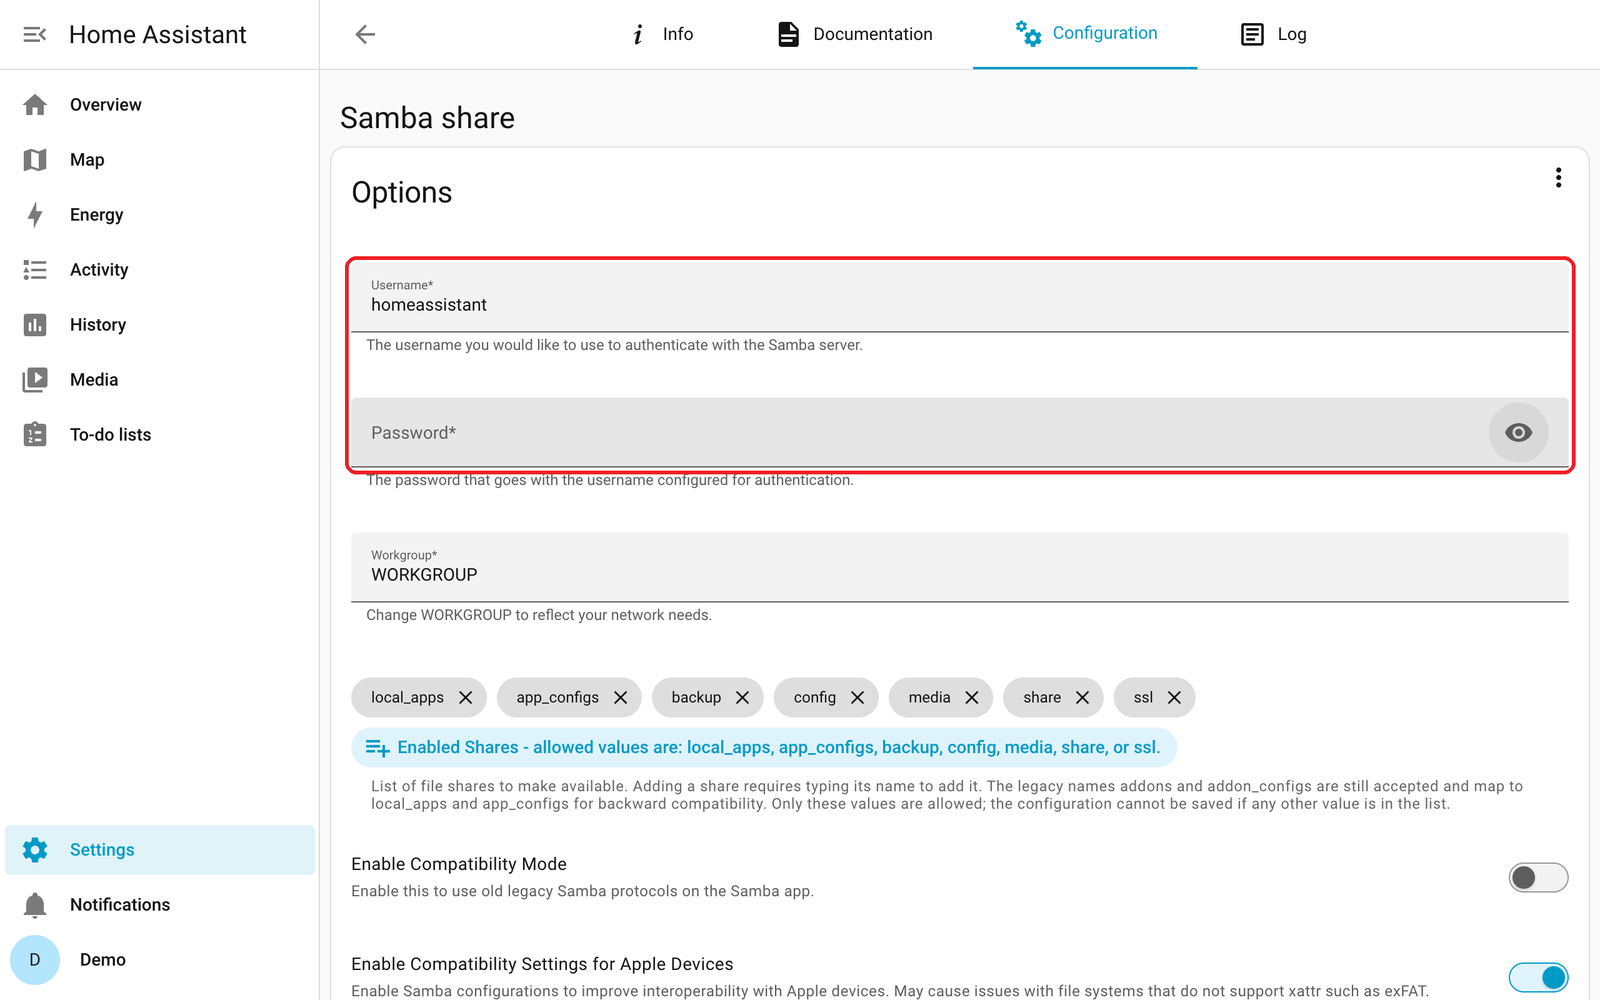
5. Give the share a password.
Open the Configuration tab. Leave Username as homeassistant. Type a new password in Password and keep it handy for a few minutes. Scroll to the bottom and click Save.
6. Open the Info tab and click Start.
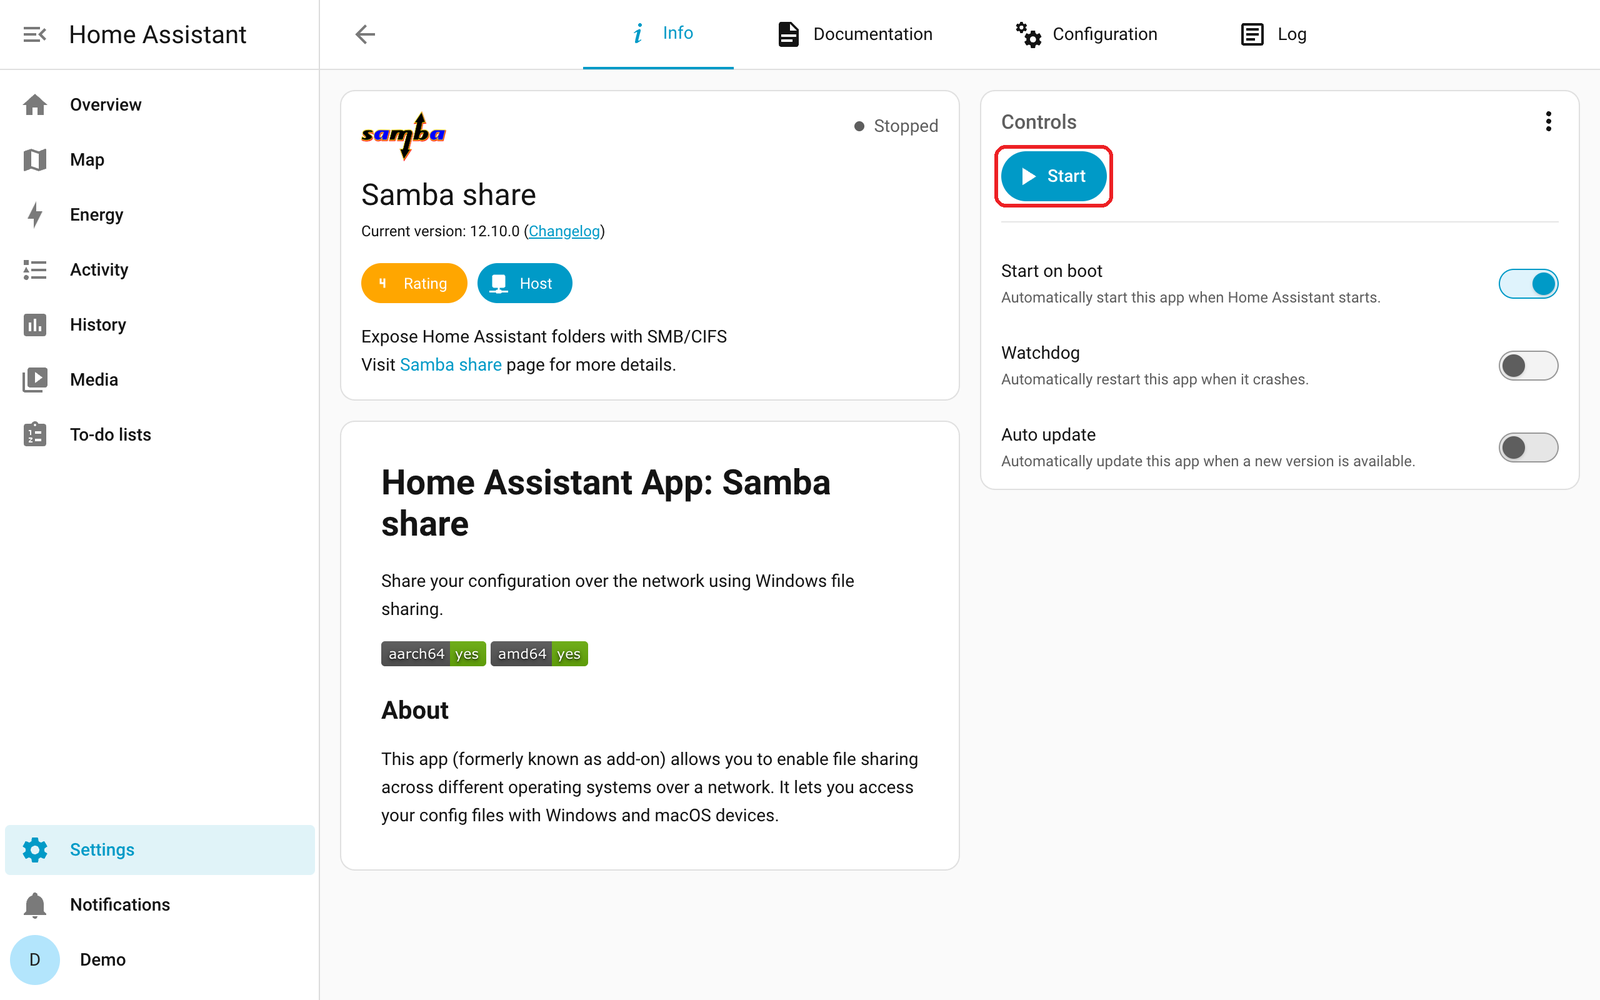
After a few seconds the top right of the card reads Running.
B. Copy the connector folder in #
1. Unzip si_trimesh_bridge.zip.
On a Mac, double-click it. On Windows, right-click it and choose Extract All. You get a folder named si_trimesh_bridge.
Open that folder once. You should see manifest.json and other files right inside. If you see another si_trimesh_bridge folder instead, the inner one is the folder to copy.
2. Open Home Assistant’s config folder from your computer.
On a Mac:
In Finder, press
Cmd+K(or Go > Connect to Server).Type
smb://homeassistant.localand click Connect.Choose Registered User. In Name, erase your own name and type
homeassistant. Enter the share password and click Connect.Pick config and click OK.
On Windows:
Open File Explorer.
In the address bar, type
\\homeassistant.local\configand pressEnter.Sign in as
homeassistantwith the share password.
3. Make a folder named custom_components. Inside config, make a new folder with exactly this name: all lowercase, an underscore in the middle, and an s on the end. If it is already there, use it.
4. Drag the si_trimesh_bridge folder into custom_components.
Done when this path exists, with no extra folder in between:
config/custom_components/si_trimesh_bridge/manifest.json
C. Restart Home Assistant #
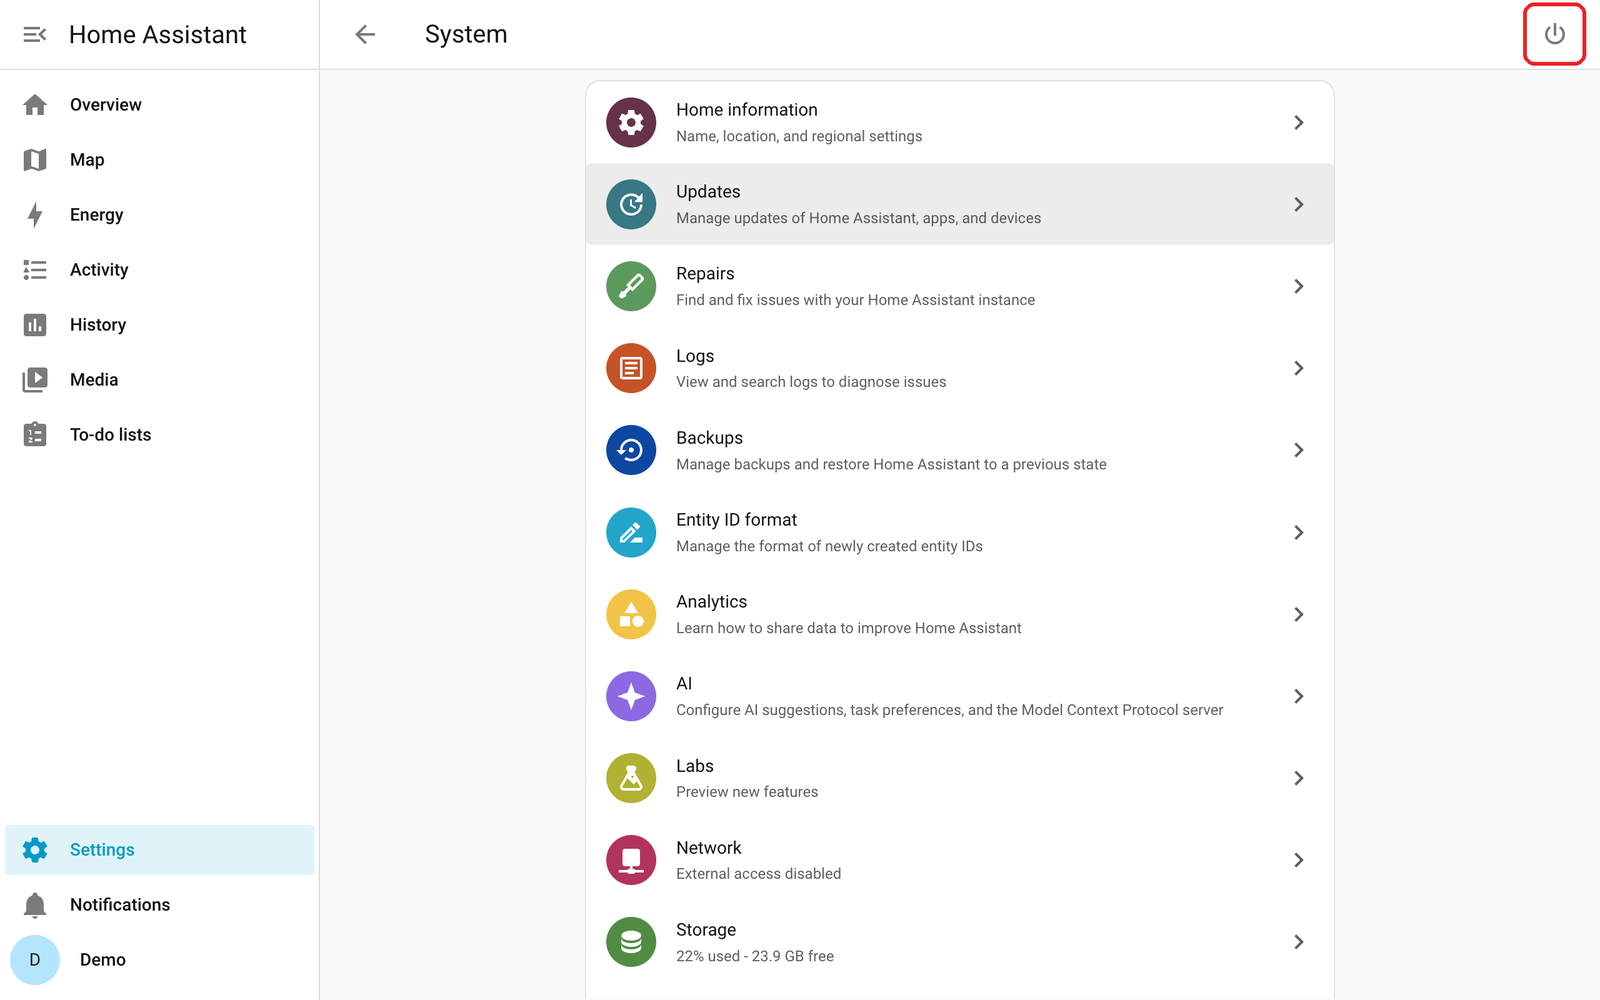
1. Go to Settings, then System, and click the power button at the top right.
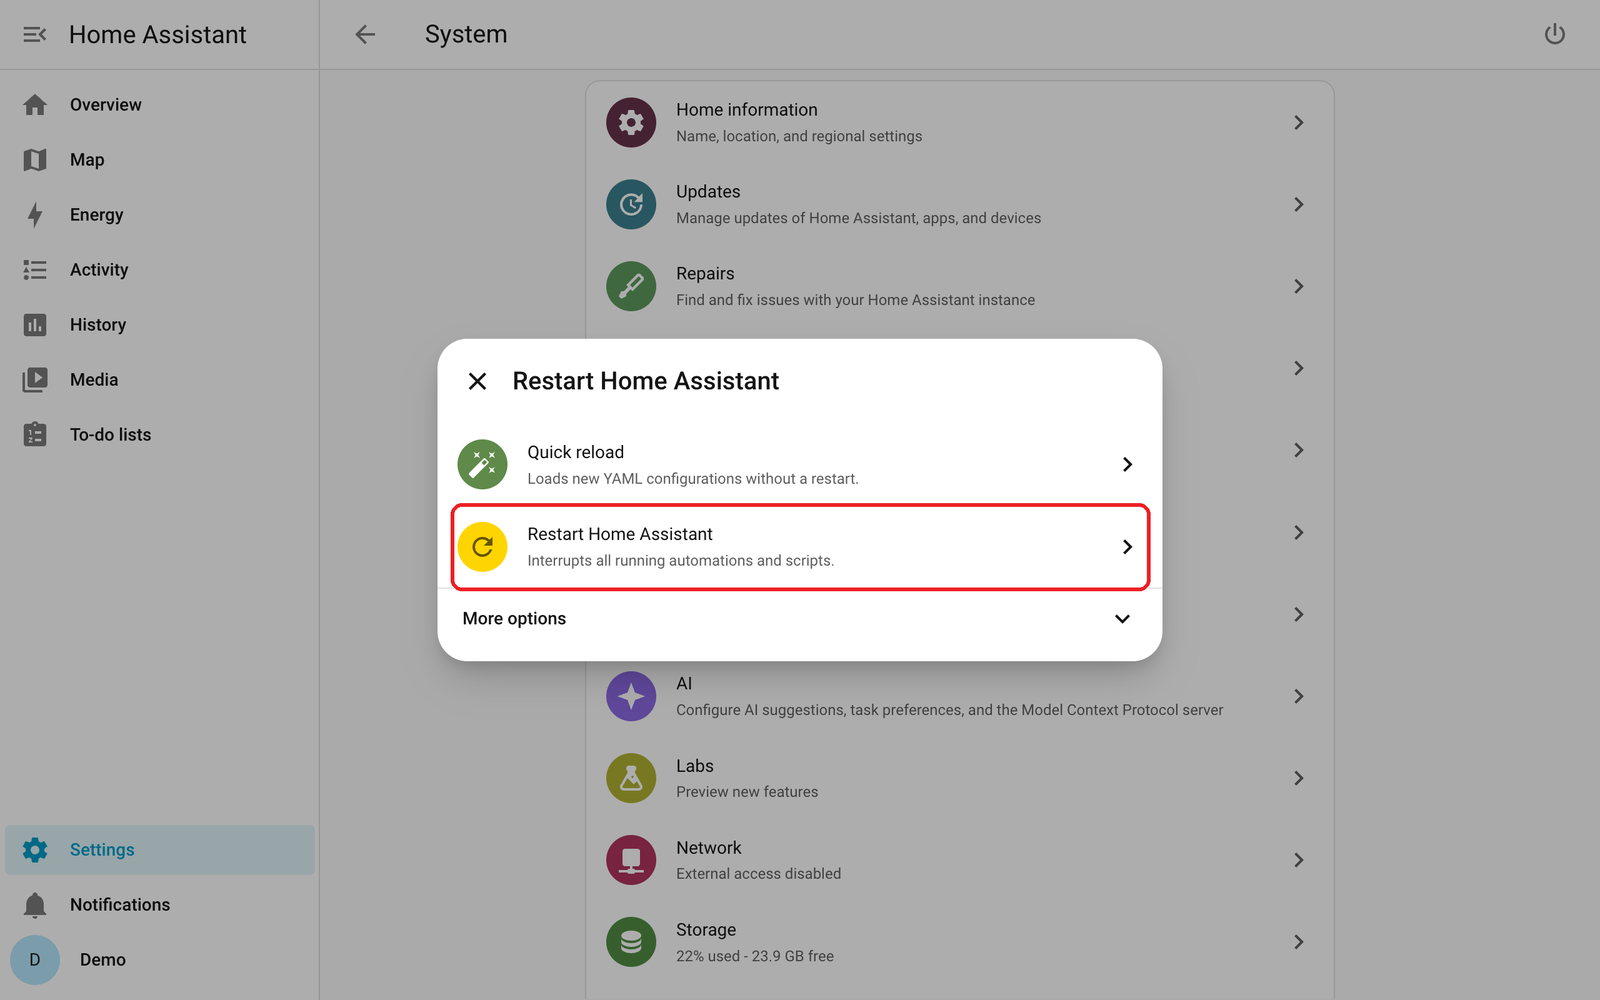
2. Choose Restart Home Assistant.
Not Quick reload. Home Assistant only notices a new connector on a full restart.
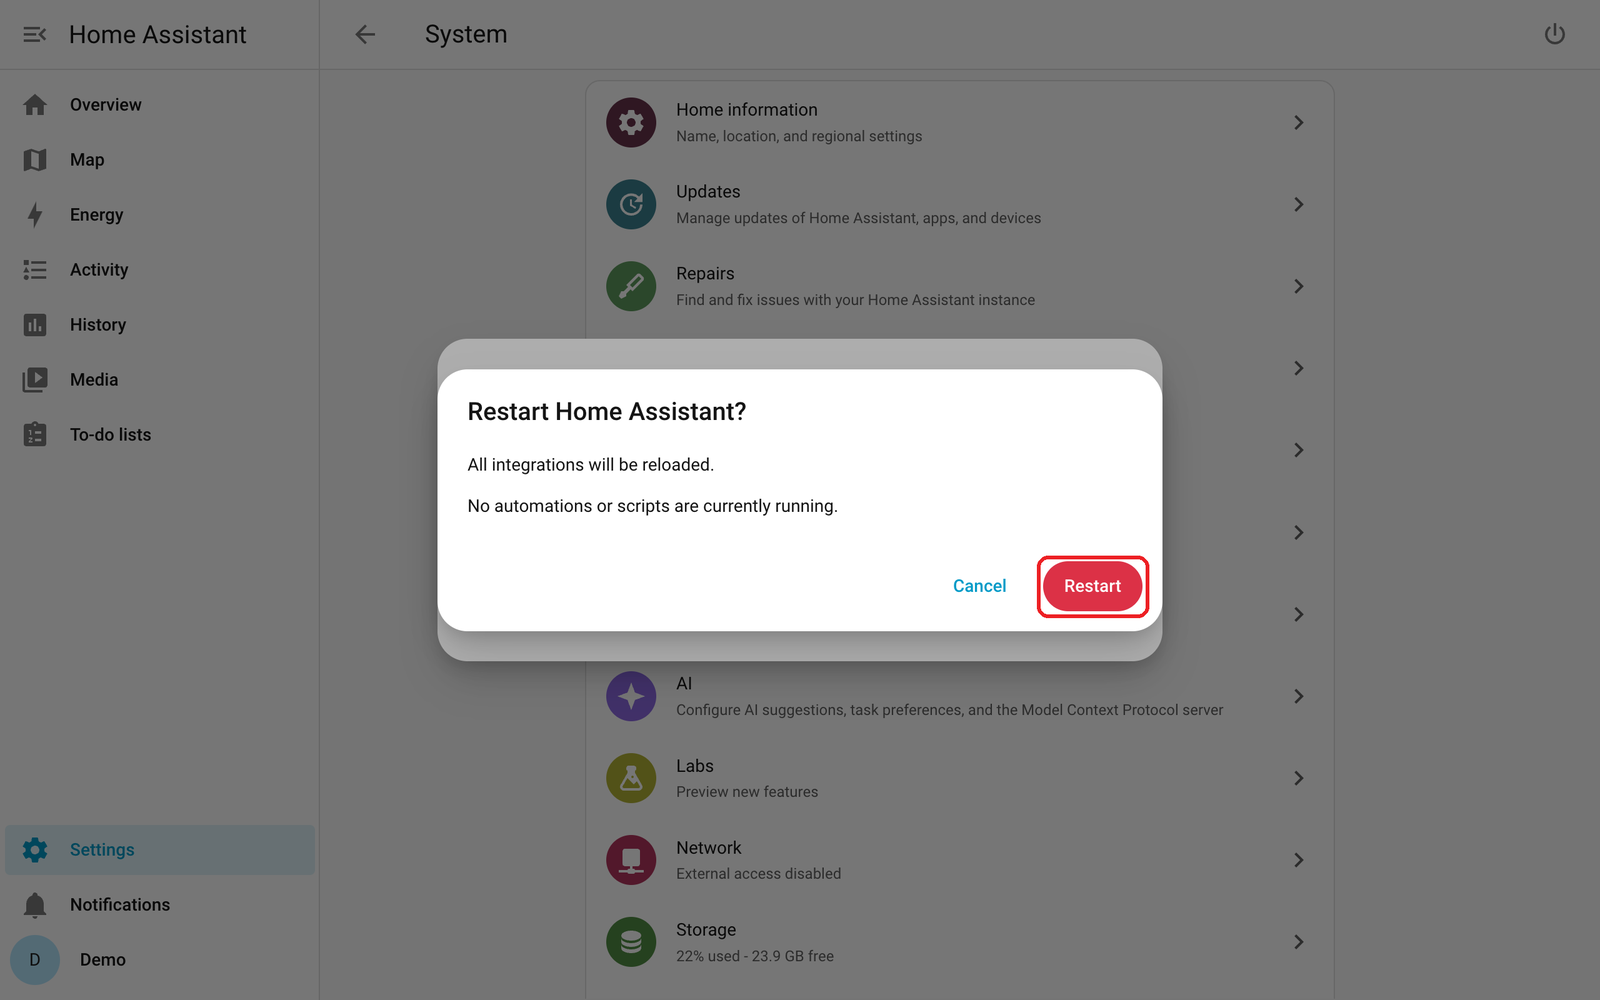
3. Click Restart.
The page goes quiet and reconnects by itself, usually within a minute.
Part 4: Connect Home Assistant to the bridge #
On the TriMesh bridge’s page #
1. Open the bridge’s page in a new browser tab and sign in. The browser shows a “not secure” or “not private” warning on the bridge’s page. That is expected. Continue past it.
2. Go to Settings, then Local API Tokens. Type Home Assistant as the name and click Create token.
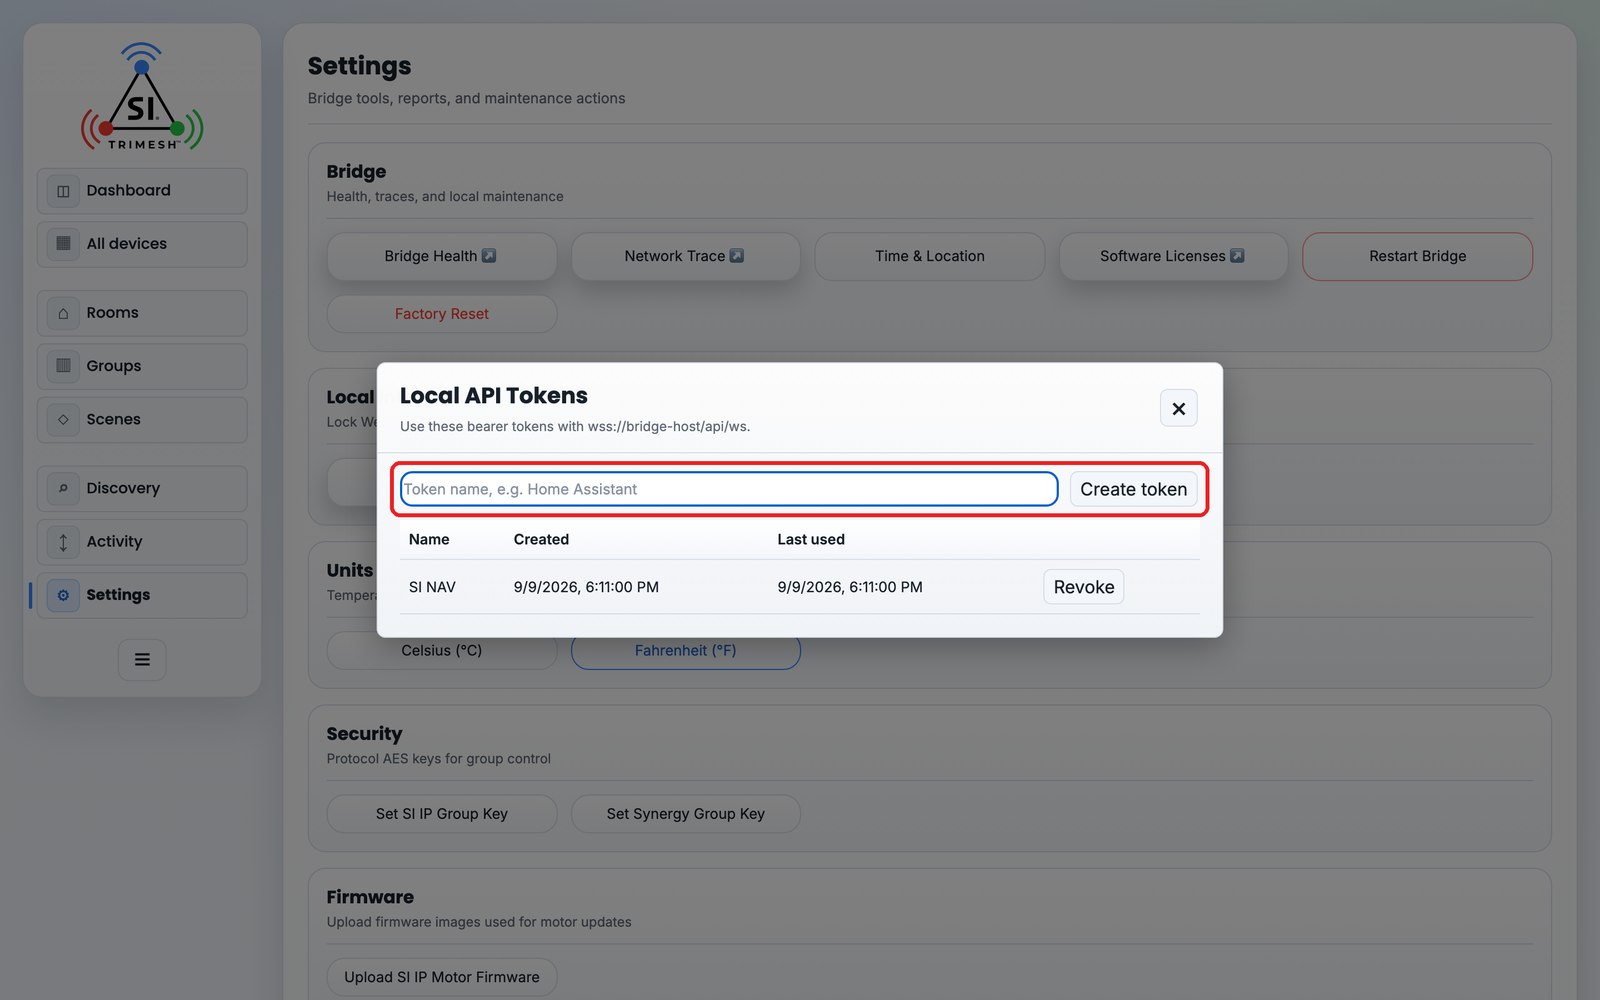
3. Click Copy.
The token is shown once. If you lose it before pasting it, click Revoke on it and make a new one.
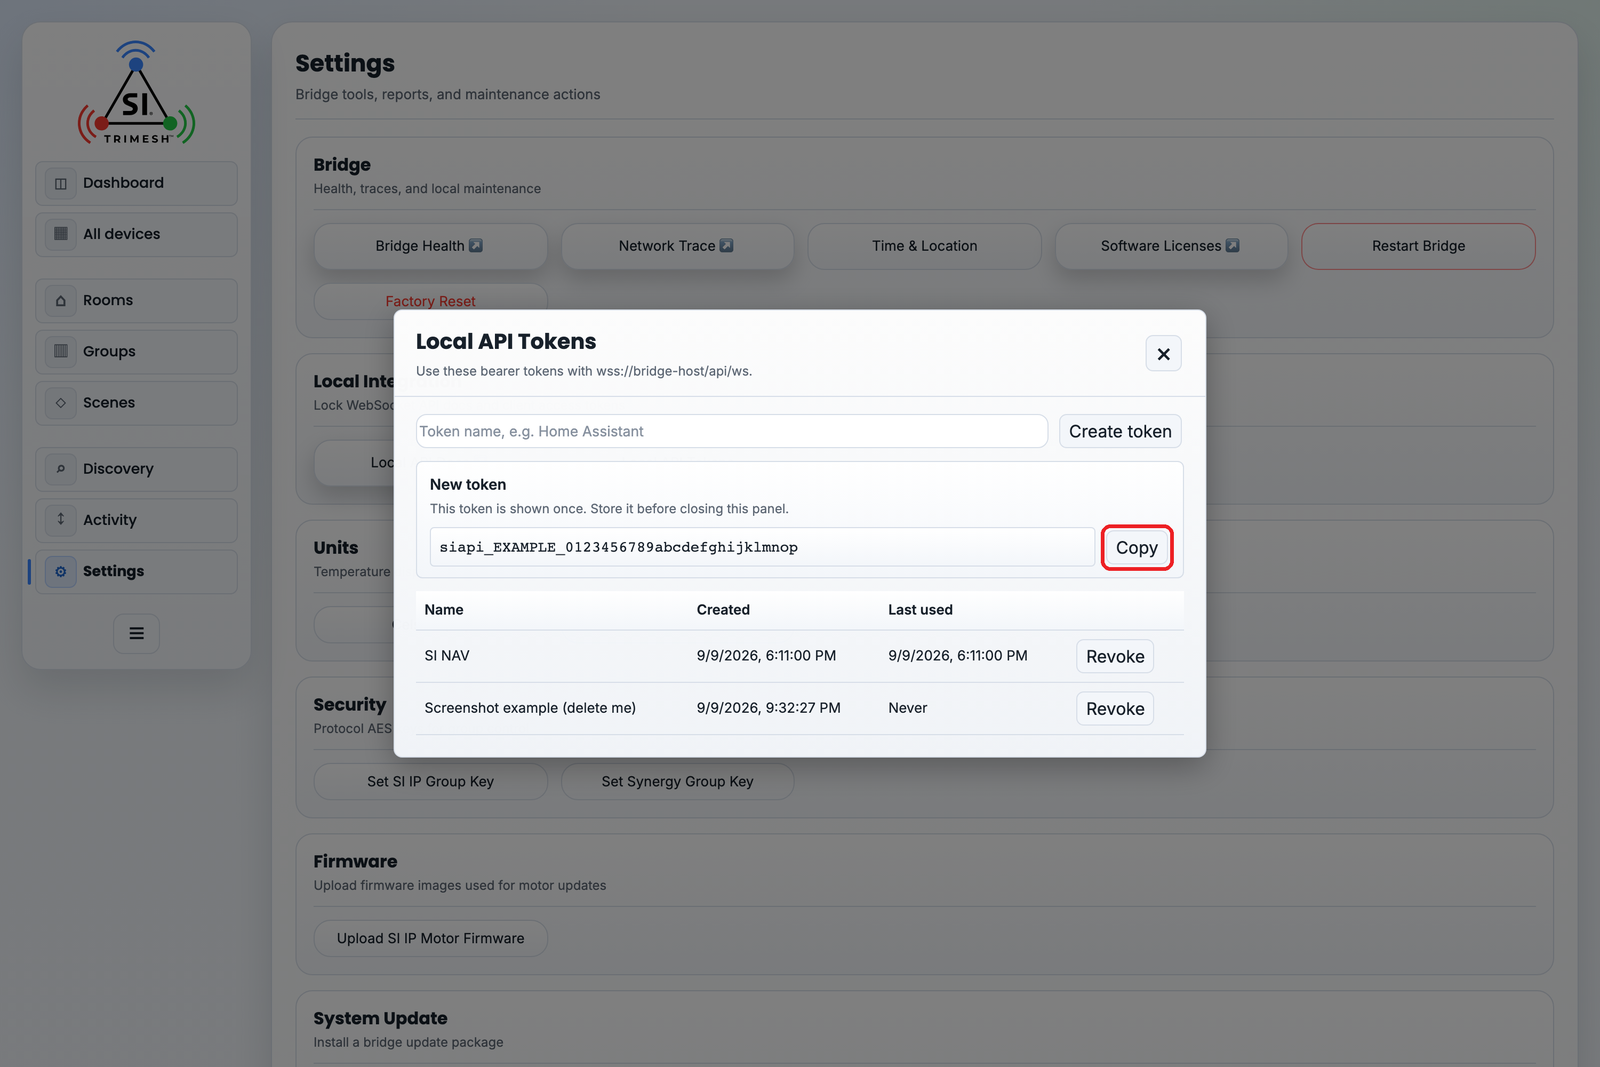
The token in this picture is an example.
In Home Assistant #
4. Go to Settings, then Devices & services, and click Add integration at the bottom right.
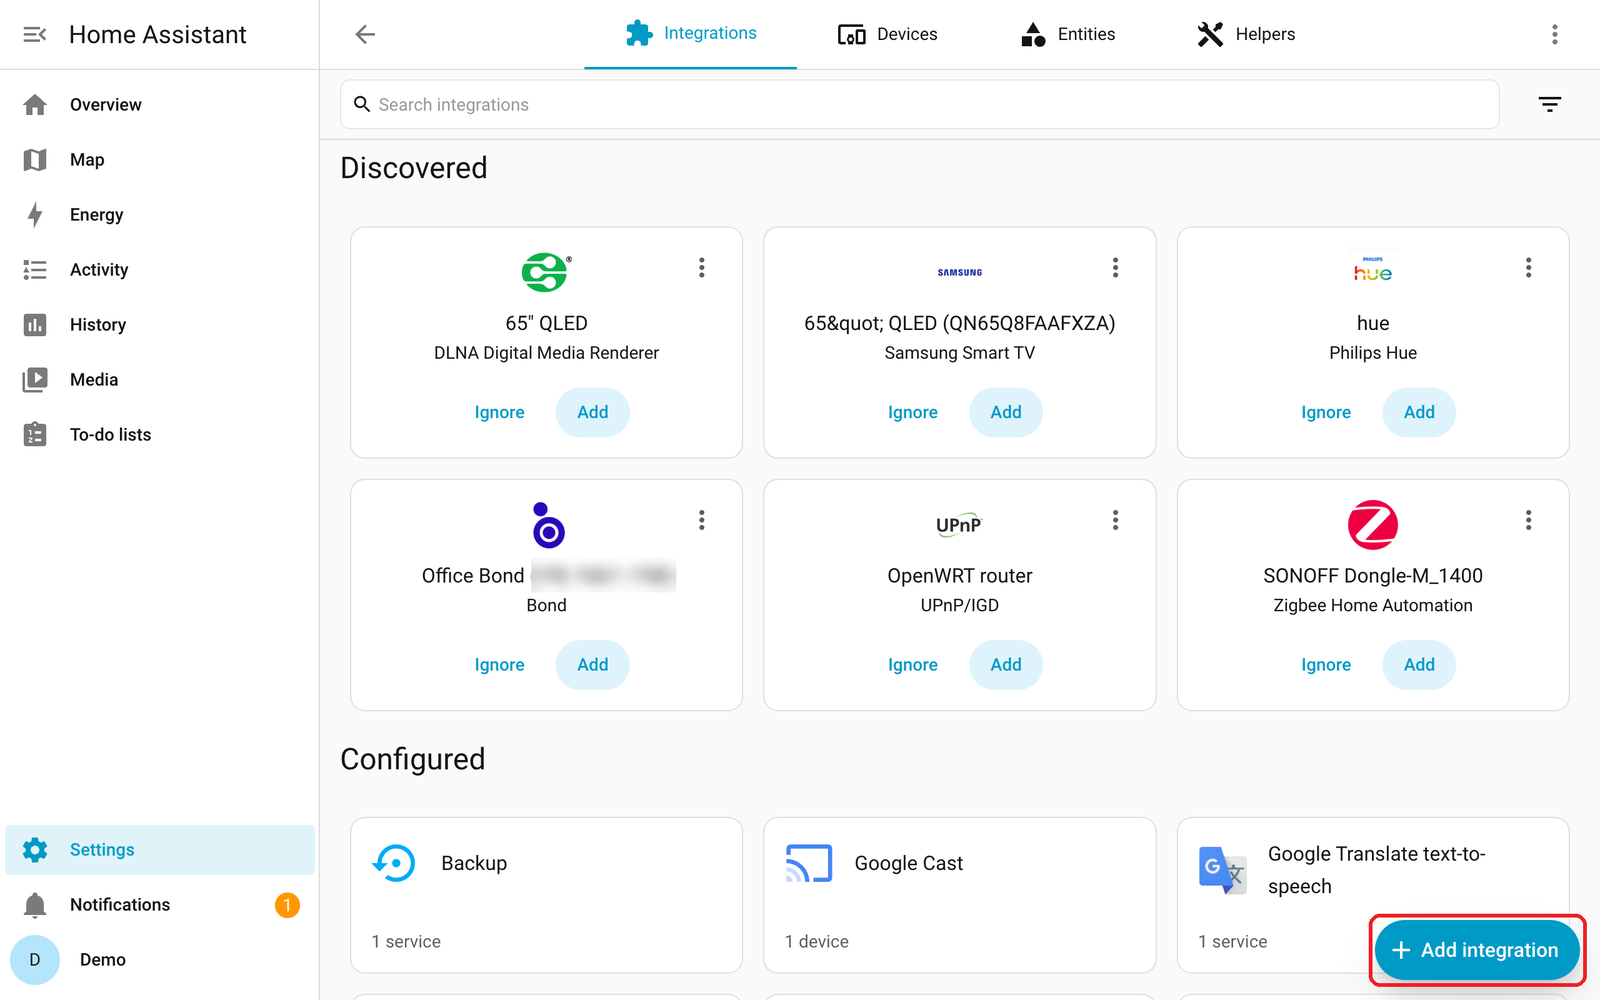
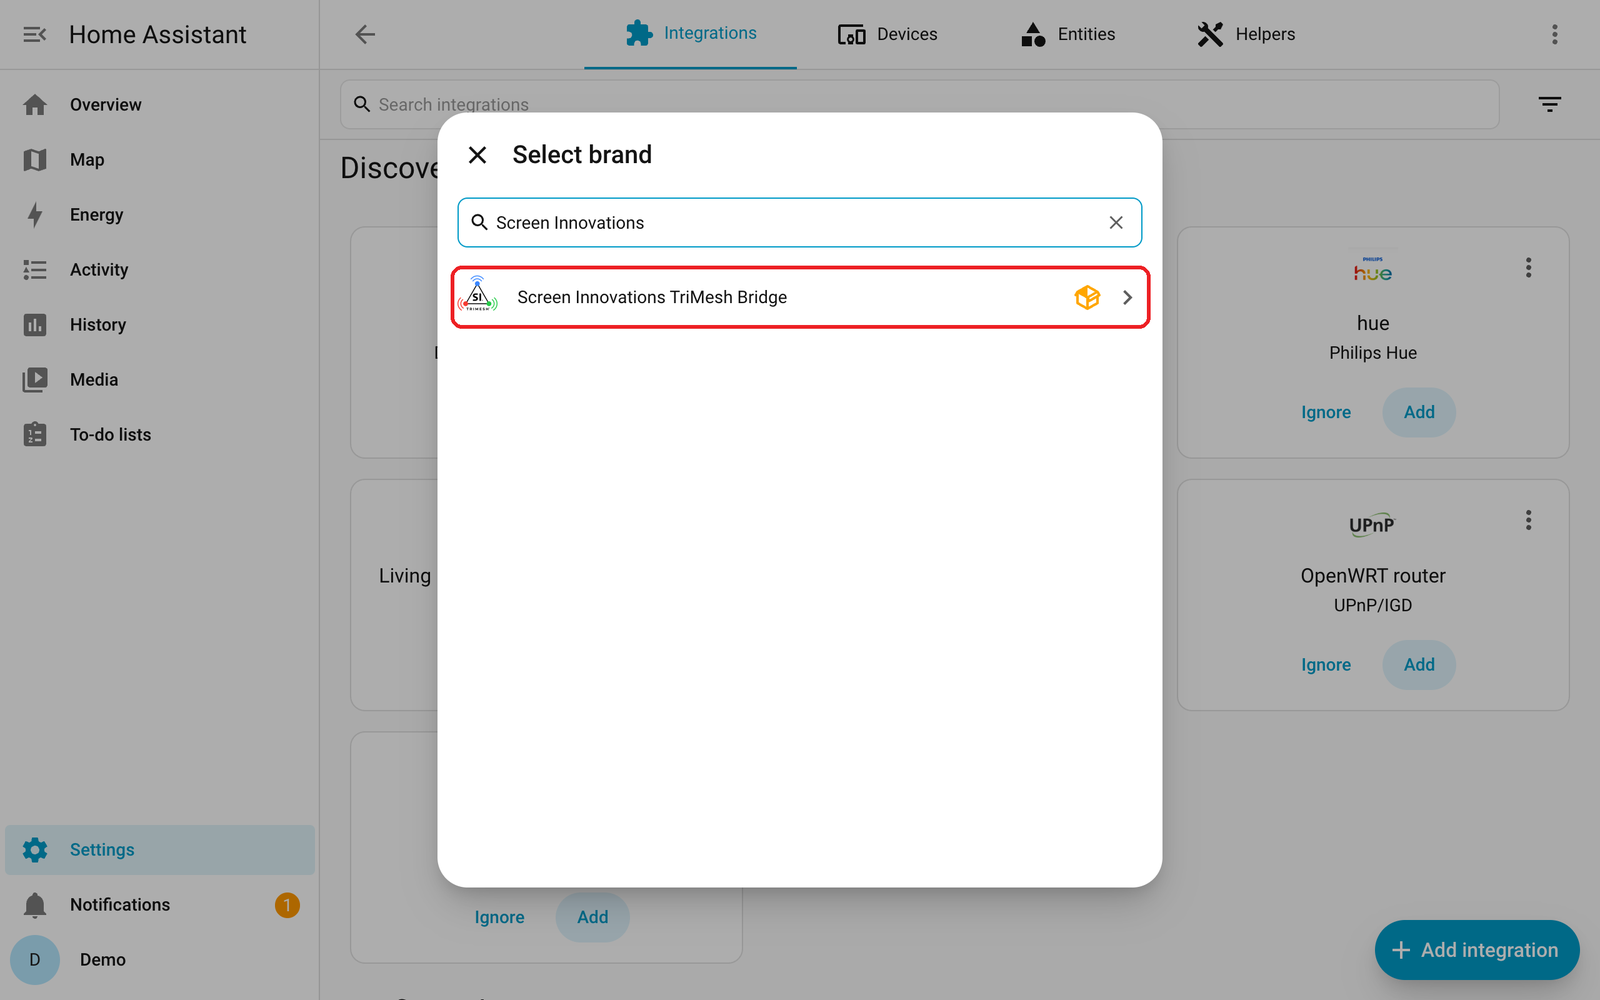
5. Type Screen Innovations and click Screen Innovations TriMesh Bridge.
The small orange box beside it means the connector comes from outside Home Assistant. That is expected.
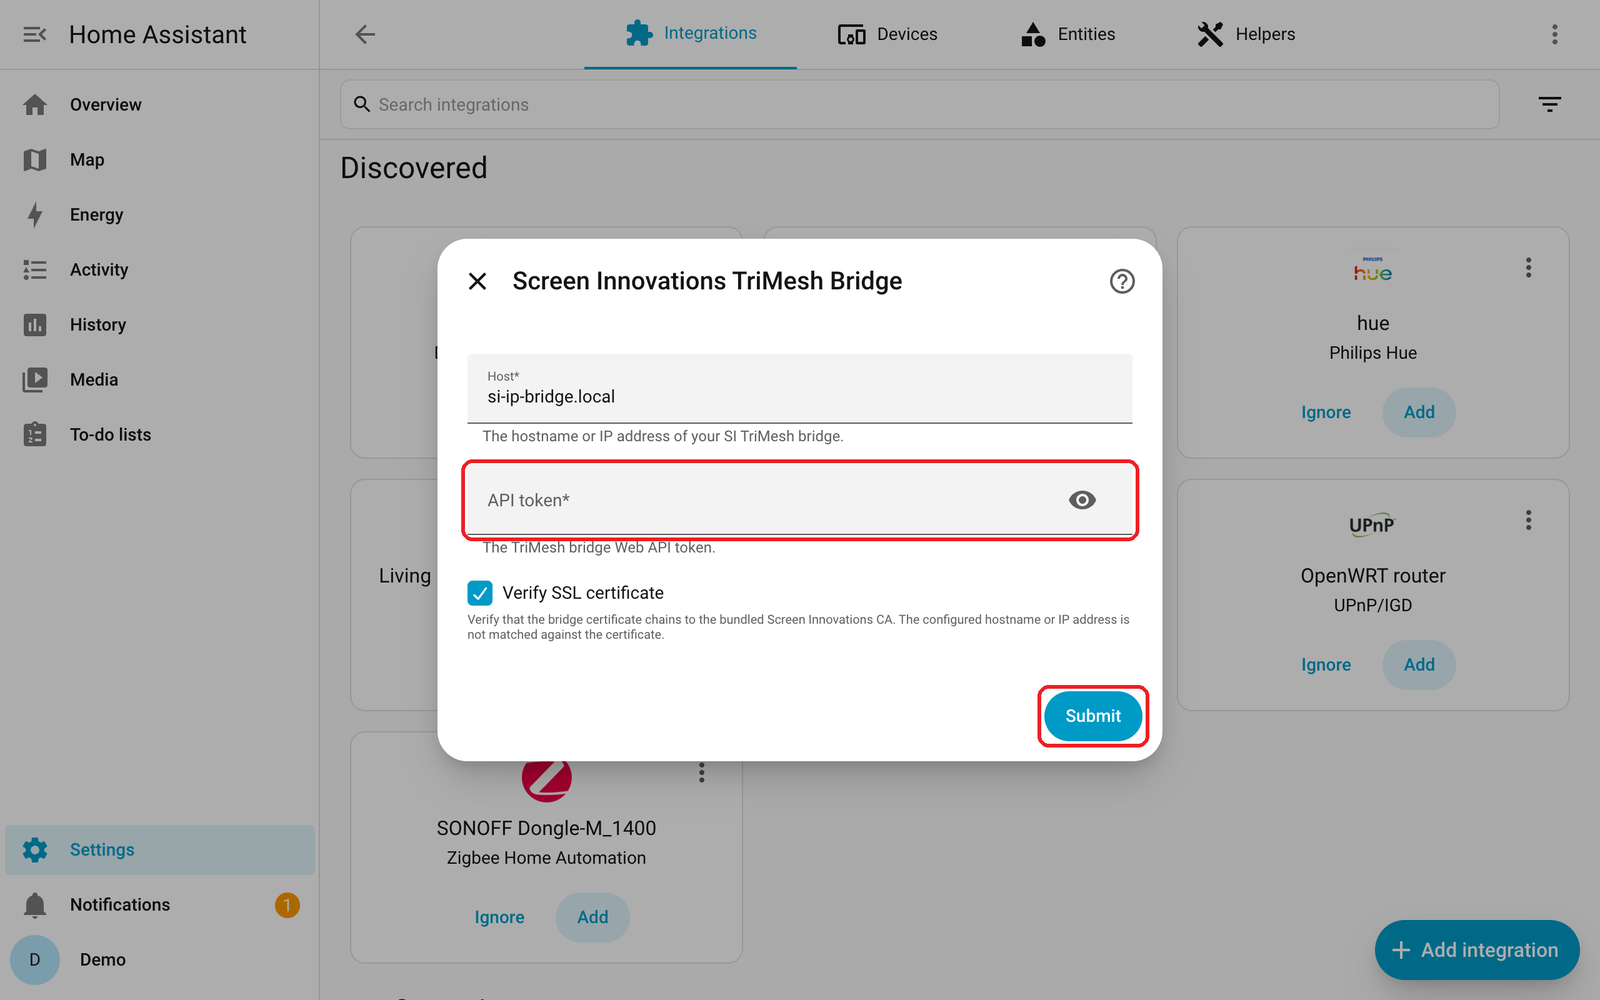
6. Paste the token and click Submit.
Leave Host as it is. Click in API token and paste. Leave Verify SSL certificate ticked. Click Submit.
Done when Settings > Devices & services > Screen Innovations TriMesh Bridge lists your bridge and its devices.
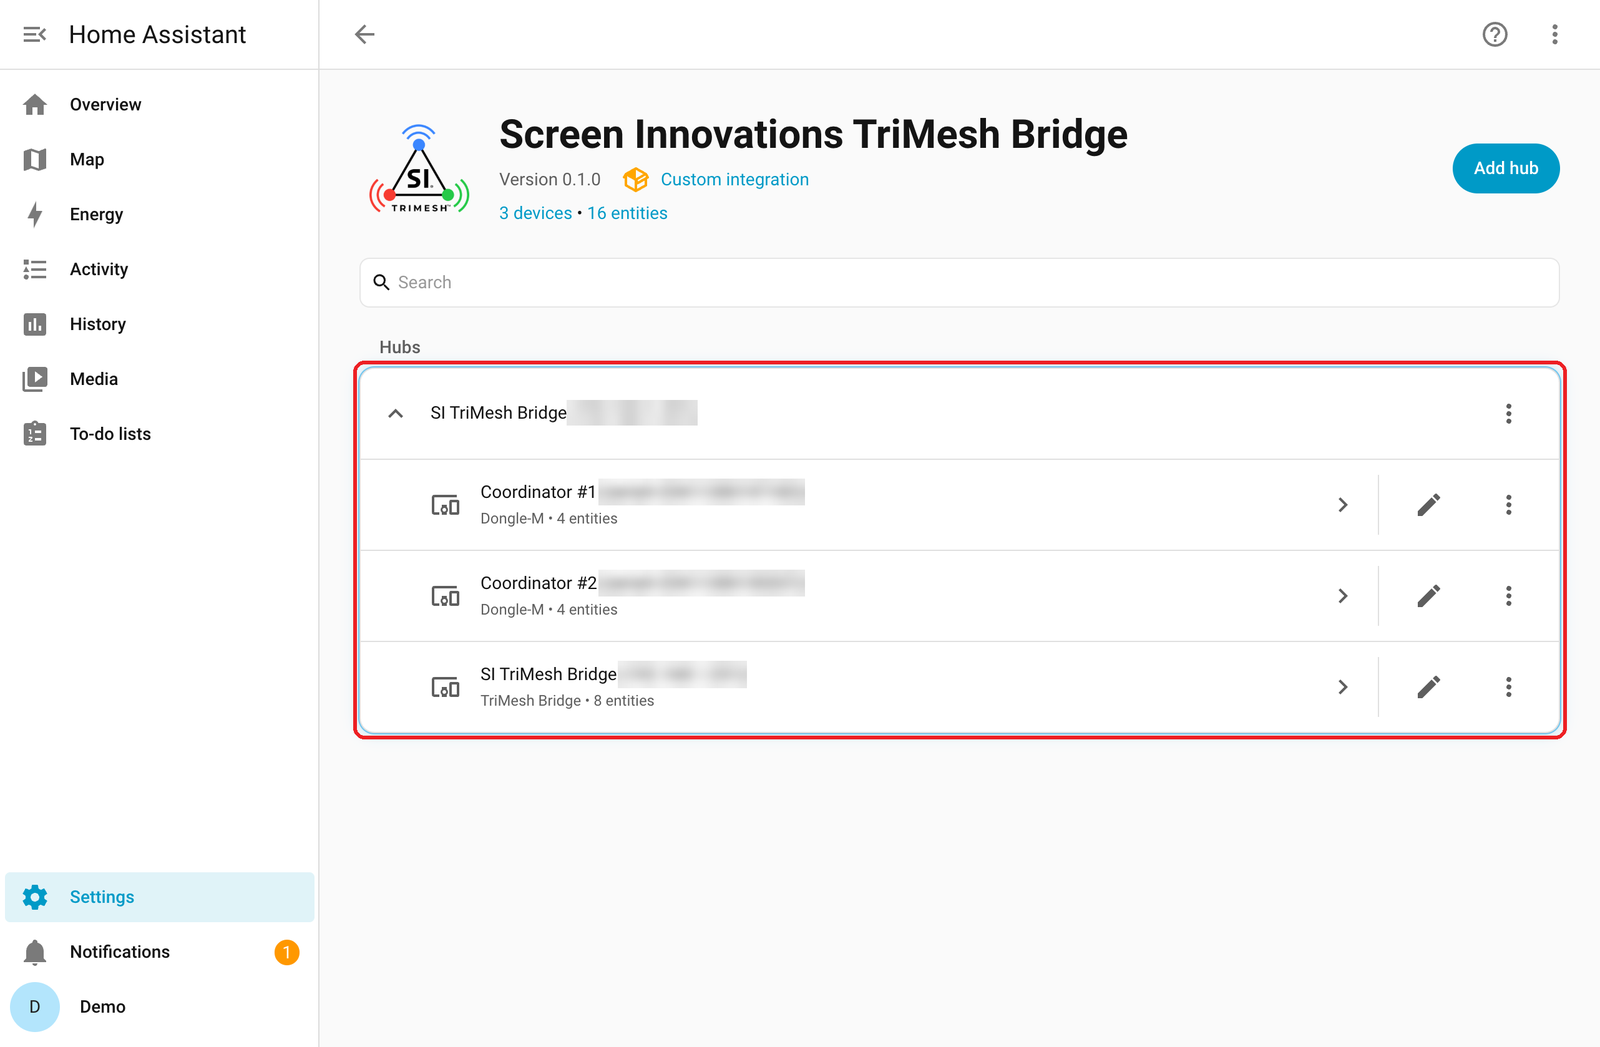
A connected bridge. The coordinators appear as devices too. Leave them as they are.
Part 5: Try it #
1. Open a device and use it.
On the Screen Innovations TriMesh Bridge page, click a shade or a plug. Move the shade or flip the switch. The device should answer within a second.
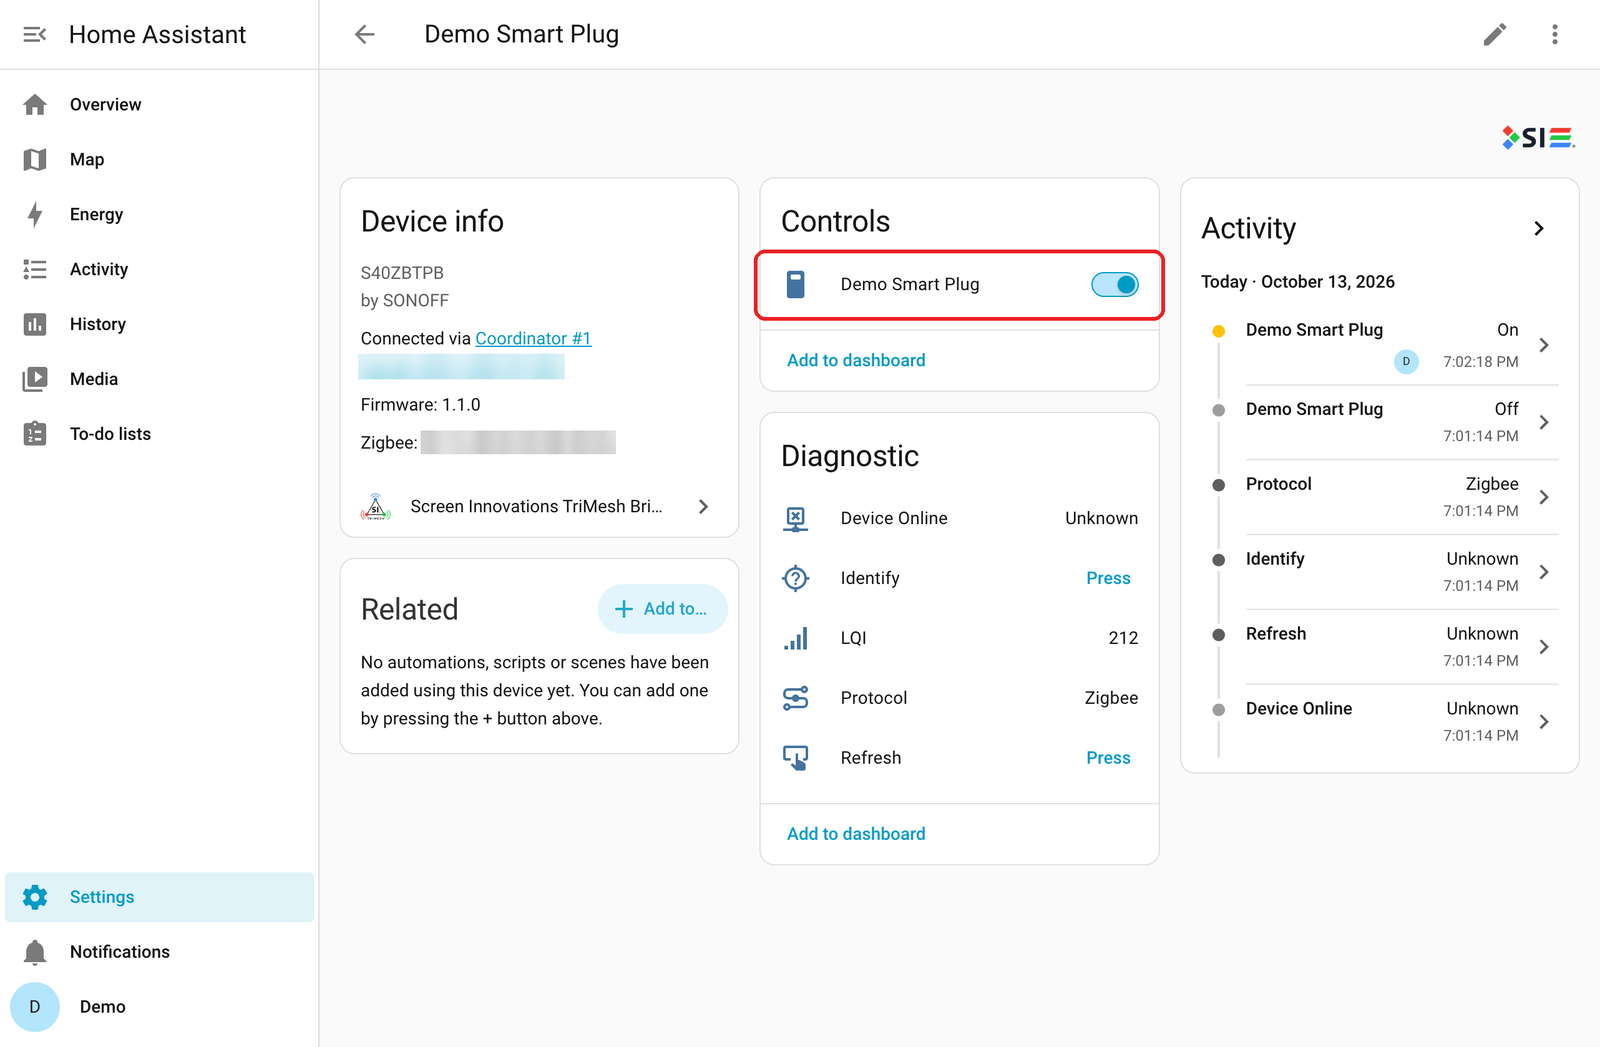
A TriMesh smart plug switched on from Home Assistant.
2. Read shade positions the Home Assistant way. Home Assistant counts percent open: 100 is fully open and 0 is closed. The bridge’s own page counts percent closed. Both describe the same shade. If a shade also moves the wrong way on the bridge’s page, fix it with Invert on the bridge, not in Home Assistant.
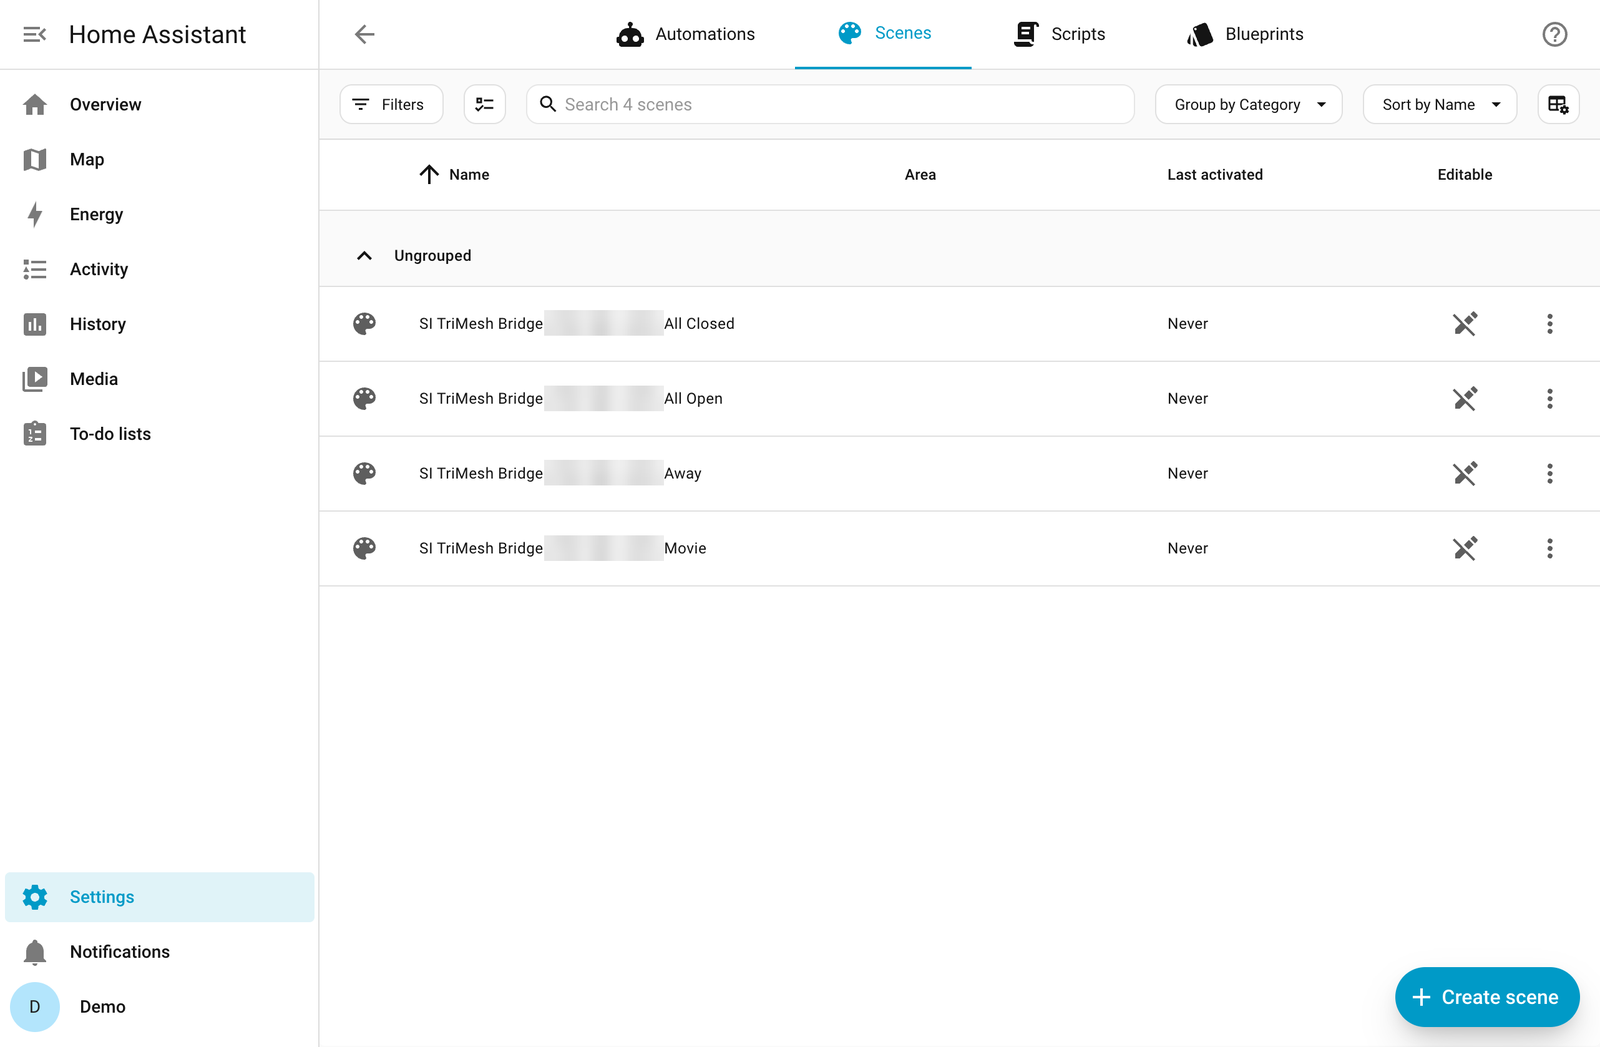
3. Run a bridge scene.
Go to Settings > Automations & scenes > Scenes. Every scene saved on the bridge is listed here. Home Assistant can run them; change them on the bridge’s page.
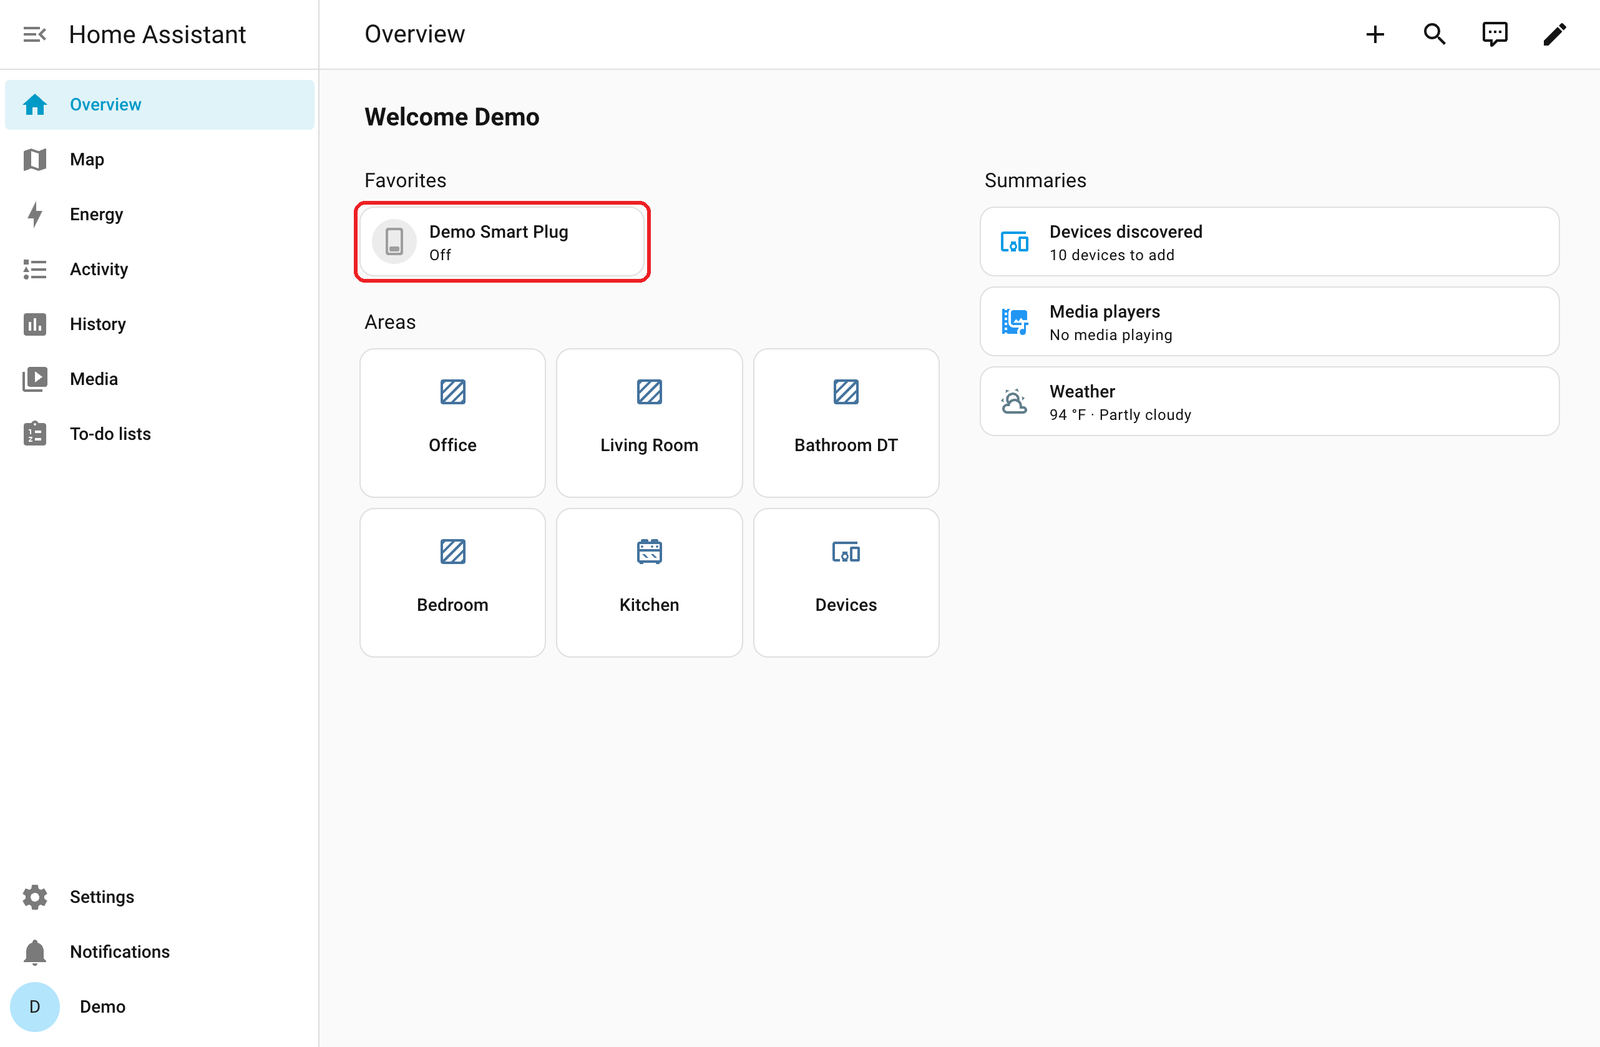
4. Find it on the everyday screen.
TriMesh devices also show up on the Overview page, which is what the homeowner uses day to day.
Good to know #
New devices show up by themselves. Pair a shade or plug on the bridge and it appears in Home Assistant within seconds.
Renamed something on the bridge? Home Assistant keeps the old name until you reload the connector: Settings > Devices & services > Screen Innovations TriMesh Bridge, three-dot menu next to the bridge, Reload.
After a bridge factory reset, its tokens are erased. Make a new token on the bridge. Home Assistant will ask for it.
Turn the share off when you are done. Samba share is a door into Home Assistant’s files. On its Info tab, click Stop and switch off Start on boot. Turn it back on when you need it.
If something goes wrong #
What you see | What to do |
|---|---|
The Mac’s sign-in box shakes when connecting to the share | The Name box still has your own Mac name in it. Erase it, type |
There is no Apps row under Settings | Sign in with the owner account, the first one created. If it is still missing, this Home Assistant has no apps (the Container or Core kind). Copy the folder into |
“Screen Innovations” is not in the Add integration list | Check the path is exactly |
| Use the box’s IP address from the router’s device list instead. |
“Failed to connect” after Submit | Replace |
“Invalid authentication” after Submit | The token was not copied whole, was revoked, or the bridge was reset. Make a new token and paste it. |
A shade is missing | Shades wired to a TRO.Y (485 or RTS) do not appear. For a Zigbee or PoE shade, check it works from the bridge’s page, then reload the connector. |
A device’s name is a long code such as | Name it on the bridge, then reload the connector. |
Removing the connection #
1. In Home Assistant, delete the integration. Settings > Devices & services > Screen Innovations TriMesh Bridge, three-dot menu, Delete.
2. Delete the connector folder. Remove si_trimesh_bridge from config/custom_components, then restart Home Assistant.
3. On the bridge, revoke the token. Settings > Local API Tokens, then Revoke next to Home Assistant.



