Keypads & Remotes #
Pairing Remotes to Pegasus #
RF Compatibility Modes #
There are four RF Compatibility Modes to choose from:
Somfy – Somfy/Olibra/RF Control
Alpha – KAOS Alpha Motors
Lutron – Lutron Pico Remote control
SI Screens / SI KAOS – SI Screens / SI KAOS motor and remote control
Select the appropriate RF Compatibility Mode from the dropdown in the RF Remote Table before pairing your remotes.
Somfy Remote #
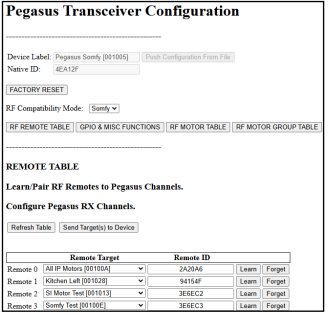
Select Somfy Compatibility mode from the Drop Down to add Somfy/Olibra remotes, keypads, and sensors.
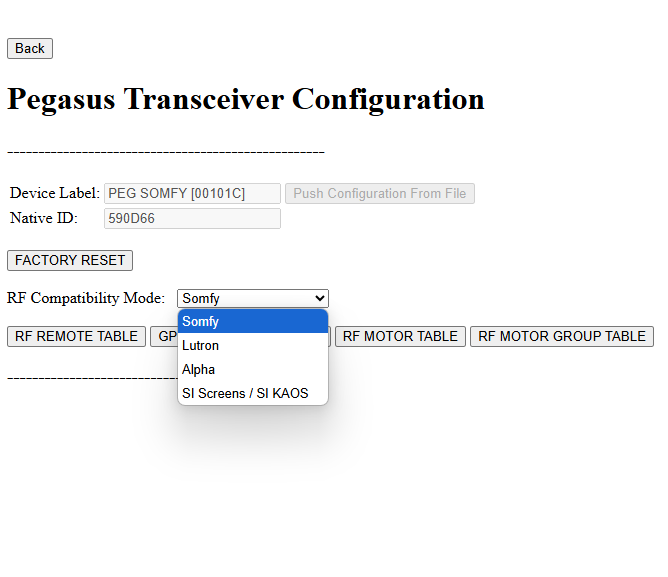
Open the RF Remote Table and click Learn (button turns yellow).
Press the program button on the remote.
If successful, the Learn LED will stop flashing, and the Remote ID will appear.
Choose a remote target for the learned remote.
Click Send Target to Device to finalize.
To remove a remote, click Forget.
Pro Tip: Some devices require opening the case or using a paper clip to access the programming button.
SI KAOS Remote #
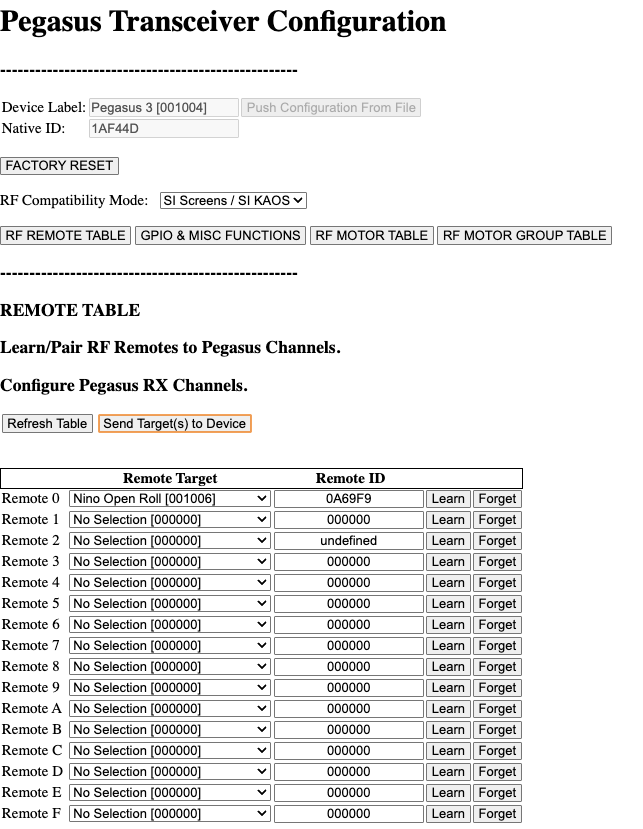
Select SI KAOS mode from the Drop Down to add SI KAOS remotes.
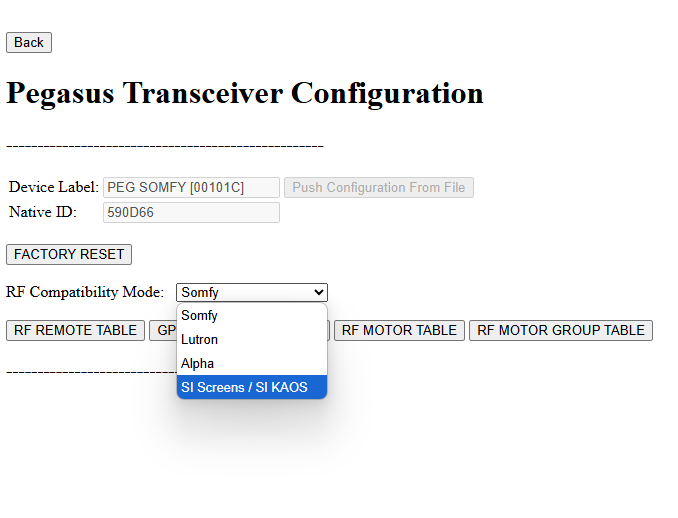
Open the RF Remote Table and click Learn (button turns yellow).
Push and HOLD the UP button for 7 seconds
When paired, the Learn button turns gray, and the Remote ID appears.
Select a remote target for the learned remote.
Click Send Target to Device to finish.
To remove a remote, click Forget.
Pro Tip: Some devices require opening the case or using a paper clip to access the program button.
Alpha Remote #
Select Alpha Compatibility mode from the Drop Down to add Alpha remotes.
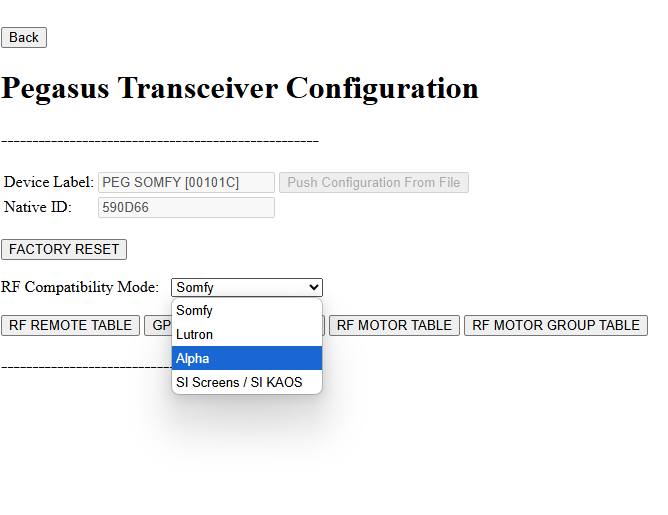
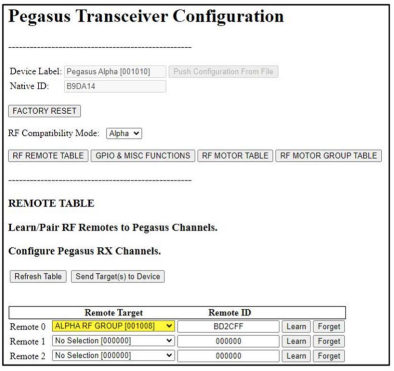
Open the RF Remote Table and click Learn (button turns yellow).
Press the UP and DOWN buttons together, then immediately press the STOP button 8 times rapidly
When paired, the Learn button turns gray, and the Remote ID appears.
Select a remote target for the learned remote.
Click Send Target to Device to finish.
To remove a remote, click Forget.
Pro Tip: Some devices require opening the case or using a paper clip to access the program button.
Lutron Pico #
Select Lutron Compatibility mode from the Drop Down to add Lutron Pico remotes.
This only learns directly from a Pico remote, and does not require a Lutron System.
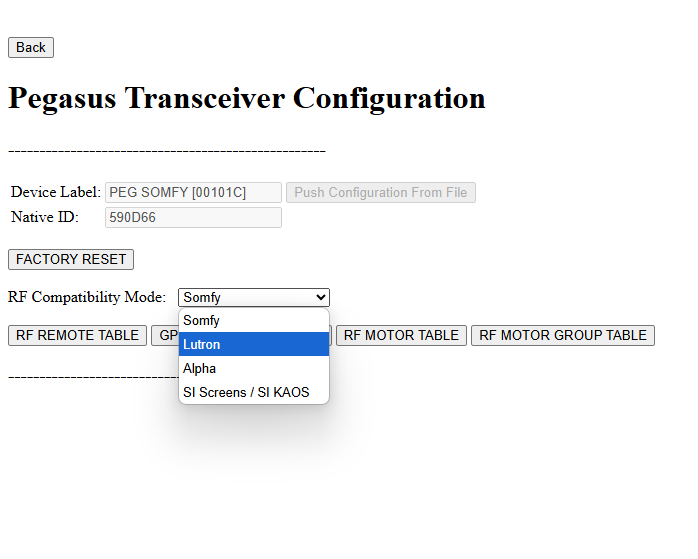
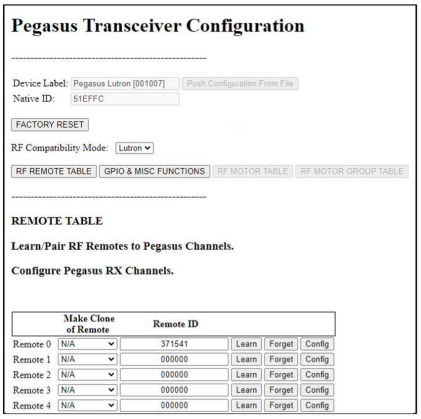
Open the RF Remote Table and click Learn (button turns yellow).
Hold any button on the Pico remote for 7 seconds.
If successful, the Learn LED stops flashing, and the Remote ID appears.
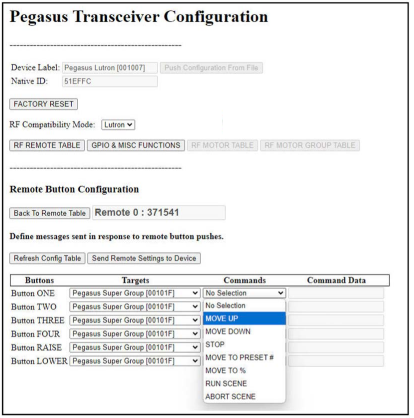
Click Config to set button functions.
Click Forget to remove a remote.
Pro Tips:
Use Clone to copy settings to multiple remotes.
If learning fails, try using button #1 and hold for 7+ seconds.
The Learn mode times out after 60 seconds if nothing is programmed.
Configuring Pico Button Actions #
Select targets (Devices, Groups, or Scenes).
Choose the command action for each button.
Enter any required data (e.g., IP address or motor position %).
Click Send Remote Settings to Device to save.
To reset, click Refresh Table to clear selections.
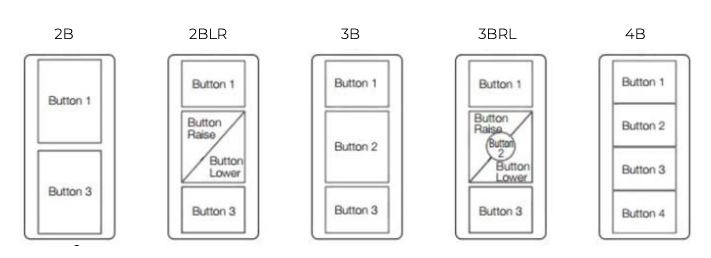
Pro Tip: Not all Pico remotes have the same button options. Refer to the guide below for details.
DecoFlex RS-485 Keypad #
Adding a DecoFlex Keypad #
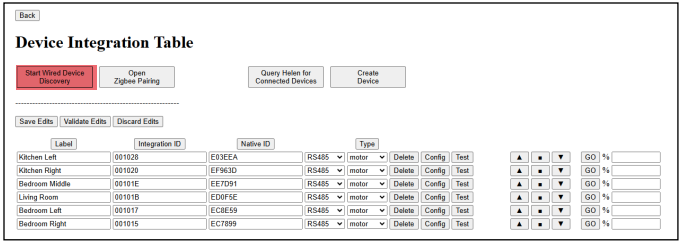
In the Integration Table:
Click on Device Table

Click Start Wired Discovery
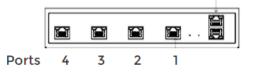
The DecoFlex will appear in the Device Table
Programming DecoFlex #
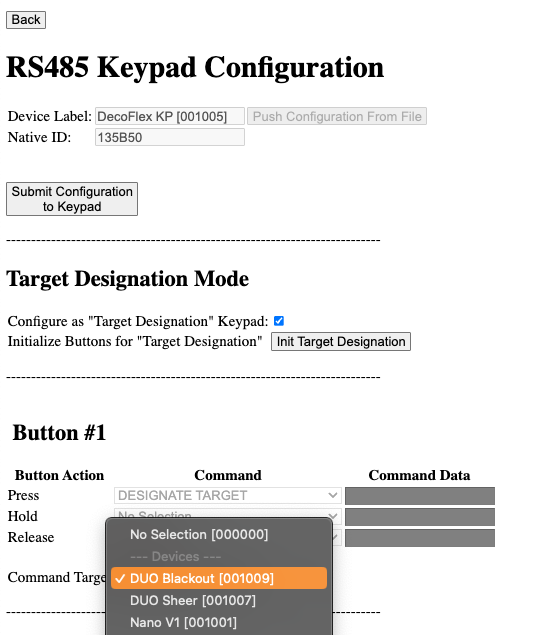
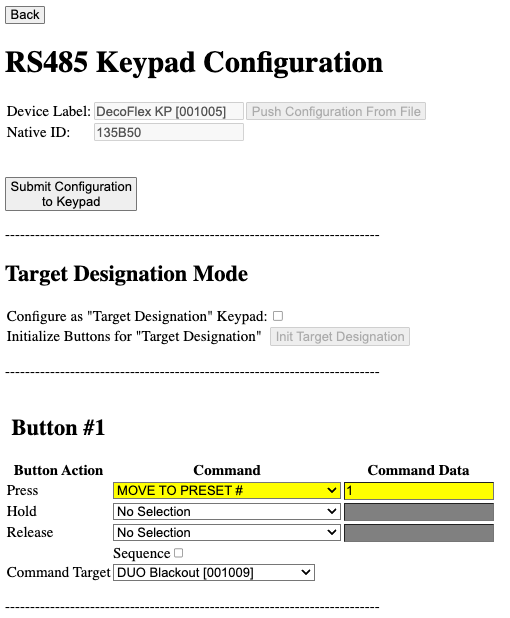
Keypad Button Actions #
Select the button you want to configure.
Each button can have different commands for Press, Hold, Release, or Sequence (with different targets if needed).
Press: Sends the command when the button is pressed.
Hold: Sends the command after holding for 0.2 seconds.
Release: Sends the command when the button is released.
Repeat for all buttons you want to configure.
Click “Submit Configuration to Keypad” to save changes (only modified buttons are updated).
Keypad Sequence Mode #
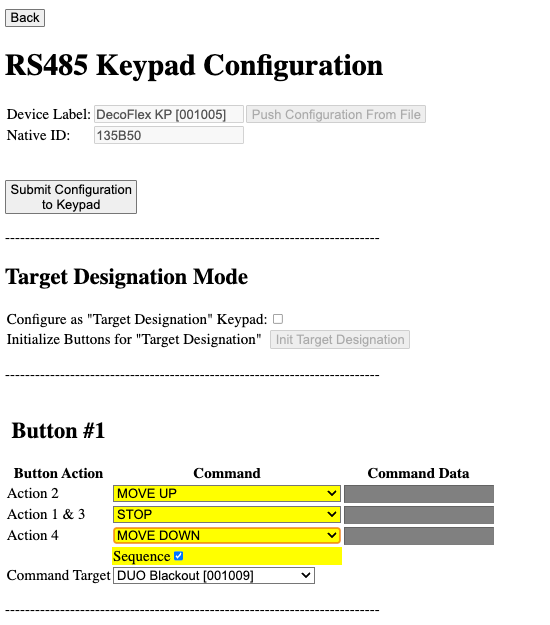
A button can be set to cycle through up to three commands each time it’s pressed.
Commands change in this order:
Press → Action 2
Hold → Actions 1 & 3
Release → Action 4
Each press moves to the next action in the sequence
Valid targets include: Motors, Groups, Scenes
To Enable Sequence Mode:
Check the box labeled “Sequence”
Select the commands for:
Action 2
Action 1&3
Action 4
Select the “Command Target” from the drop down
Repeat for all buttons you want to configure
Click “Submit Configuration to Keypad” to save changes (only modified buttons are updated)
Keypad Command List #
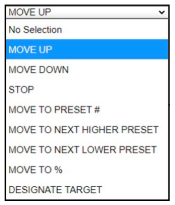
MOVE UP – Sends target to upper limit
MOVE DOWN – Sends target to the lower limit
STOP – Sends target the stop movement command
MOVE TO PRESET # – Sends target to IP # specified in the command data field
MOVE TO NEXT HIGHER PRESET – Sends target to next IP#
MOVE TO NEXT LOWER PRESET – Sends target to previous IP#
MOVE TO % – Sends target to a specified % in the command data field
DESIGNATE TARGET – Specifies which motor or group the command is sent to
RUN SCENE – Triggers pre-programmed Scene
ABORT SCENE – Cancels triggered Scenes
GPIO on Pegasus #
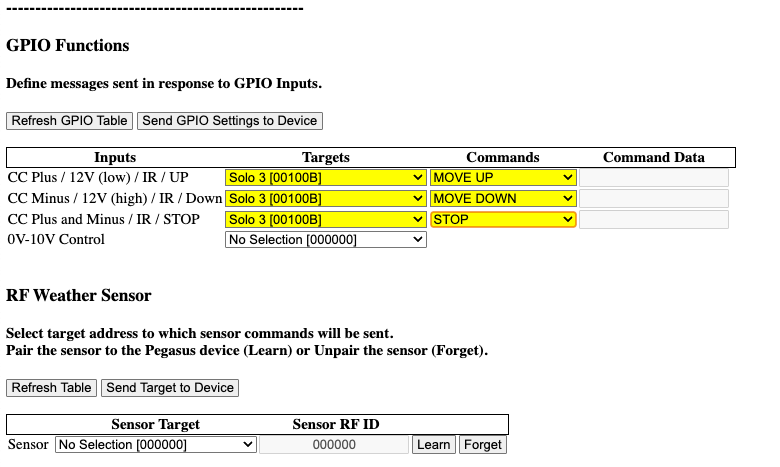
GPIO allows external triggers (contact closure, 12v, IR) to control shades.
Click Config on Pegasus
Click GPIO & Misc Functions
Select shade or group
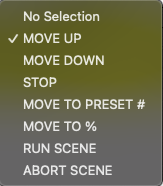
Select command (UP/DOWN/STOP)

Adding a Sensor to Pegasus #
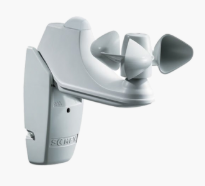
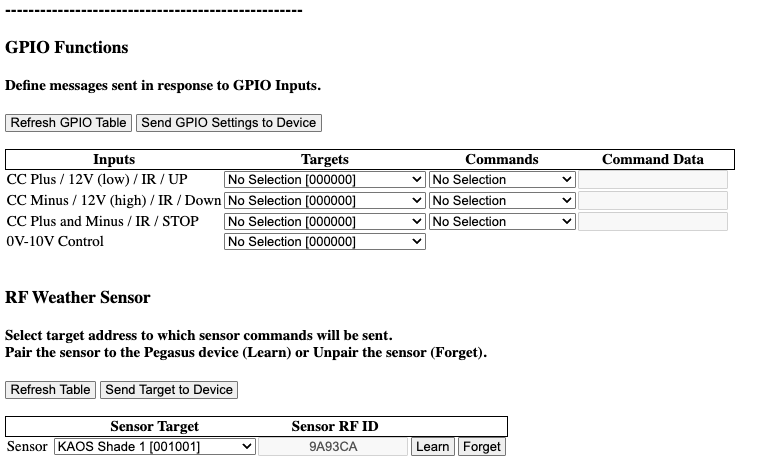
To add a Sub GHz sensor (ex. Somfy Eolis Wind Sensor):
In the Integration Table:
Click the “Config” button next to the Pegasus.
In the Pegasus Config, Click the “GPIO & Misc Functions” Button
Click Learn (Learn LED flashes)
Press the sensor’s program button.
Select a Sensor Target from the dropdown.
Click Send GPIO Setting to Device to save.